🧰 Managing your project
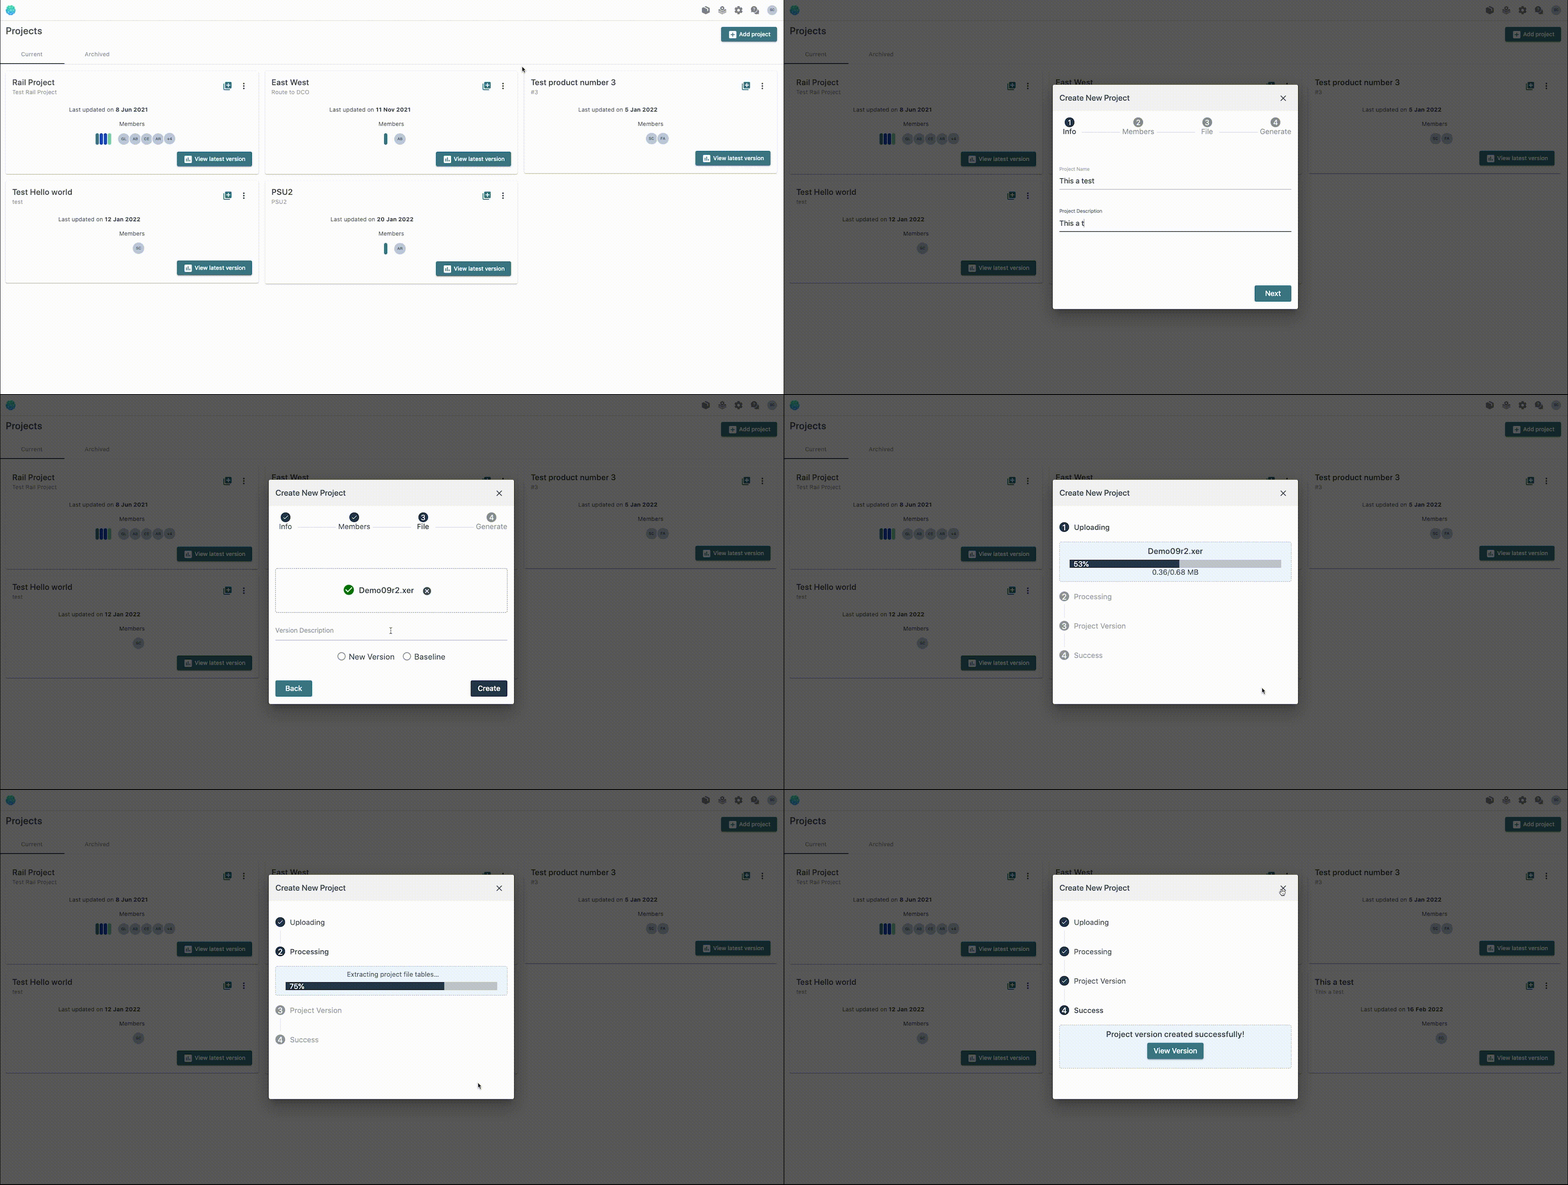
Creating a new project
All you need is internet access, a project schedule, and a modern browser and you are good to go!

Upload a new schedule for an existing project
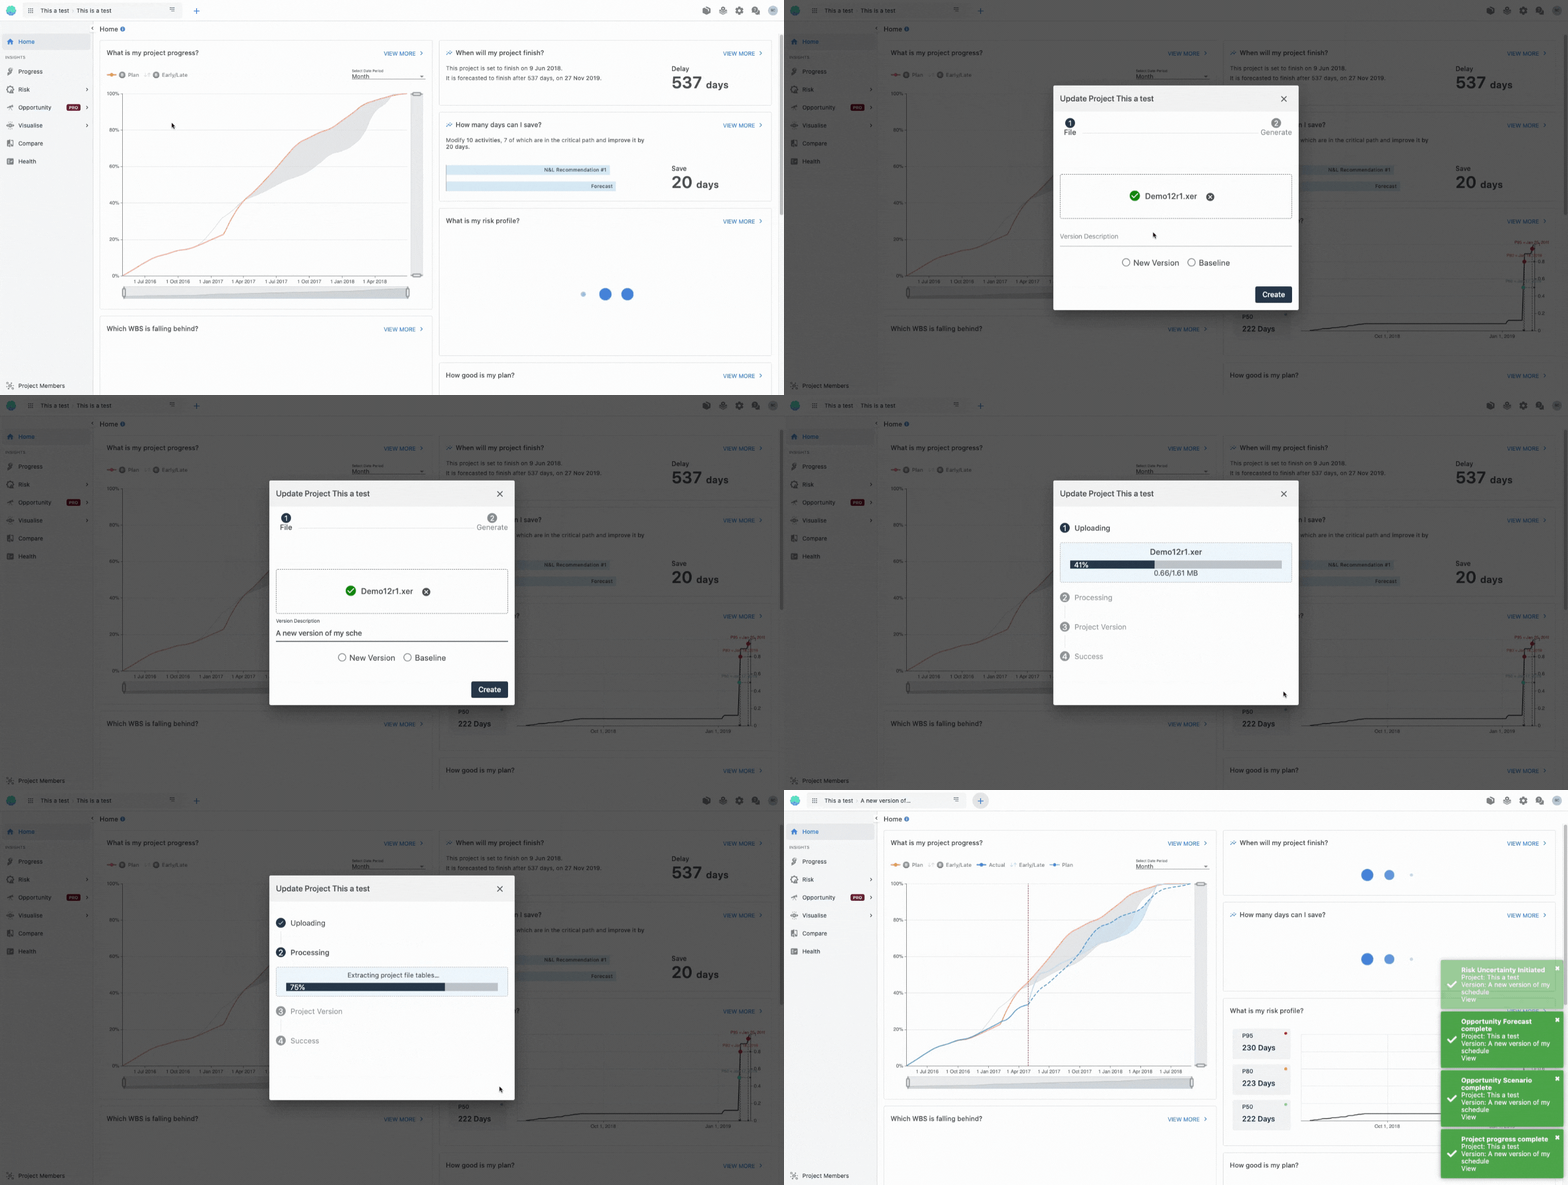
There are several ways of uploading a new schedule to an existing project.
We recommend doing so from the Home Screen - simply go to the top left corner and click on the ‘+’ icon. Once you are there, follow the on screen instructions and you are good to go!
Assigning a new schedule as your project’s baseline
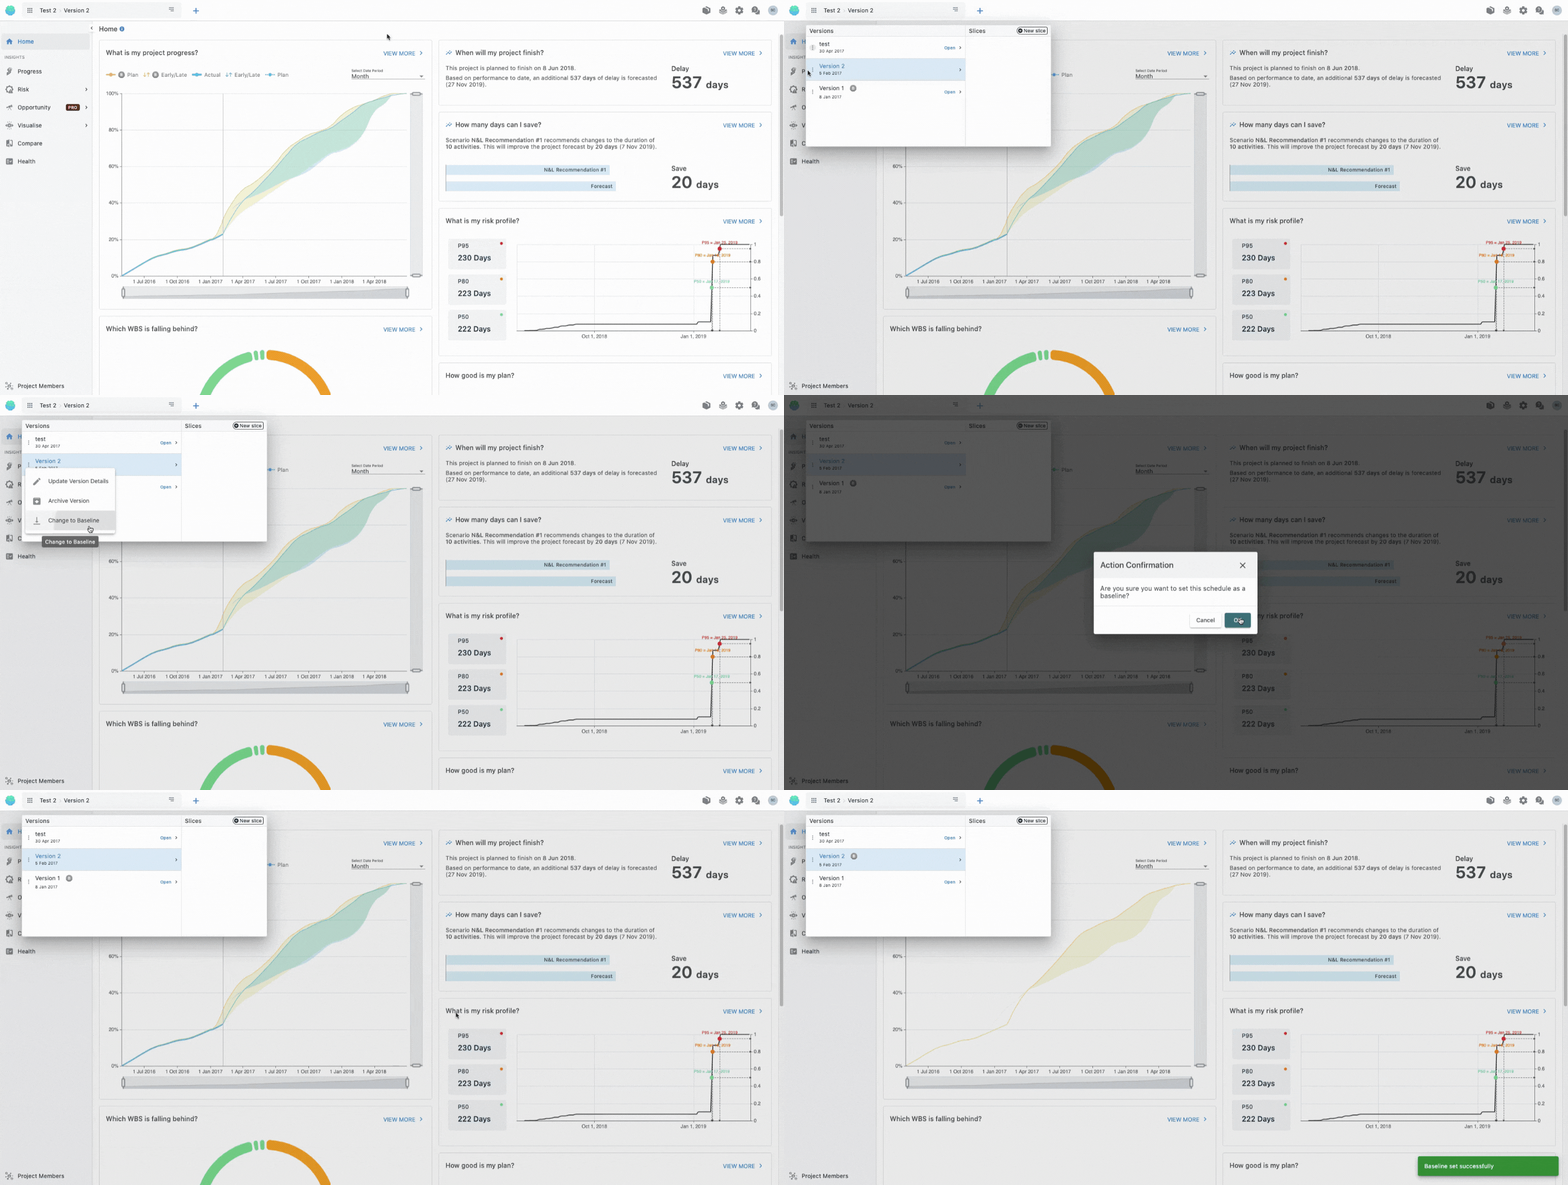
As your project evolves, so will the baseline. You can easily make any schedule as the baseline by simply accessing the project location on the top left, click the three dots and select ‘Change to baseline’. Simply confirm and you are good to go!
Adding users to a project
You can easily add users to an existing project.
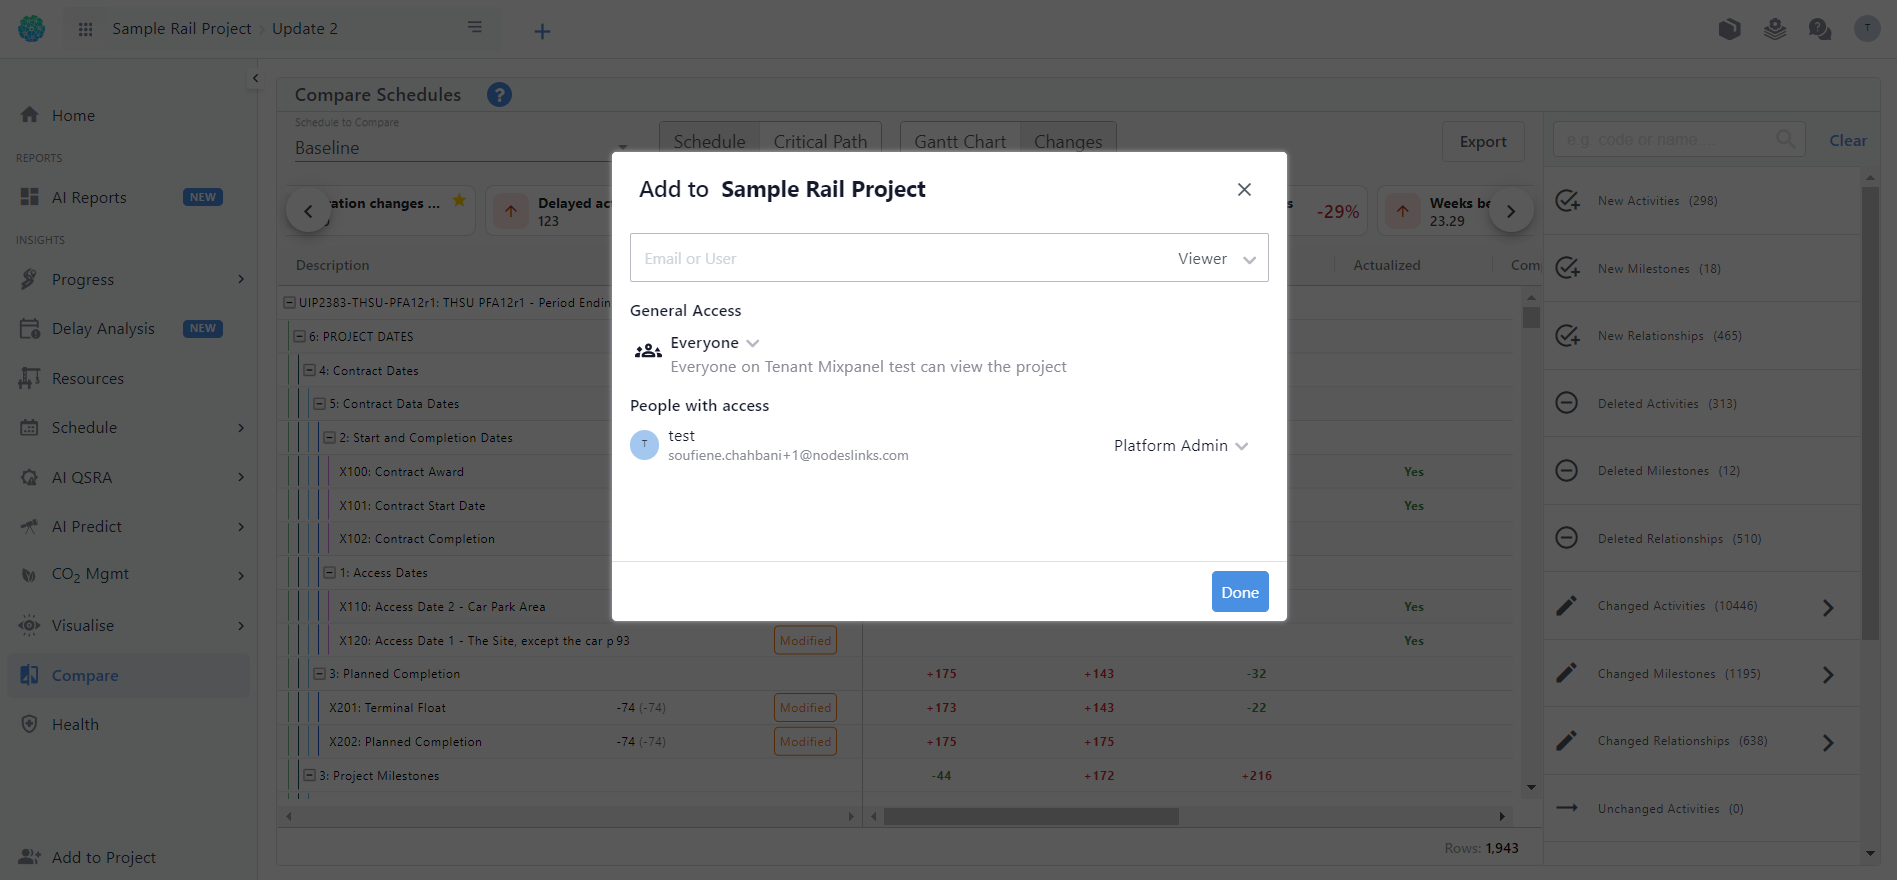
First, make sure you are already within a project. Then simply go to the bottom left corner and click on the ‘Add to a project’ button. You can invite one or many users at the same time, by simply adding their email addresses and assigning roles to them. For each user you invite, you will also need to assign a platform role, which controls what they can see and do on the platform.
Note that you can only invite a new user up to you own role. For example, if you are a Viewer, you can only add someone with a Viewer role. If you are an Admin, you can invite a new user and pick a role between Viewer, Contributor or Admin.


