🎰 Risk
🎰 Risk
This screen enables you to:
- Configure the time granularity of your QSRA
- Change the hierarchy between WBS and ACS
- Define your duration uncertainty
- Add risk events to your schedule
- Adjust the number of iterations of the Monte Carlo simulation
- Import risk configuration and duration uncertainty from a previous update
- Import risk configuration and duration uncertainty from an Excel file
- Run a QSRA analysis
- Run an AI QSRA analysis
- Export duration uncertainty, risk assignments, and results
- Add notes to your risk and duration uncertainty assignment
- Use smart filters to focus your energy on high-value activities
- Assign Risk Profile in One Go
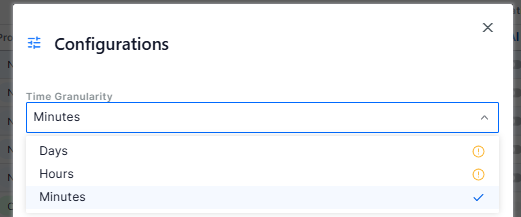
Configure the time granularity of your QSRA
To begin your QSRA analysis, start by setting the time granularity (days, hours, or minutes). Setting the time granularity allows you to express duration uncertainty and risk impact in the most convenient granularity for your analysis, as well as view activity durations and QSRA results accordingly.
To configure the time granularity, follow these steps:
- Click the Configure button.
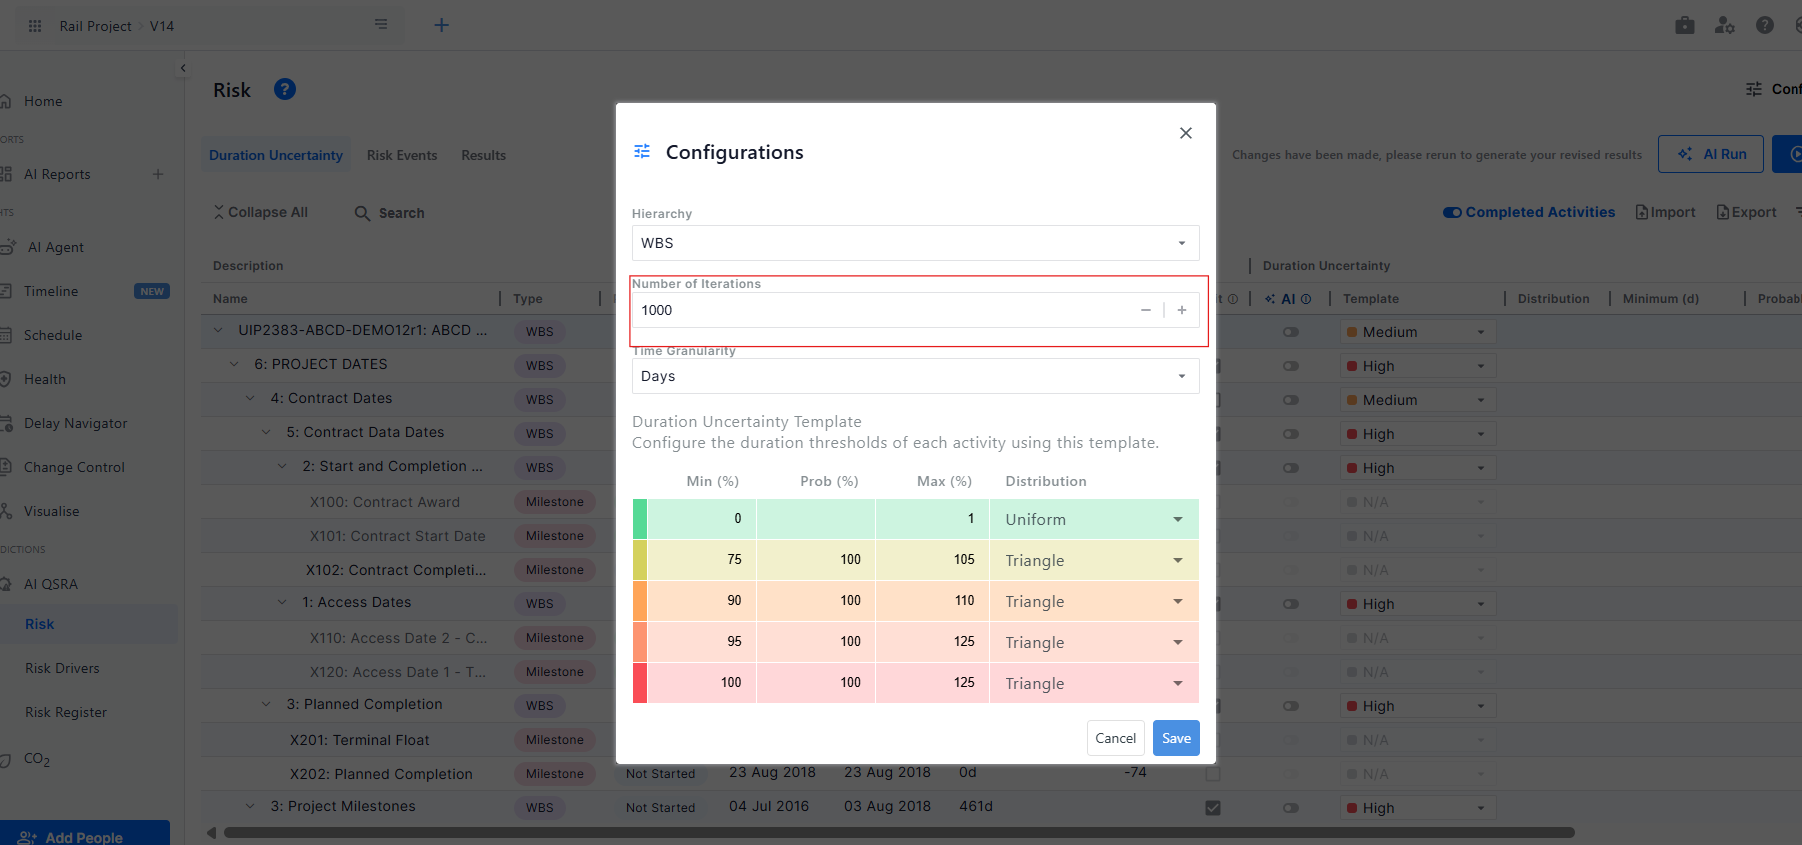
- Select your preferred time granularity.
Change the hierarchy between WBS and ACS
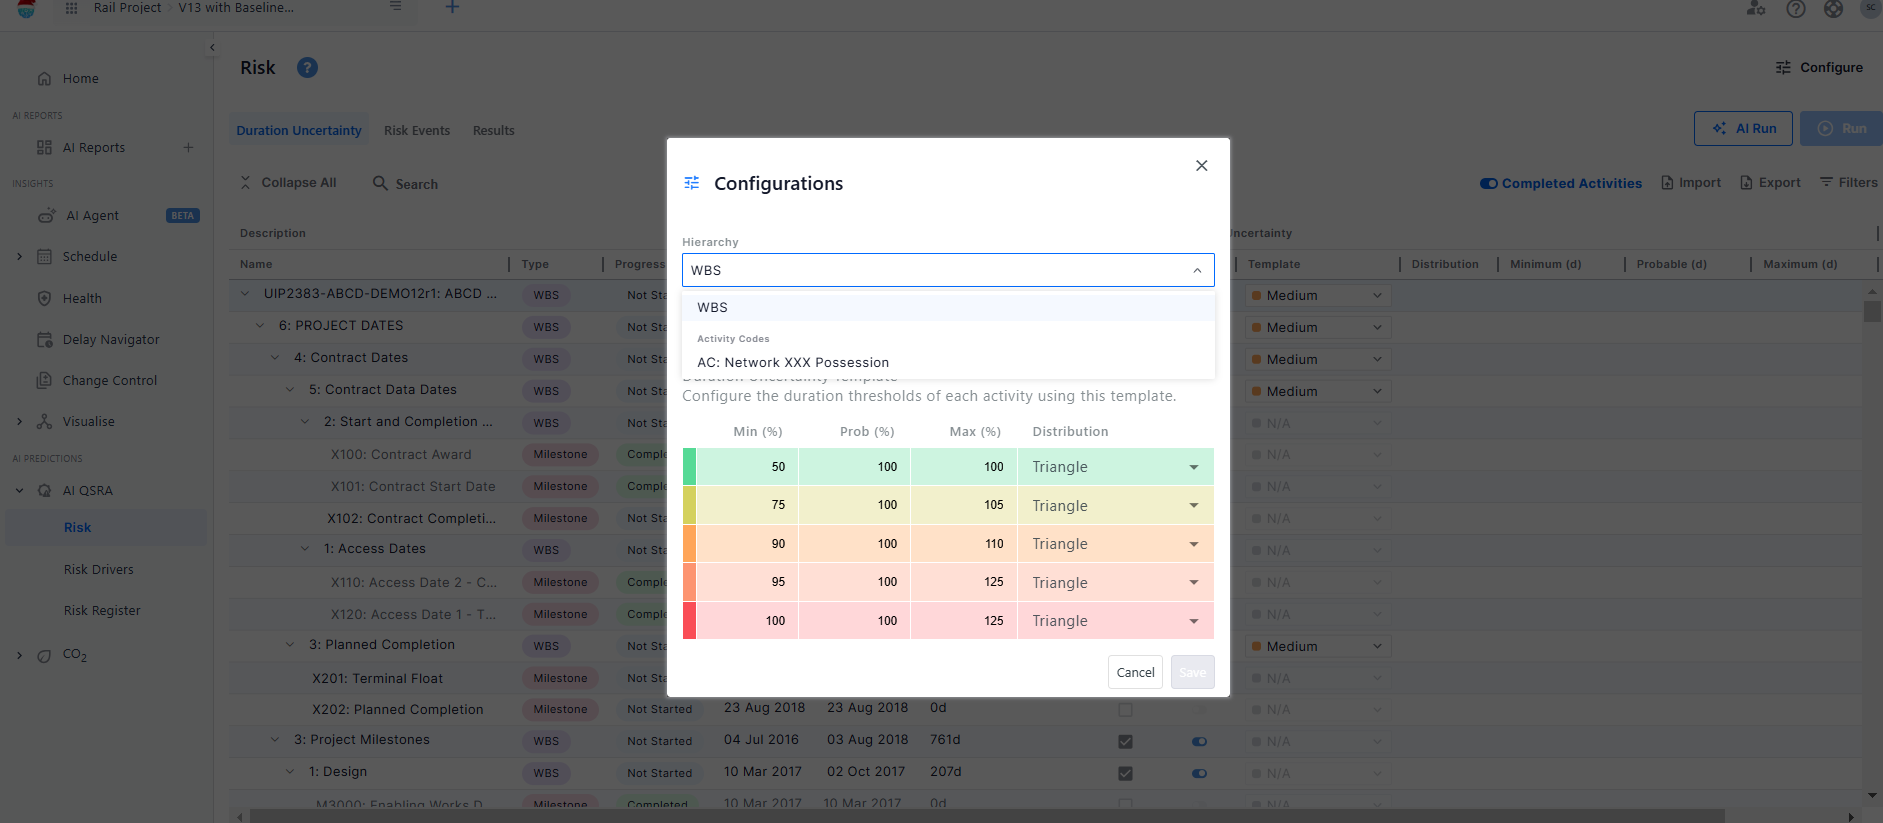
You can easily switch the hierarchy view on the Risk screen between WBS and ACS. To change the hierarchy, click the Configure button at the screen's top right corner. Then, select your preferred option (WBS or ACS) from the dropdown menu under Hierarchy.
Run an AI QSRA Analysis with one click
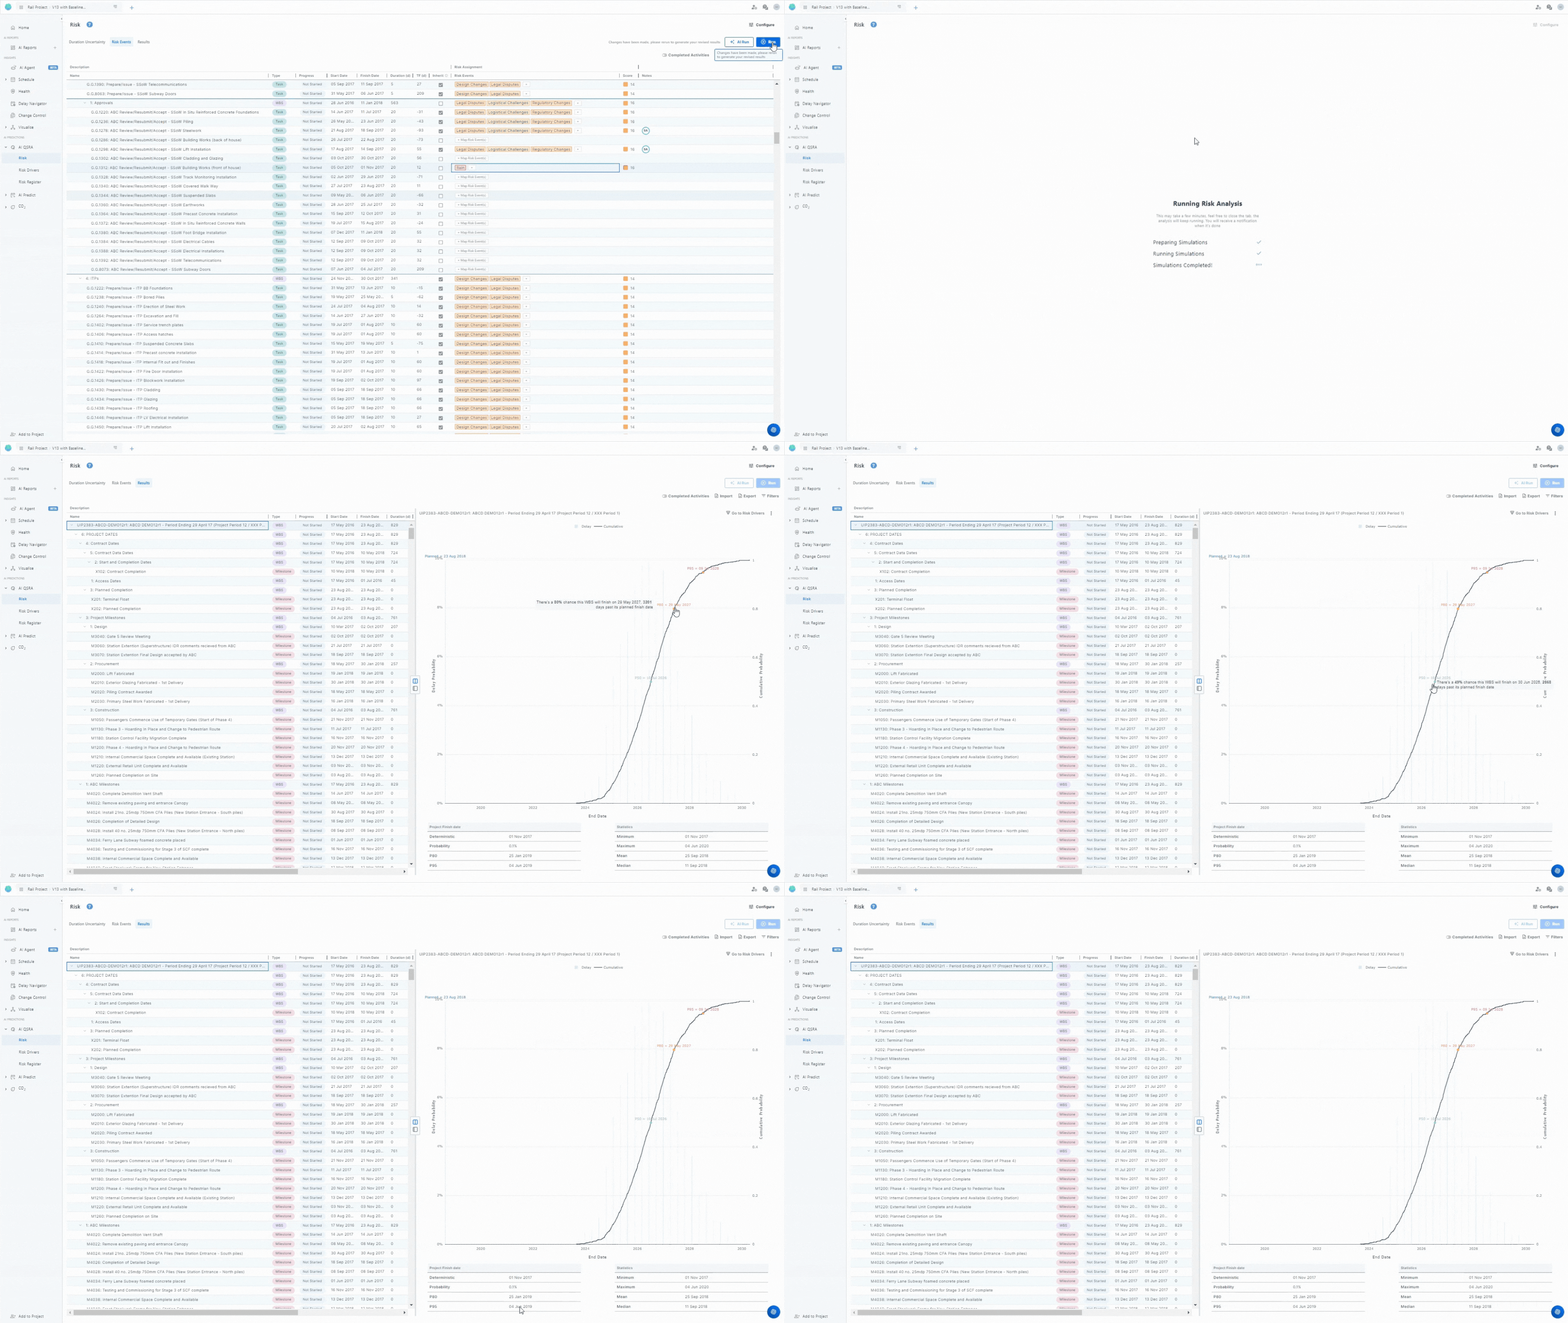
Experience the cutting-edge power of AI to manage duration uncertainty with ease. With this feature, you don’t need to set duration uncertainties manually. Click the AI Run button, and let the AI handle the rest. Intelligently analyze your schedule performance and automatically assign appropriate risk profiles to all your activities.

To access the results directly click the results page:

This advanced feature streamlines your workflow by leveraging AI to optimize and automate the handling of duration uncertainties.
Run a Risk Analysis with your input
This screen is designed to follow the workflow of a risk workshop. Each tab is a step in risk analysis.
- Define Duration Uncertainty
- Add Risk events to your schedule
- See the results

1. Define Duration Uncertainty
You can specify duration uncertainty at both the Work Breakdown Structure (WBS) and activity levels. There are three methods to do this:
- Applying Templates: Use pre-defined templates to set duration uncertainty quickly.
- Manual Entry: Individually enter duration uncertainty values for each WBS or activity.
- AI Recommendations: Utilize AI to suggest duration uncertainty values for your activities or WBS.
Applying Templates
Follow these steps to use a template for defining duration uncertainty:
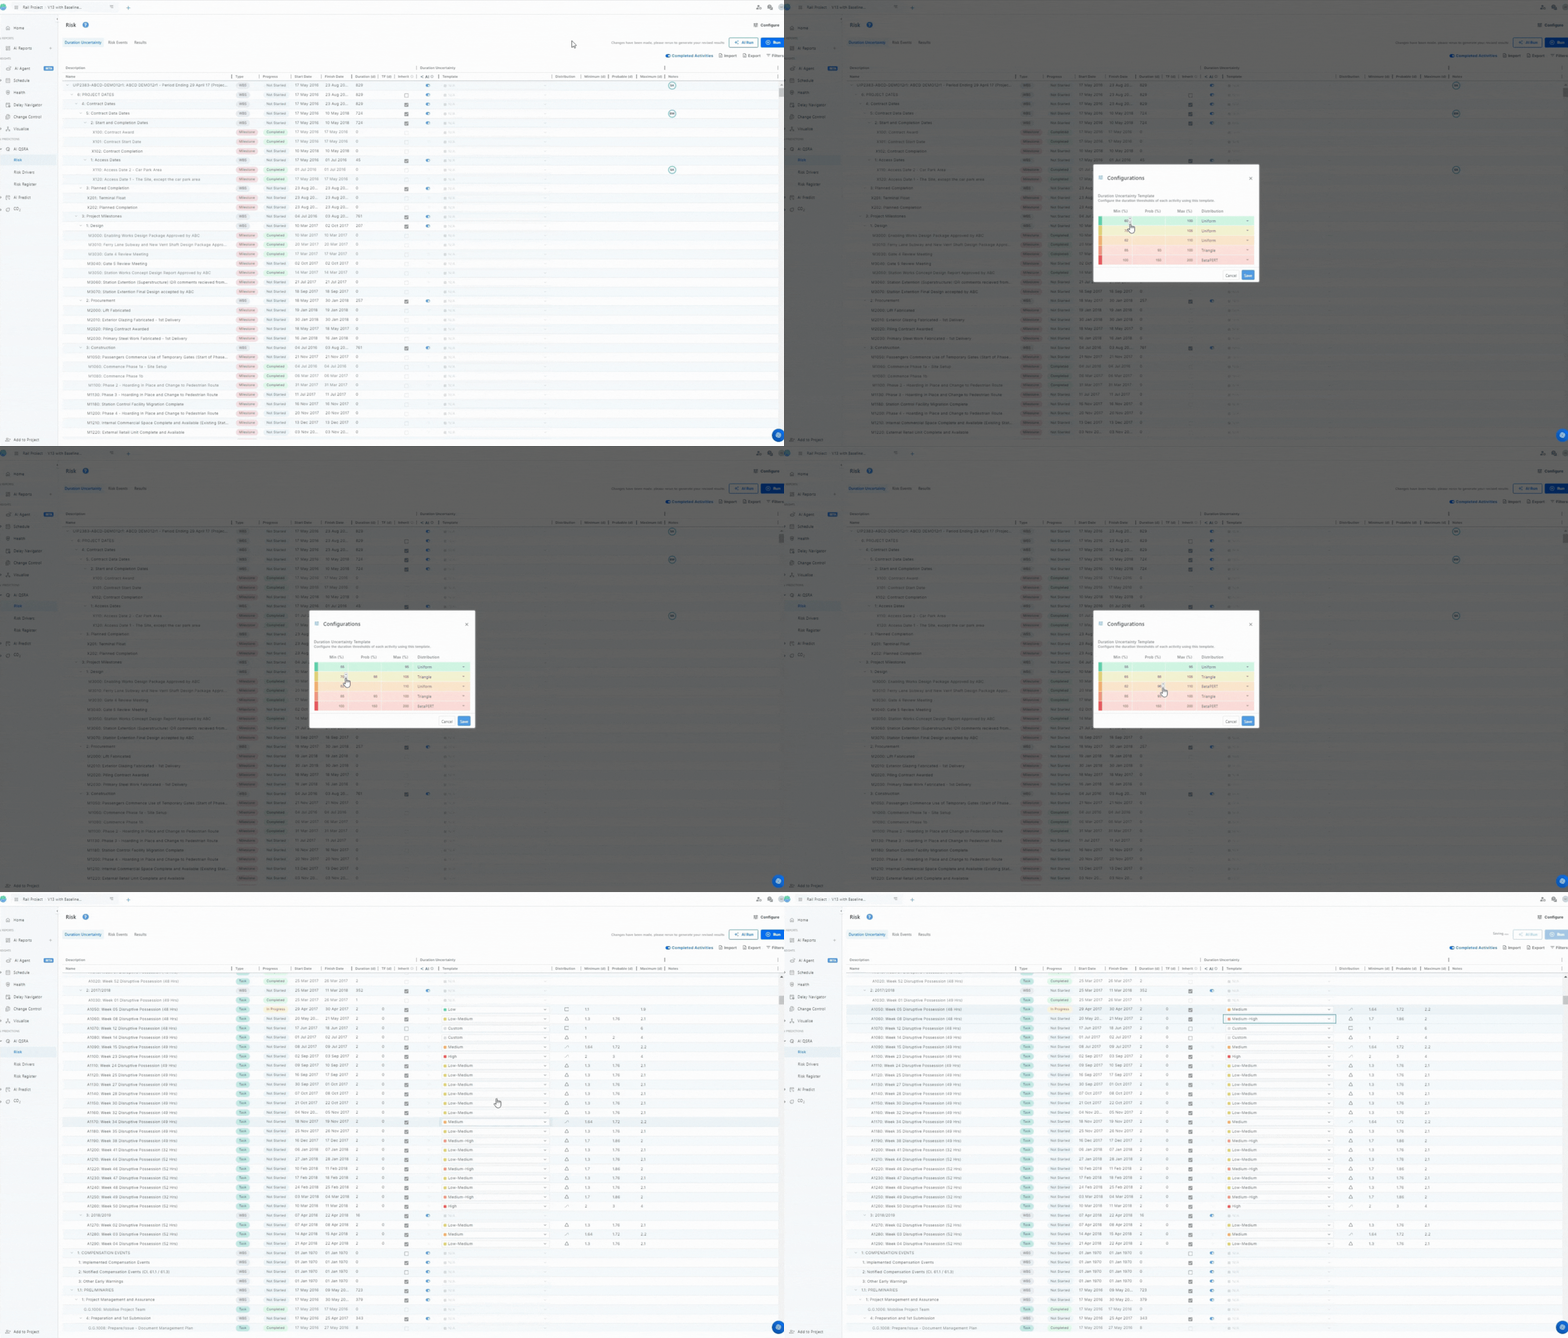
- Set Up Template Thresholds: Click on the Configure button at the top right-hand side of the screen and set up the values for the five templates.
- Apply Templates: Once the templates are configured, you can apply them at the activity or WBS level by selecting the desired template from the template column dropdown menu.
Manual Entry
Follow these steps to enter your duration uncertainty values:
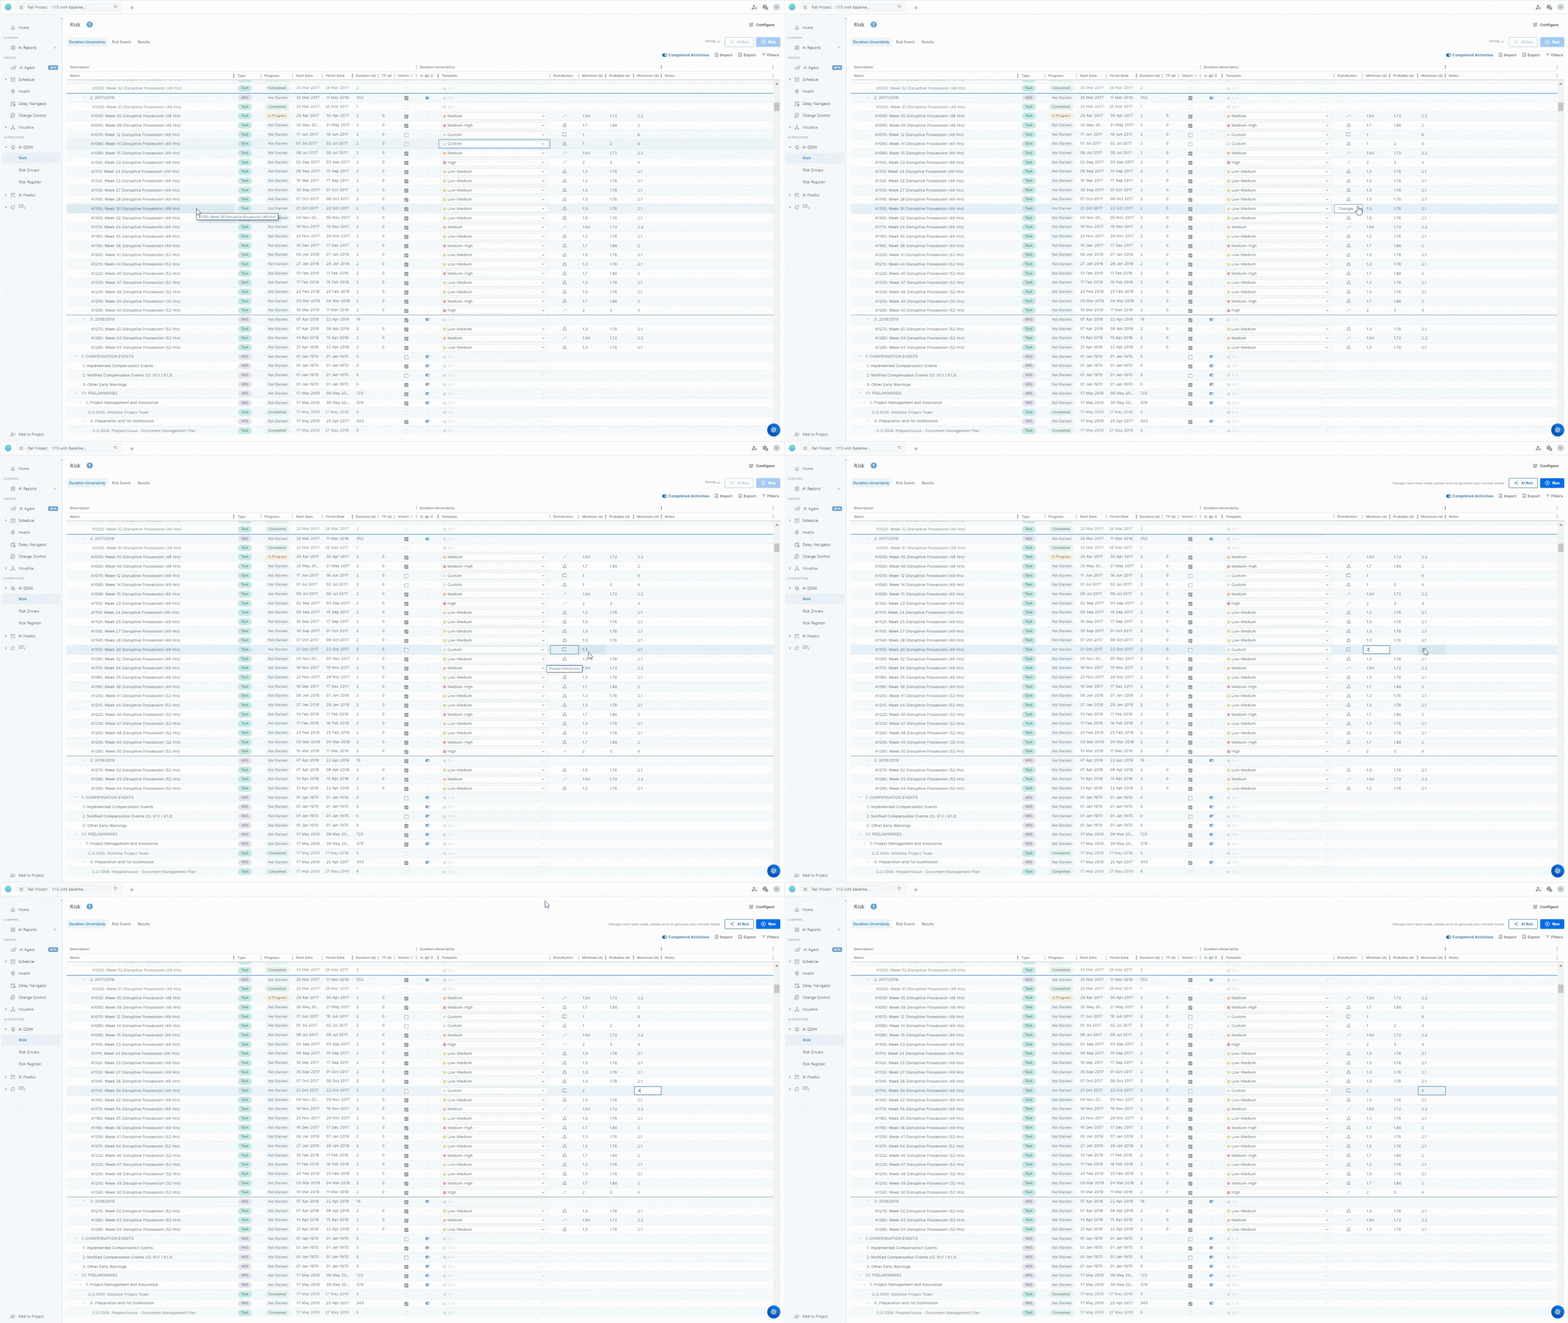
- Select the WBS or Activity: Choose the WBS or activity you want to modify.
- Select a Distribution: Choose the appropriate distribution for the selected WBS or activity. Available options include BetaPERT, Triangle, and Uniform.
- Enter Duration Uncertainty Values: Input the duration uncertainty values for the chosen distribution.
AI Recommendation
AI uses your schedule update to understand the performance and recommend duration uncertainty values. Follow these steps to use AI for recommending duration uncertainty values:
- Select the Activity or WBS: Choose the Work Breakdown Structure (WBS) or activity for which you want to use AI recommendations.
- Turn on the AI Toggle: Enable the AI toggle button for the selected WBS or activity.
- View AI Recommendations: The AI-recommended duration uncertainty values will appear in the minimum, probable, and maximum columns.
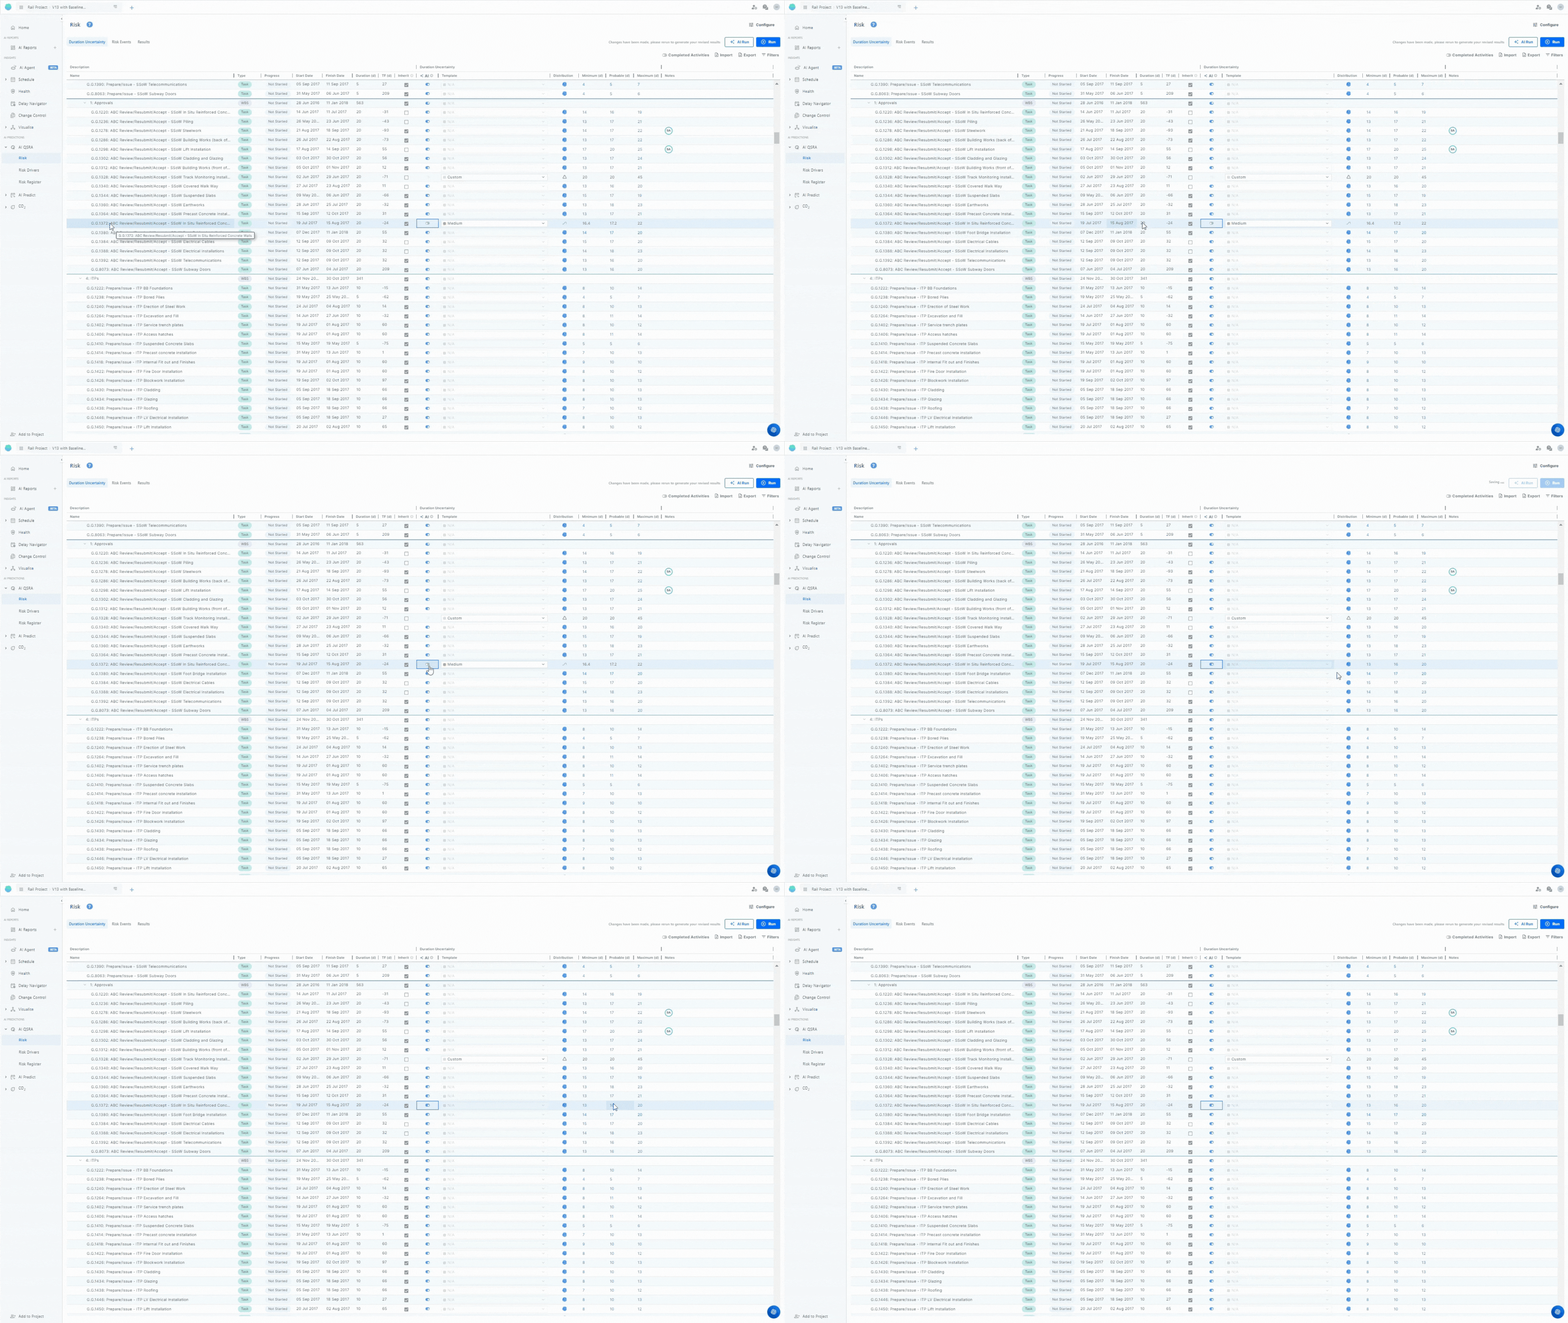
You can also set up an activity to inherit the duration uncertainty parameters from its parent WBS with a click of a button. Enabling this will allow a change in the uncertainty of a parent WBS to cascade below to all its children.
2. Add Risk events to your schedule
You can assign risk events to an activity and/or WBS easily, by following these simple steps:
Set Up the Risk Register
You can easily record risk events for future use on your risk register:
- Click on the Risk Register page from the sidebar.
- Add all the details about the risk event. You can find more information on how to do this here.
Map Risk Events to an Activity and/or a WBS
You can map risk events to an activity and/or a WBS with just three clicks:
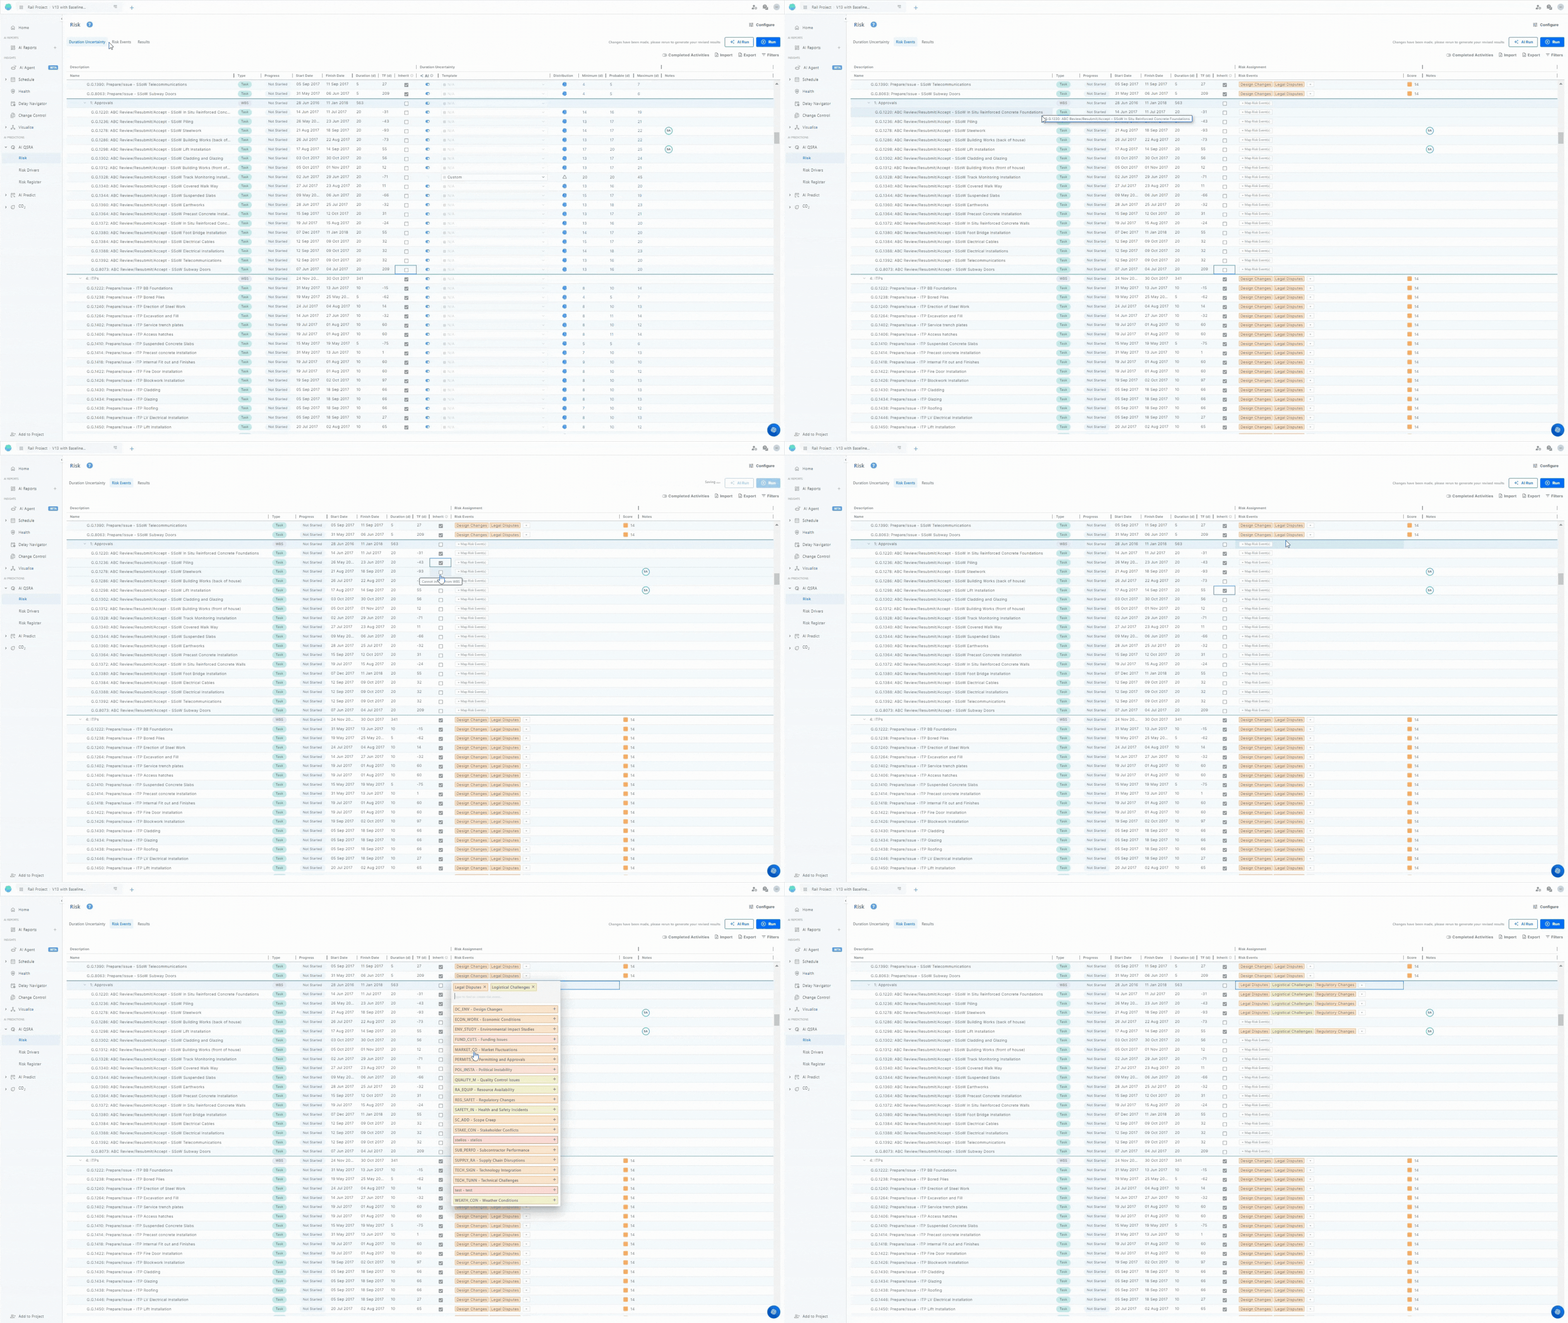
- From the Risk Events tab, select the activity or WBS you want to add a risk to.
- Click on Map Risk Events. A list of all your risk register events will pop up.
- Click on the risk event you want to add, and you're done.
You can also set up an activity to inherit the risk parameters from its parent WBS with a click of a button. Enabling this will allow a change in the risk configuration of the parent WBS to cascade below to all its children.
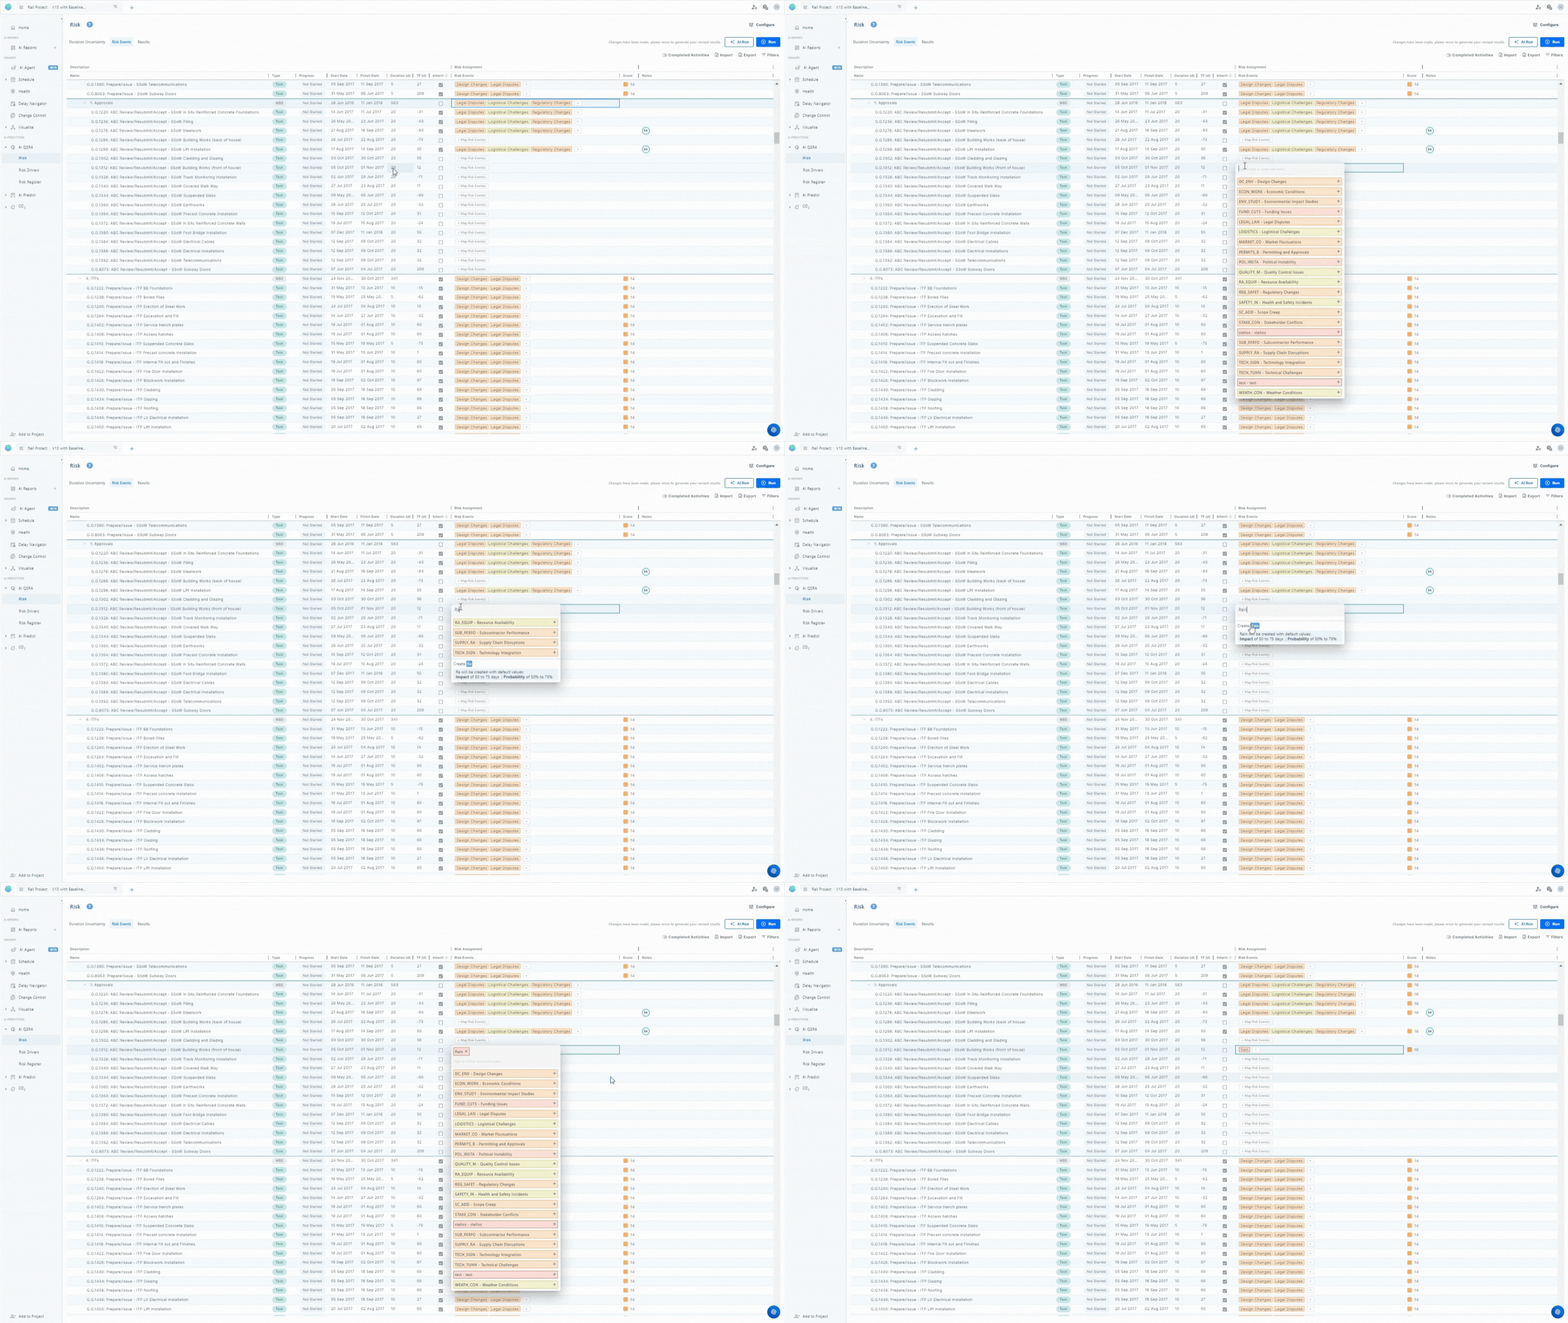
If you missed adding a specific event to your register, you can do that from the main screen. Simply type the name of the risk event you wish to add and click Create. This event will automatically be added to your risk register with default impact and probability values.
Add notes to your risk and duration uncertainty assignment
You can add notes to explain why specific duration uncertainties or risks were assigned to activities or WBS elements. To do this:
- Select the activity or WBS to which you want to add a note.
- Click on the Notes cell and write your comment. This allows you or your team members to document the rationale behind the assigned values or risks.
These notes provide context and help ensure that the reasoning behind decisions is clear for future reference and amendments.
3. Adjust the number of iterations of the Monte Carlo simulation
To change the number of iterations, click on Configure in the top-right corner of the screen. A pop-up will appear, allowing you to specify the number of iterations to run, ranging from 1 to 10000. Enter the required number of iterations and click Save to apply the changes.
Note: The default is set to 1000 iterations.
4. Run a QSRA Analysis
Now that you have assigned risk events and set your duration uncertainty, click the Run button to start the simulations. Once completed, you will immediately gain access to an interactive visualization showing the entire risk curve and P-positions of the project, as well as a table with details including:
- The deterministic project finish date
- The probability of meeting the deterministic project finish date
- P80
- P95
- Minimum, maximum, mean, and median project finish dates
5. Viewing Risk Curves for WBS or Activities
You can also drill down to examine the risk curves for specific WBS or activities. Simply select the desired activity, and you will access the interactive Activity QSRA chart. This chart provides detailed insights into the P-position and includes a table with the same comprehensive information as the project view, such as:
- The deterministic project finish date
- The probability of meeting the deterministic project finish date
- P80
- P95
- Minimum, maximum, mean, and median project finish dates
Note: You can download the chart by clicking on the three dots icon on top of the chart
Importing Risk profiles
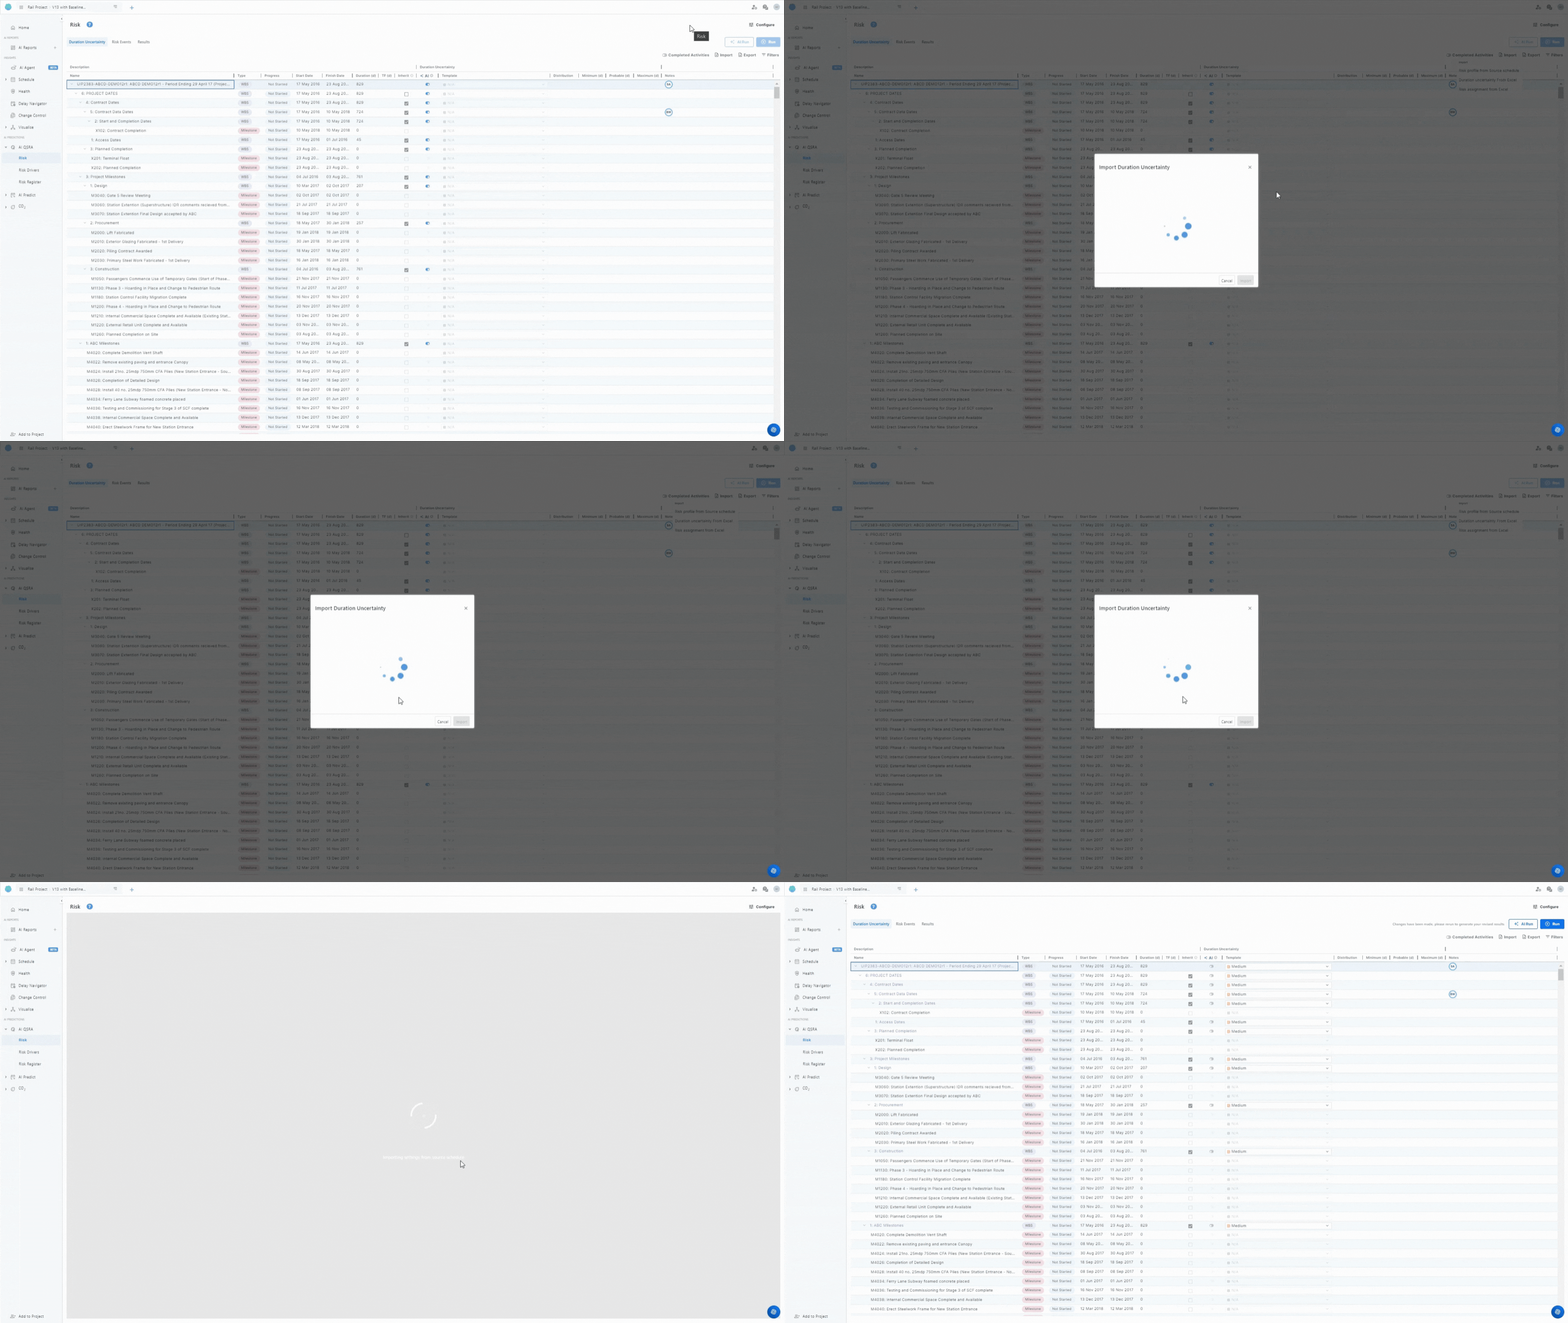
Import risk profile from a previous update
Follow these steps to import your risk profile from a previous update:
- Click the Import Button: From the main screen, click on the Import button.
- Select the Import Option: Choose the option Risk Profile from Source Schedule.
- Choose the Schedule: A pop-up will appear where you need to select the schedule you want to import from.
- Click Import: Click on Import and the risk profile will be imported to your new schedule.
Import Risk Configuration from Excel
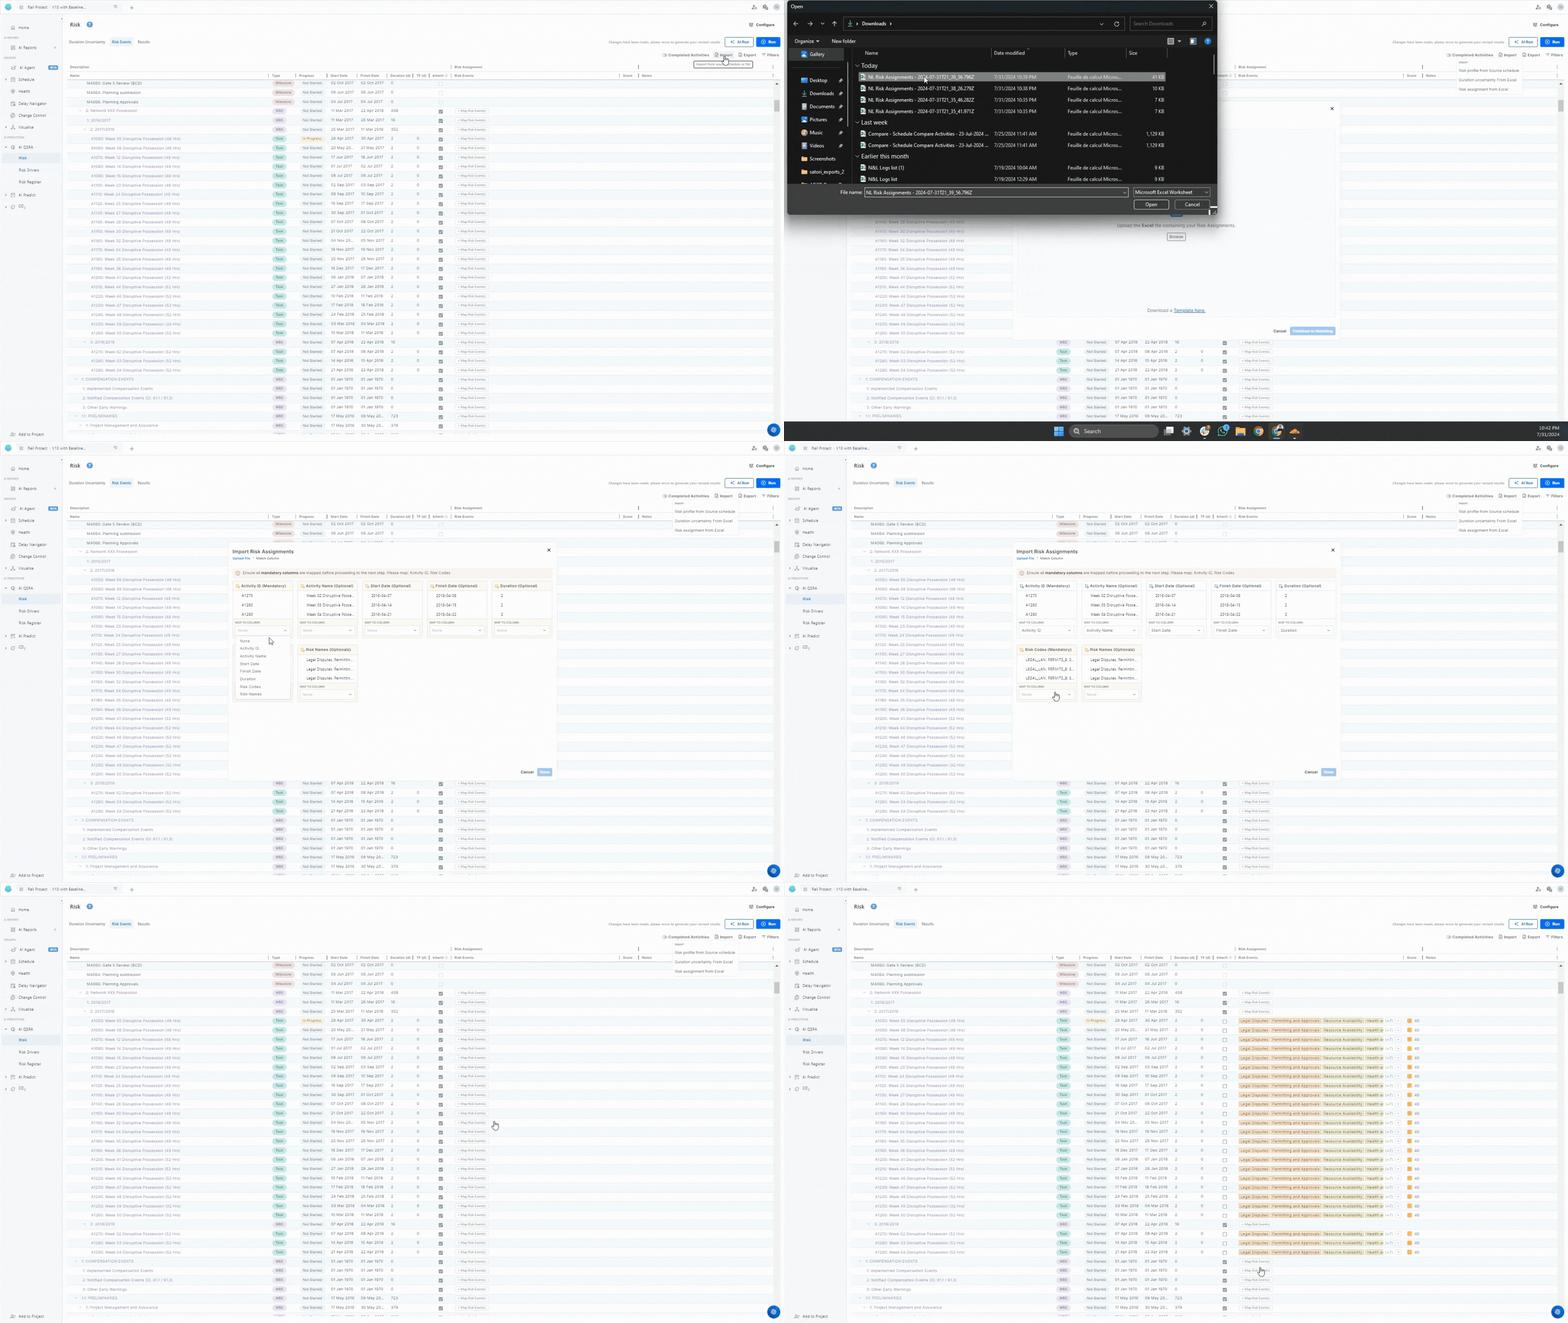
This feature allows you to manage your risk assignments in Excel and easily import them into the platform. Follow these steps to import your risk assignments
- Navigate to the Main Risk Screen: Click on the Import button.
- Select Import Option: Choose Risk Assignment from Excel.
- Upload Your Excel File: A pop-up window will appear. Click on the Browse button to upload your Excel file. You can also download a sample file for reference (optional).
- Indicate Column Headers: Specify if your file contains column headers to ensure proper mapping of the column and click on continue to matching.
- Map Mandatory Columns: Ensure the mandatory columns are mapped correctly. The required columns are:
- Activity ID
- Risk Codes
Once all mandatory columns are mapped, click on the Done button. The platform will proceed with the import process and assign the risk events to the activities.
Import Duration Uncertainty from Excel
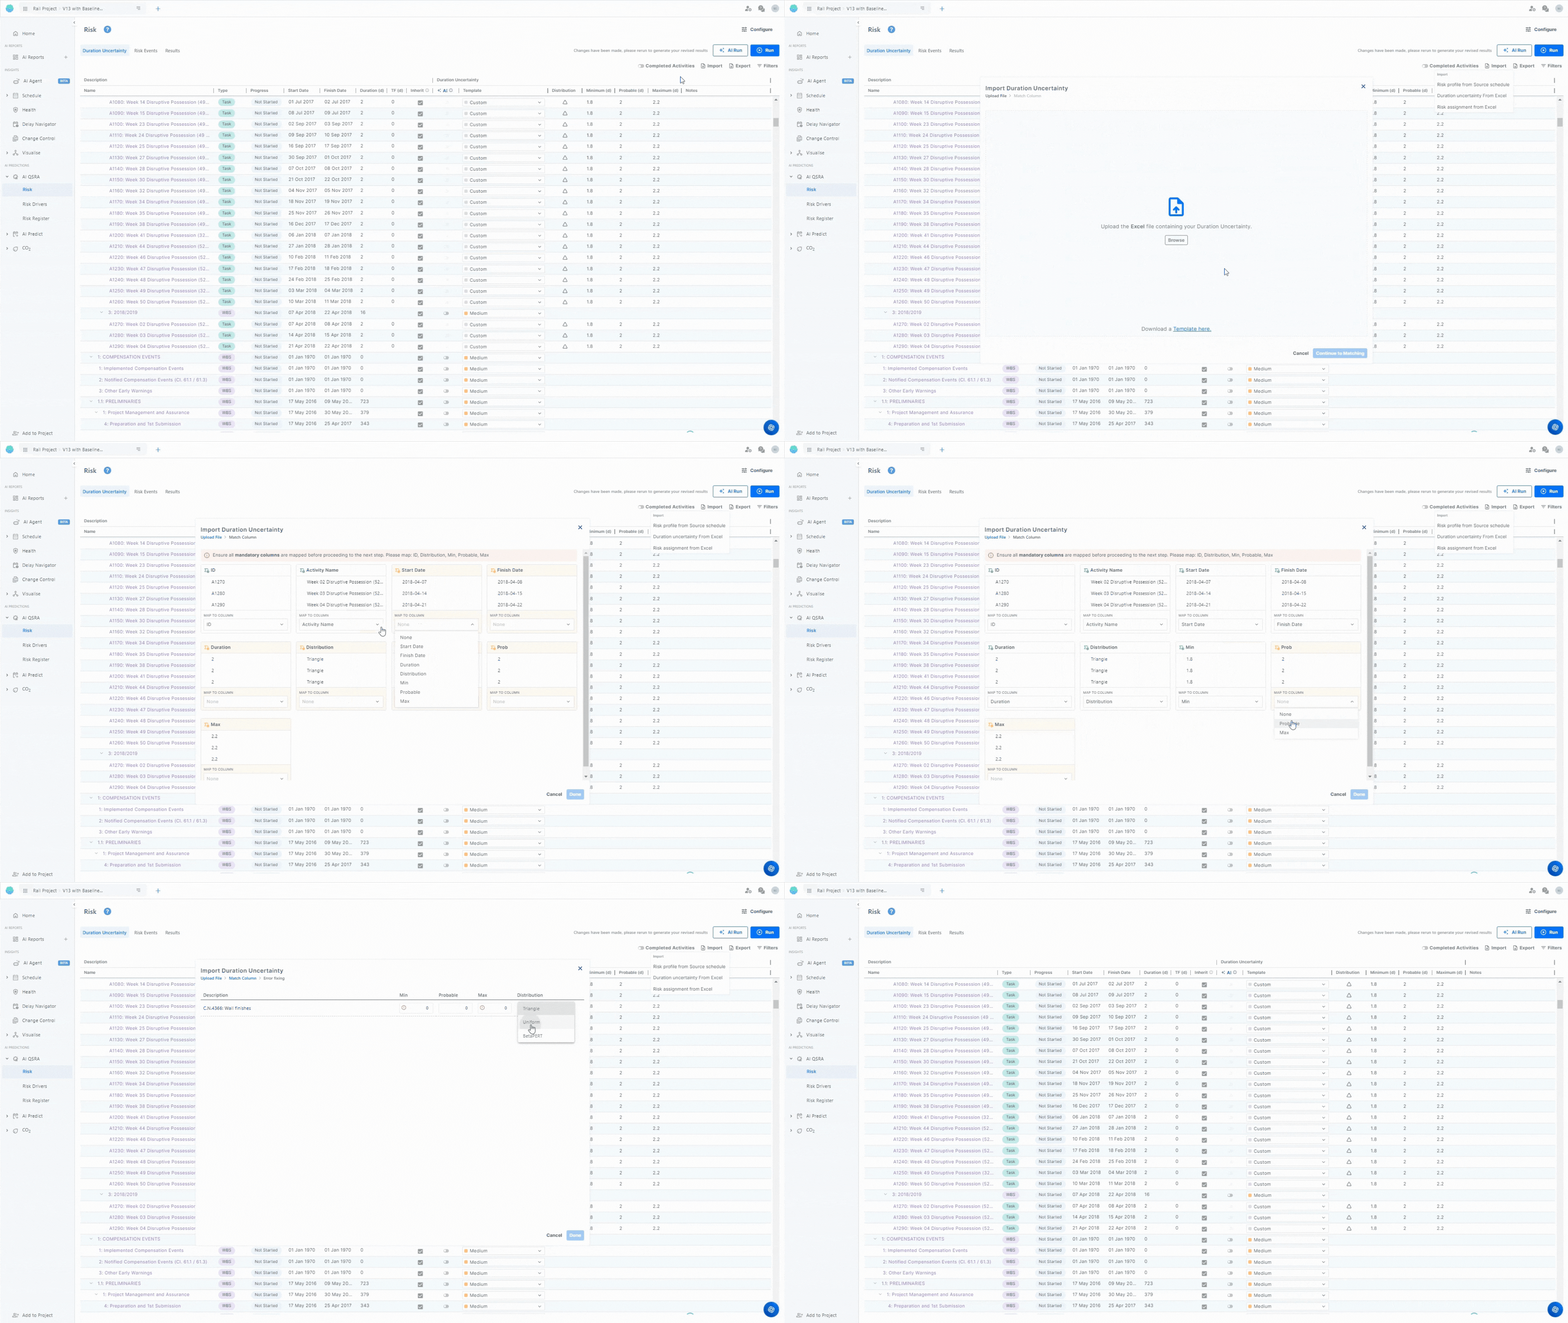
- Navigate to the Main Risk Screen: Click on the Import button.
- Select Import Option: Choose Duration Uncertainty from Excel.
- Upload Your Excel File: A pop-up window will appear. Click on the Browse button to upload your Excel file. You can also download a sample file for reference (optional).
- Indicate Column Headers: Specify if your file contains column headers to ensure proper mapping of the column and click on continue to matching.
- Map Mandatory Columns: Ensure the mandatory columns are mapped correctly. The required columns are:
- Activity ID
- Distribution
- Min
- Probable
- Max
Once all mandatory columns are mapped, click on the "Done" button. The platform will then proceed with the import process and add the new Duration Uncertainty values.
Export duration uncertainty, risk assignments, and results
For offline work on duration uncertainty and risk assignments, you can easily export and import data to and from Excel. Click on the Export button and select one of the following options:
Duration Uncertainty – exports the assigned duration uncertainty for each activity.
Risk Assignment – exports a list of schedule activities along with the risk events assigned to each one.
Risk Results – exports the P5, P50, P80, and P95 durations for all schedule activities.
This makes it easy to work offline, share key results, or use them in your own reporting workflows.
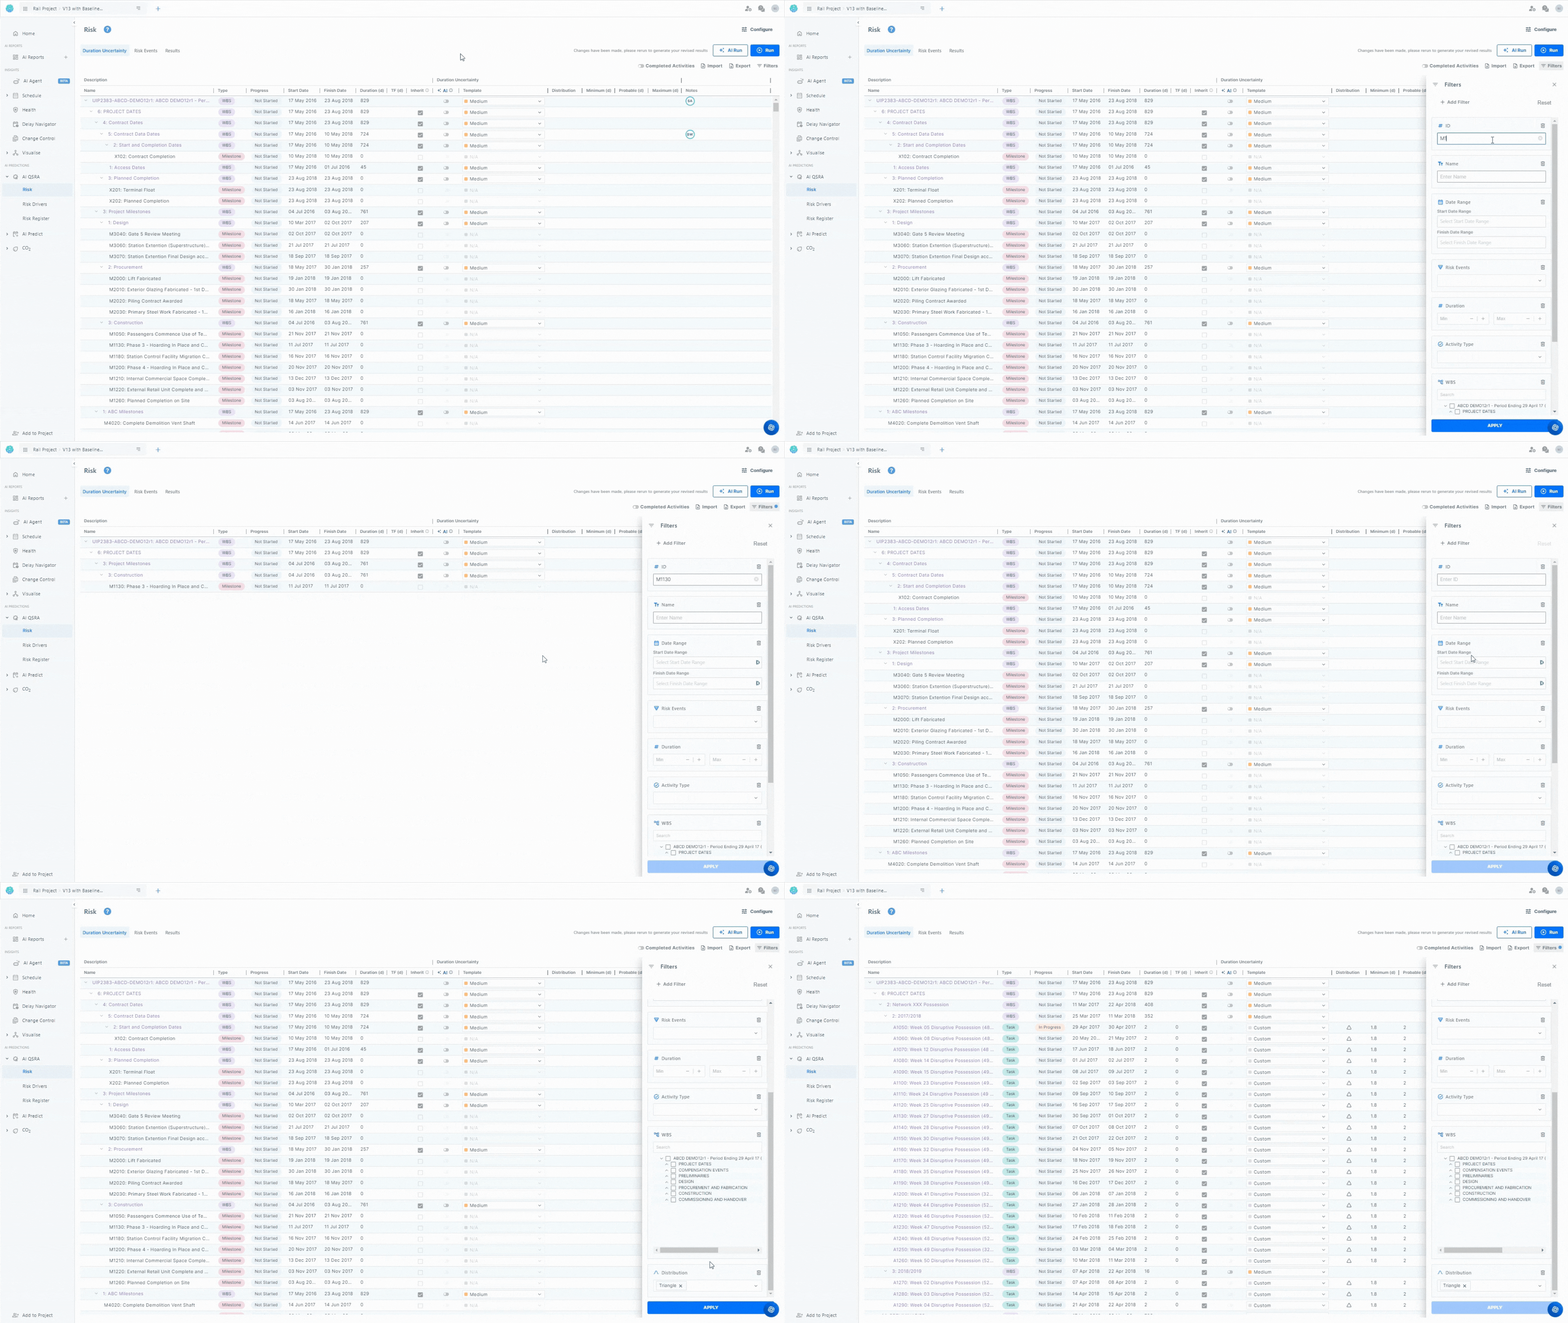
Use smart filters
Smart filters allow you to focus on activities with high values and refine your view according to specific criteria. You can filter by various parameters including:
- WBS or Activity ID
- Name
- Date Range
- Assigned Risk Events
- Duration Uncertainties
Additionally, you can add extra filters by clicking the Plus button on the filter sidebar menu to include criteria such as:
- Activity Type
- Uncertainty Distribution
- Total Float
- WBS
To apply your selected filters, simply click on the Filter button. This functionality helps you focus on the most relevant data for effective analysis and decision-making.
Assign Risk Profile in One Go
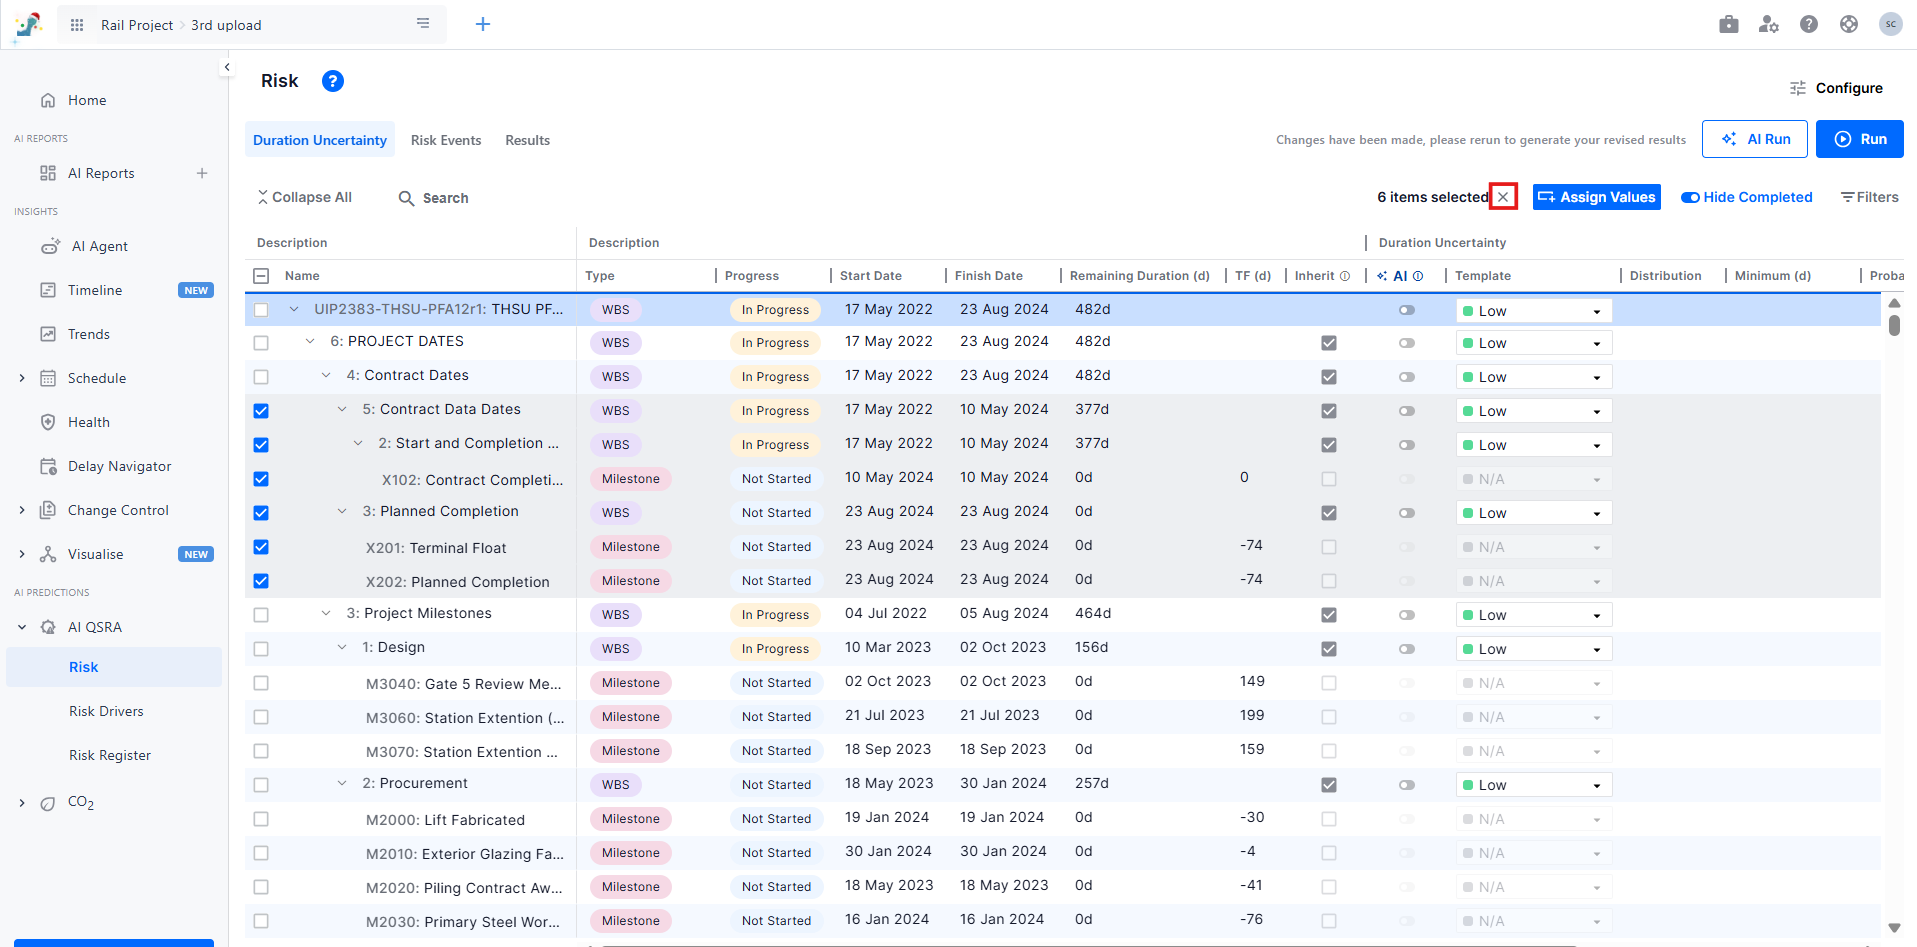
You can assign Duration Uncertainty or Risk Events to multiple activities at once using manual multi-selection. This capability works on both full table and filtered views. From the Risk screen, select multiple activities directly in the table. Once multiple rows are selected, an Assign button appears, allowing you to apply risk configurations in one action.
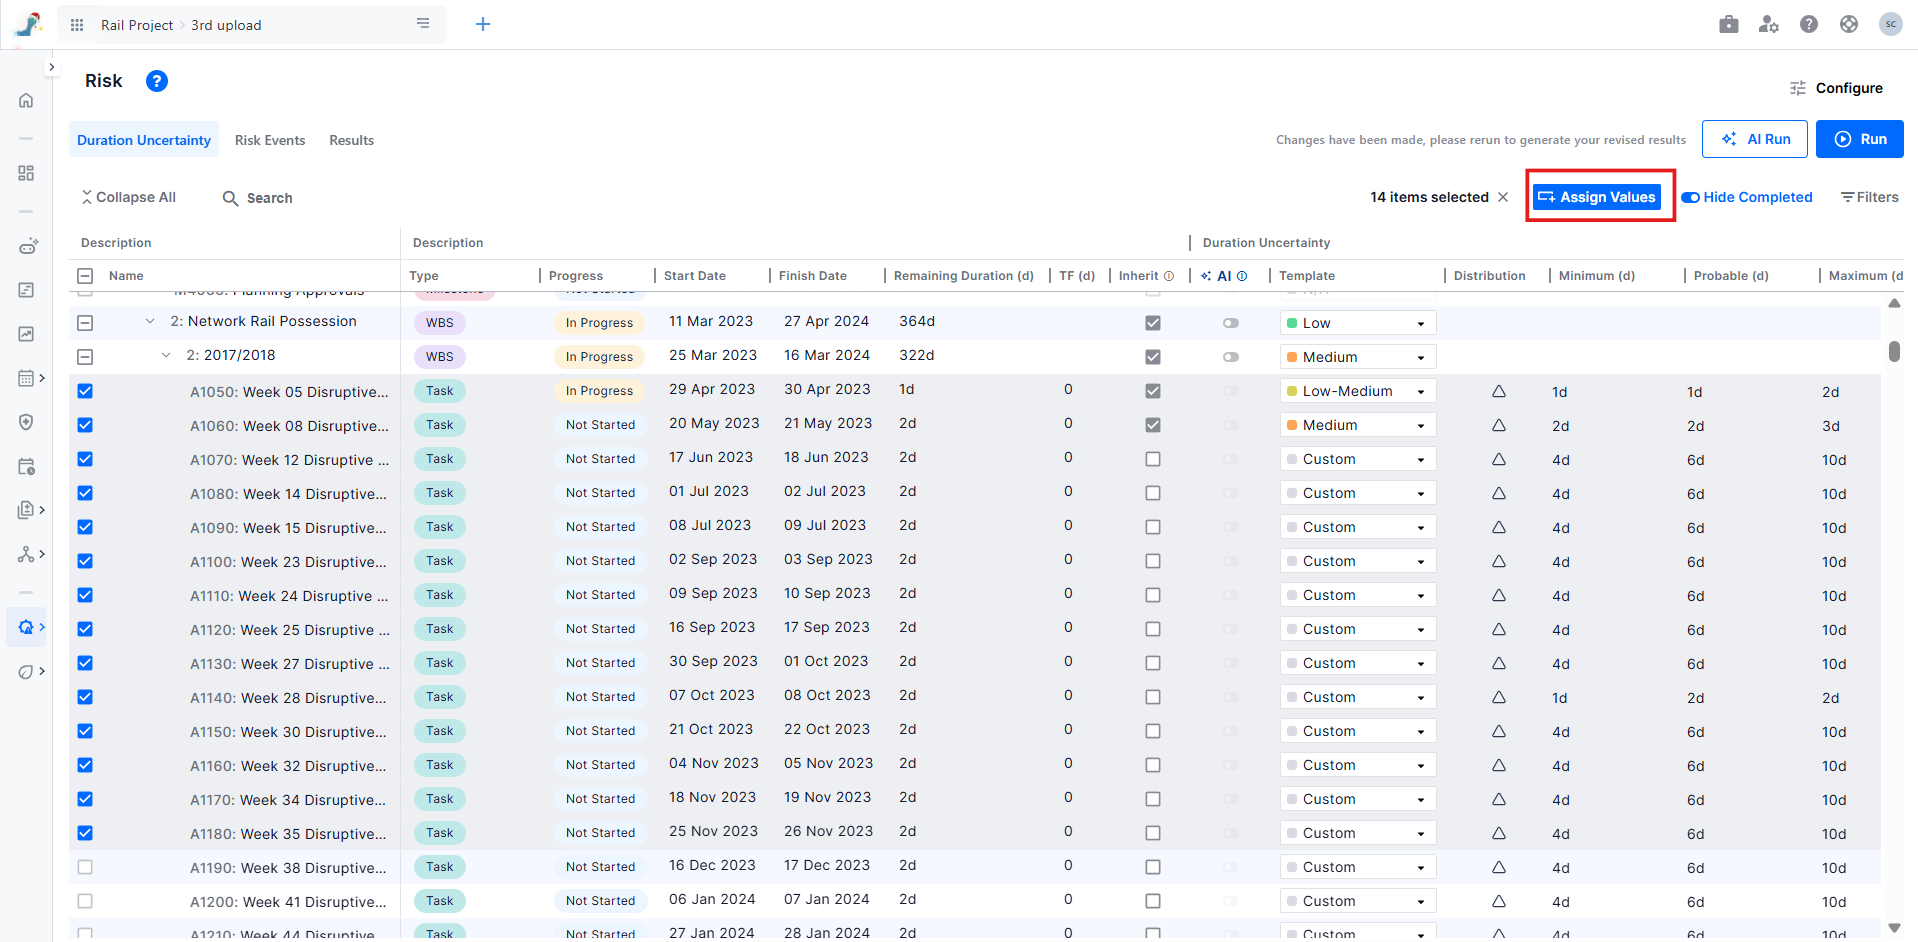
Multi-selection supports the following behaviors:
- WBS selection
Selecting a WBS automatically selects all activities under that WBS. - Shift selection
Hold Shift and select two rows to automatically select all activities between them.
Once activities are selected, click Assign Values to open the assignment pop-up. The pop-up contains two tabs:
- Duration Uncertainty
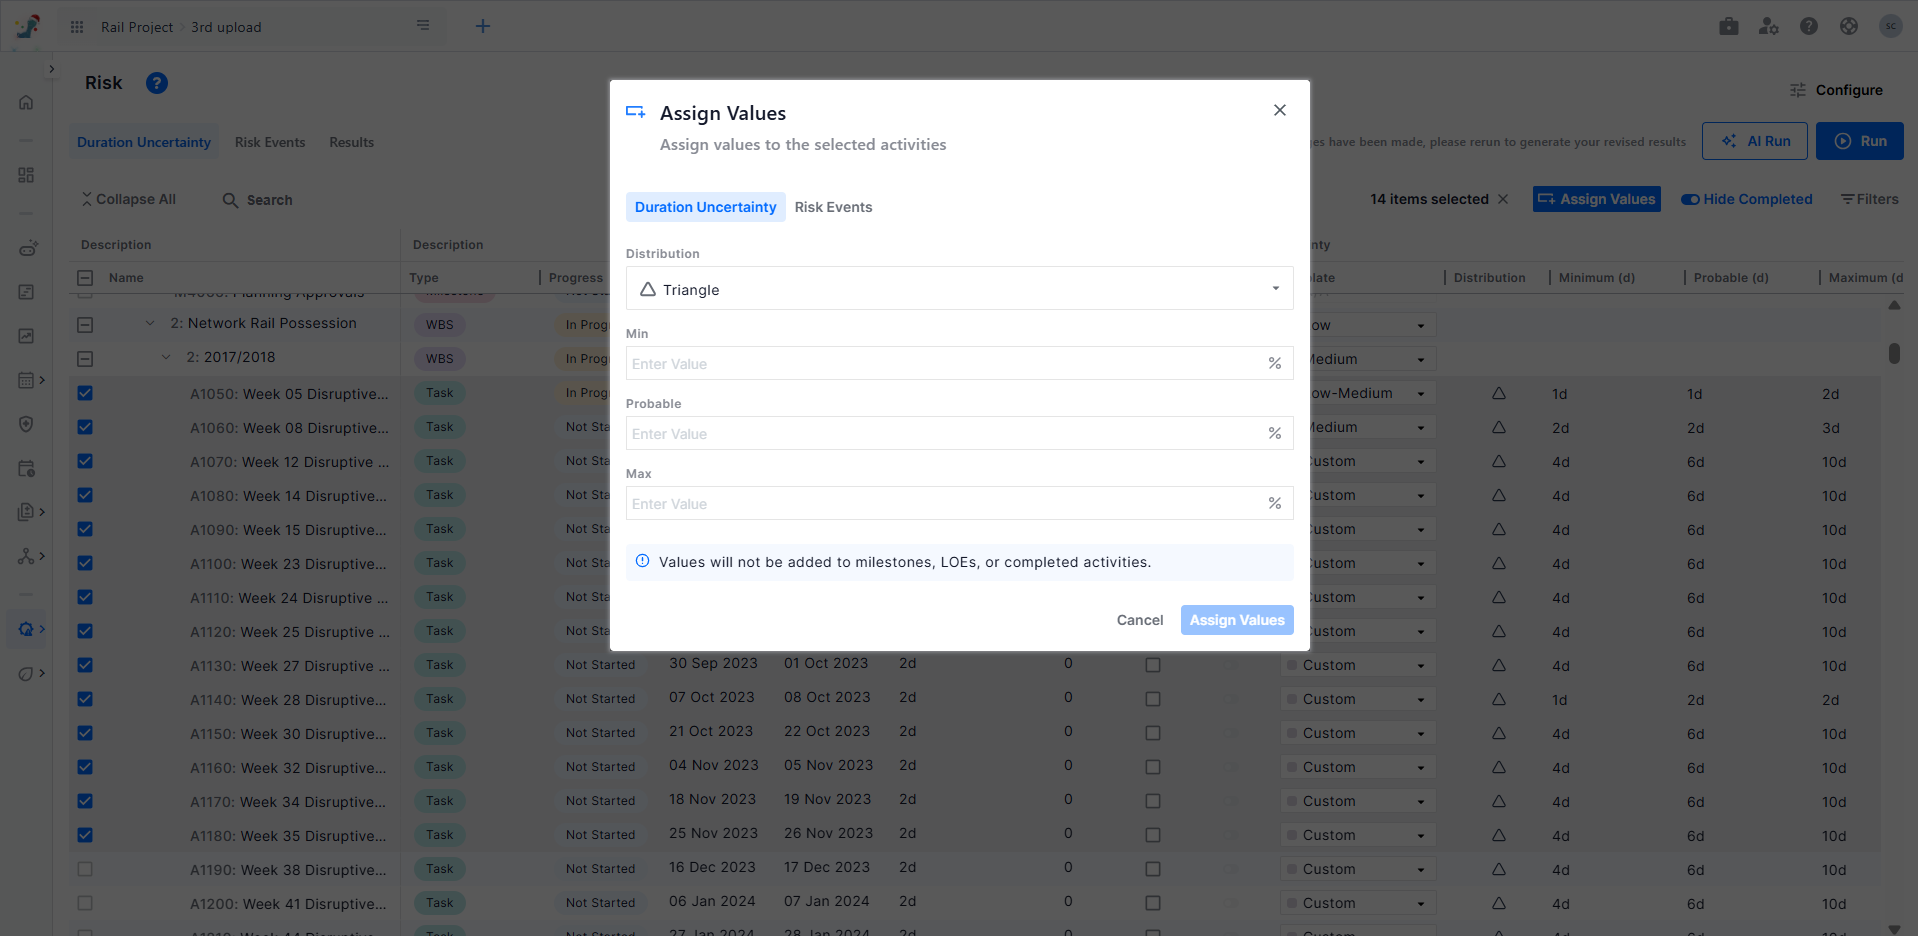
- Risk Events: When assigning Risk Events, you can choose how the new events are applied:
- Append: adds the selected risk events to existing ones
- Override: replaces any existing risk events on the selected activities

After completing the assignment, you can clear the current selection directly from the Assign button, allowing you to quickly reset your selection and continue working without manually deselecting rows.

