👋 Your first day with Nodes & Links!
Congratulations! You just made your first step to making your life easier!
Hi there! If you are reading this, it means that you just got invited into the platform!
This article will guide you through your first day with Nodes & Links and how to get started!
We use the following terms to navigate data within the platform:
- Project: A predetermined set of schedules that constitute a self-contained object. This object is called ‘project’. A project on the Nodes & Links platform usually reflects one real-world project, but there are exceptions where one project on Nodes & Links can be composed of more than one real-world project.
- Fiiles supported: Oracle Primavera P6 file (.xer) or Microsoft Project (.mpp).
Step 1: Accept the invitation in your email
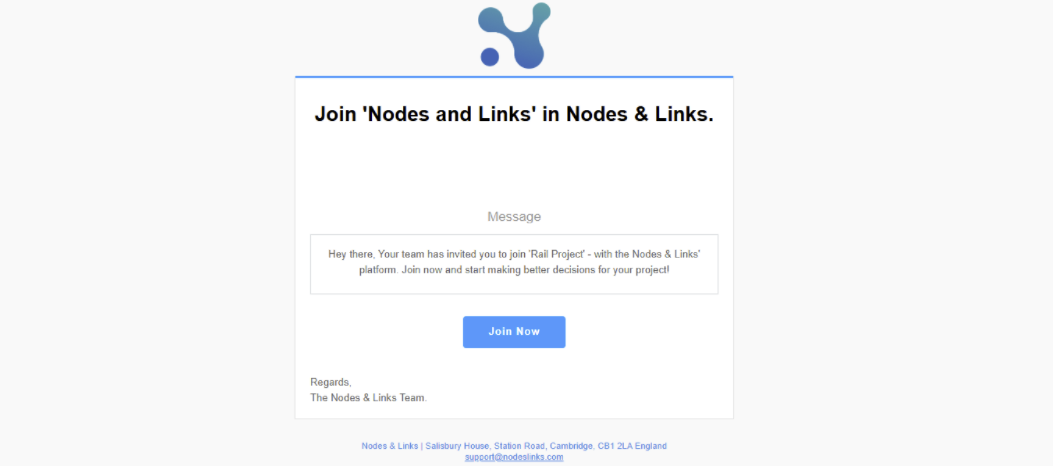
Before you get on the platform you need to create an account. You should see an email with an invitation that looks like this:
Step 2: Create a new project and upload your baseline
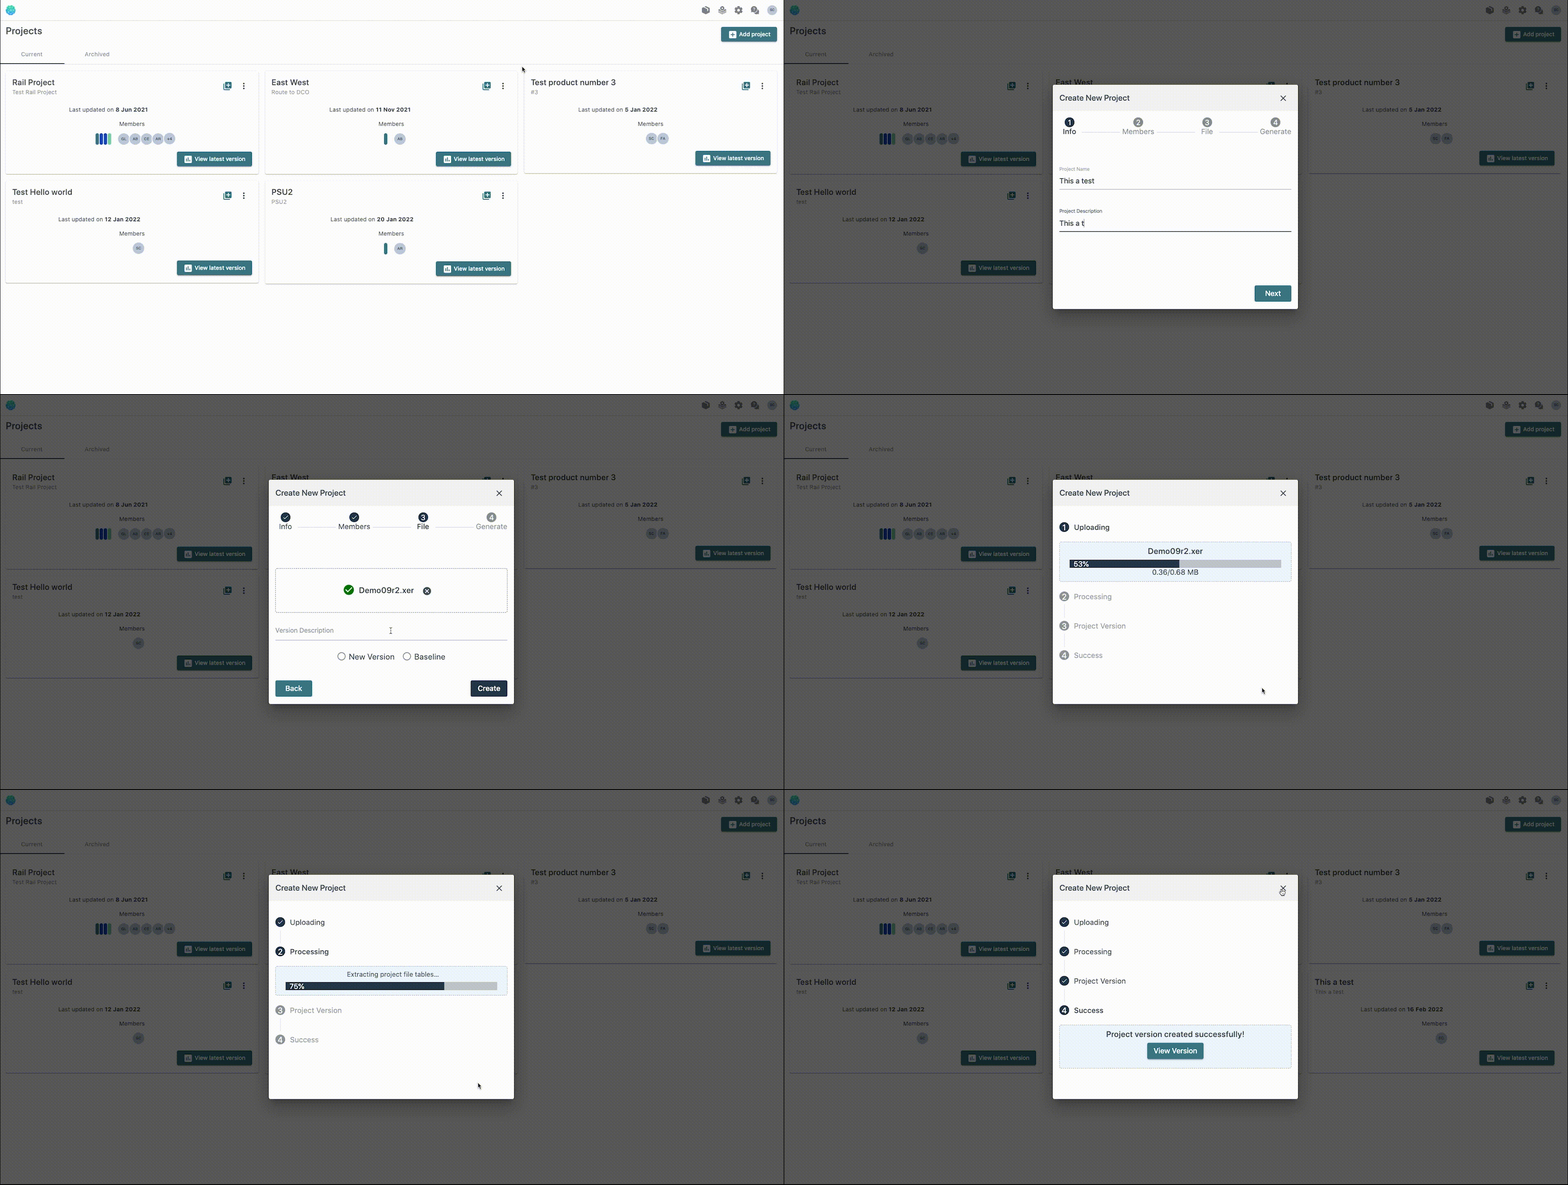
All you need is internet access, a project schedule, and a modern browser and you are good to go!
Step 3: Upload an update for your project
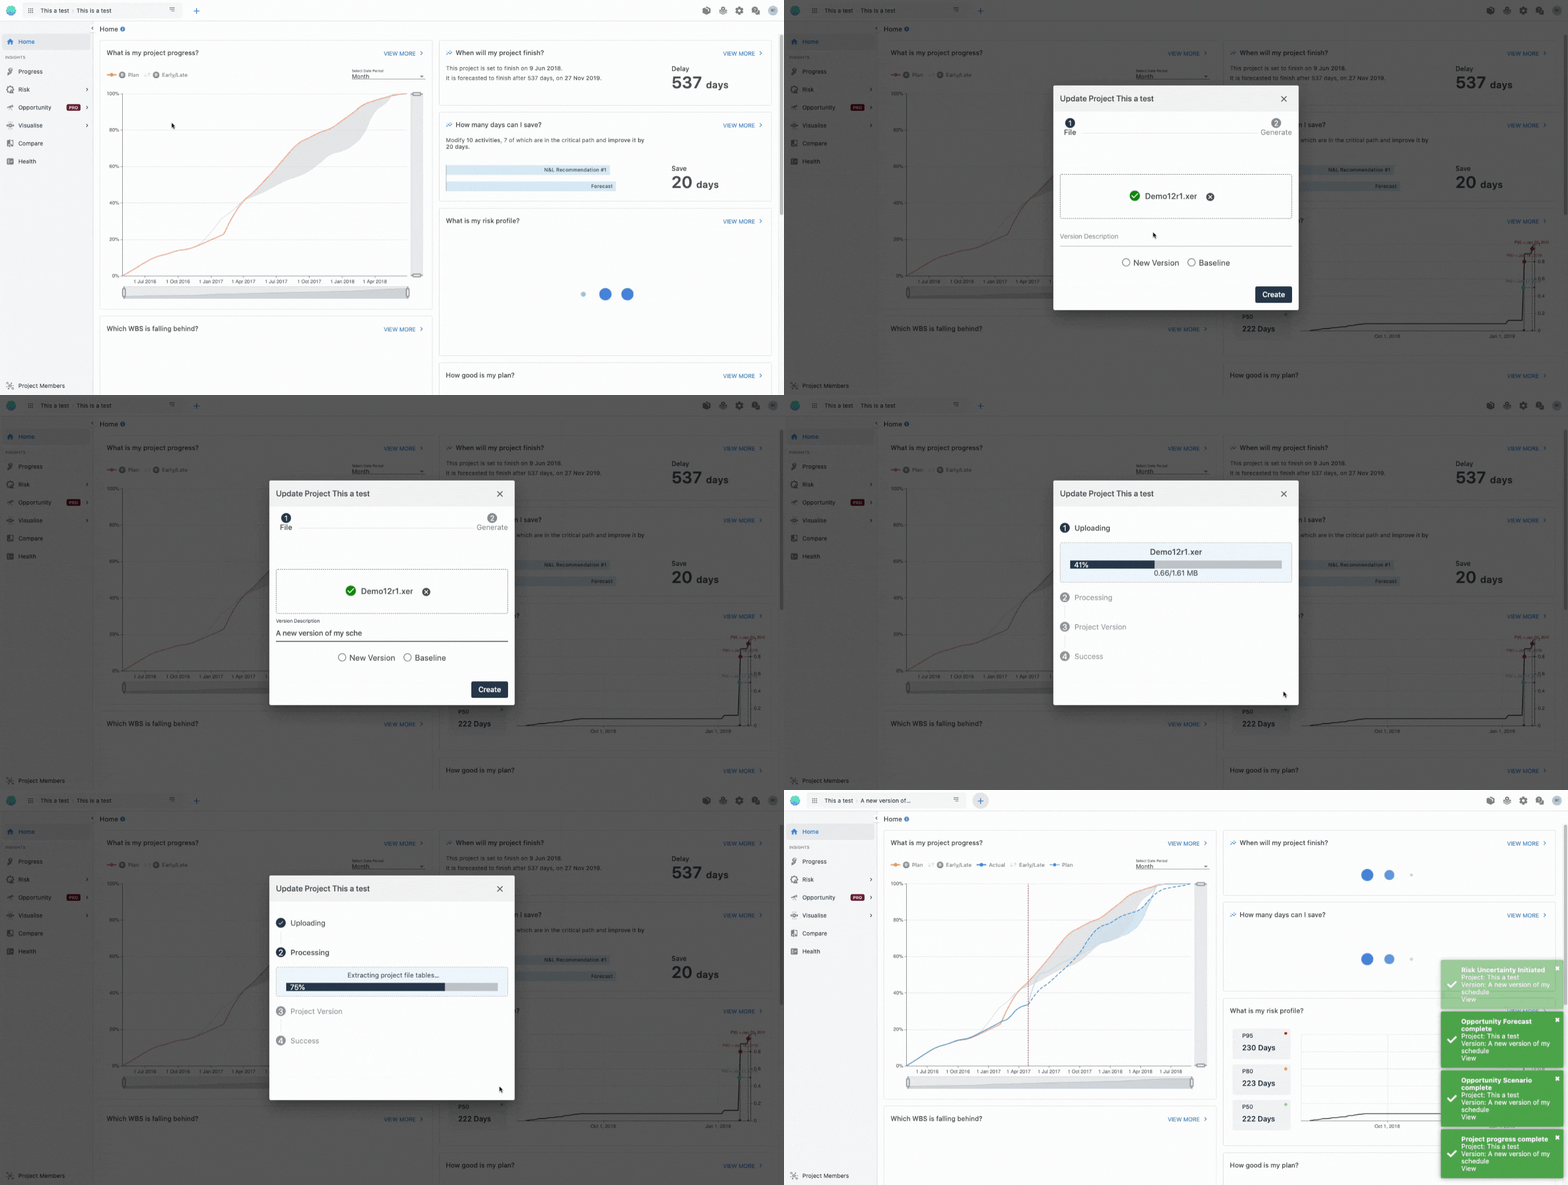
There are several ways of uploading a new schedule to an existing project.
We recommend doing so from the Home Screen - simply go to the top left corner and click on the ‘+’ icon. Once you are there, follow the on screen instructions and you are good to go!
Step 4: Invite a colleague
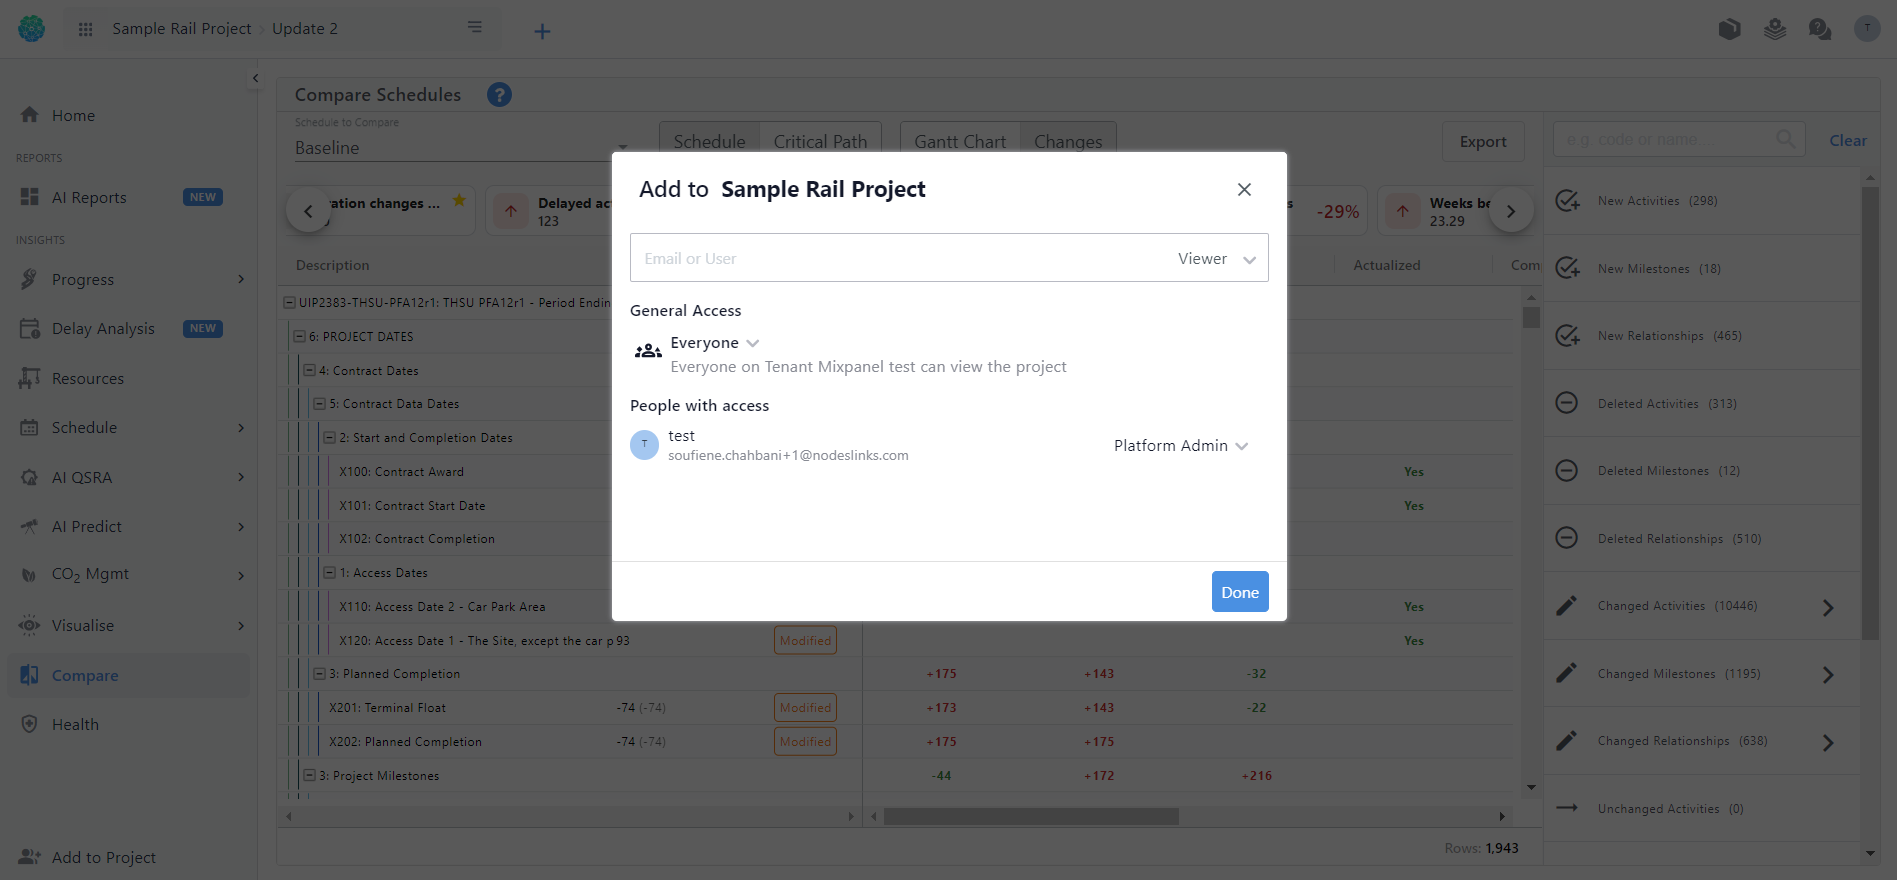
You can easily add users to an existing project. Simply go to the bottom left corner and click on the ‘Add to a project’ button. You can invite one or many users at the same time, by simply adding their email addresses and assigning roles to them. Note that you can assign permission up to the same level as your role.
You are ready to go!
Don’t hesitate to get in touch if you have any further queries!
