
📖 Risk Register
This screen allows you to:
- Define risk events
- Define mitigated values for risk events
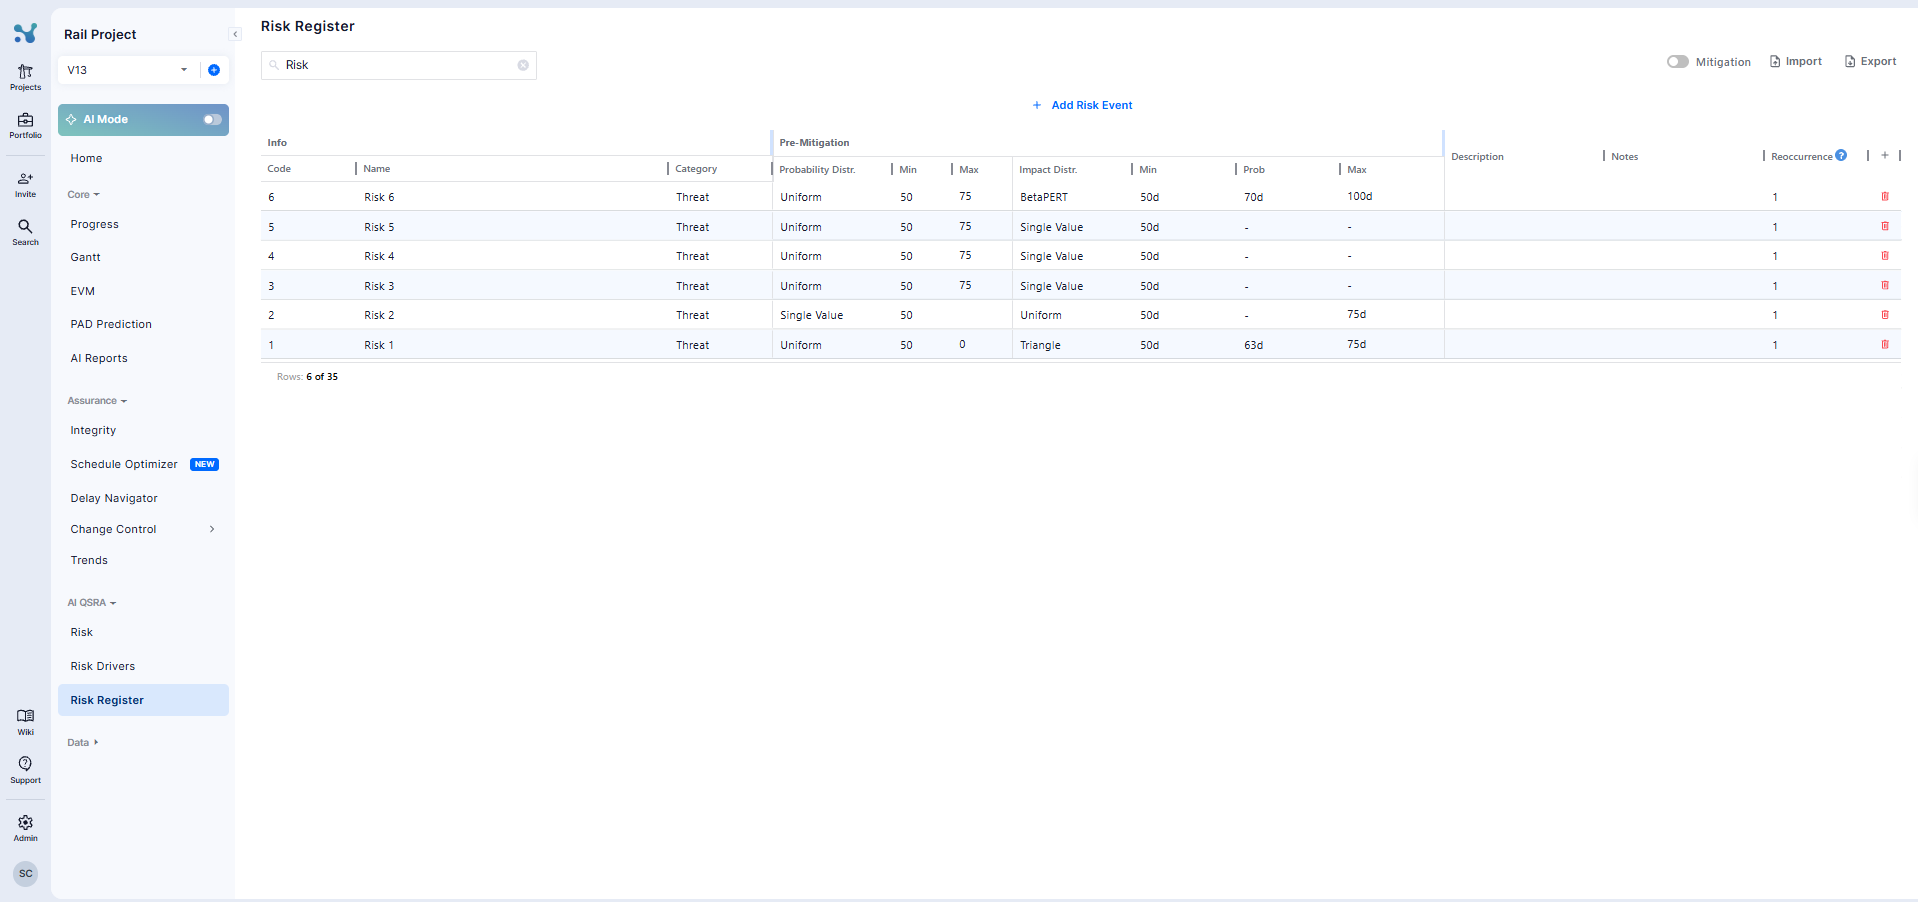
How to Define a Risk Event
The following fields are available when defining a risk event:
- Code: A short, unique identifier for the risk event, used to reference it on other pages such as Risk and Risk Drivers.
- Name: A descriptive label for the risk event, used to identify it clearly when viewing or reporting on the register.
- Category: Classify the risk event as either a Threat or an Opportunity. Threats are risk events with a negative impact on the project if they occur (i.e delays), while Opportunities are risk events with a positive impact if they occur (i.e. time saving). Note that Impact is always entered as a positive number — Category alone determines the direction the impact is applied in, not the sign of the value you enter.
- Probability Distribution: We offer two types
- Single value, e.g, 50%
- Uniform
- Probability%: The probability value.
- Impact Distribution: We offer 4 types
- Single value
- Uniform
- Triangle
- BetaPERT
- Impact: The Impact value
- Description (Optional): A description of the event
- Notes (Optional): A field that can be used to keep notes about the risk event
- Reoccurrence(Optional): The reoccurrence setting controls how many times a risk can occur during a single iteration for each activity it is assigned to. For example, if the recurrence is set to 1 and the risk event is assigned to Activity A and Activity B, the risk can occur up to once on Activity A and up to once on Activity B within the same iteration. If the recurrence is increased to 2, the risk can occur up to twice per iteration for each assigned activity.
- Independent (Optional): This field can be activated by clicking the plus (+) button.
- An independent risk event can have different impact values within its impact range for different activities.
- A dependent risk event has a fixed impact value from its impact range that applies equally to all affected activities.
- By default, if this field is not activated, all risk events are considered independent.
How to add Mitigated Values
To define mitigated values for your risk events, click the Mitigation button at the top of the table. This will show additional fields for all risk events.
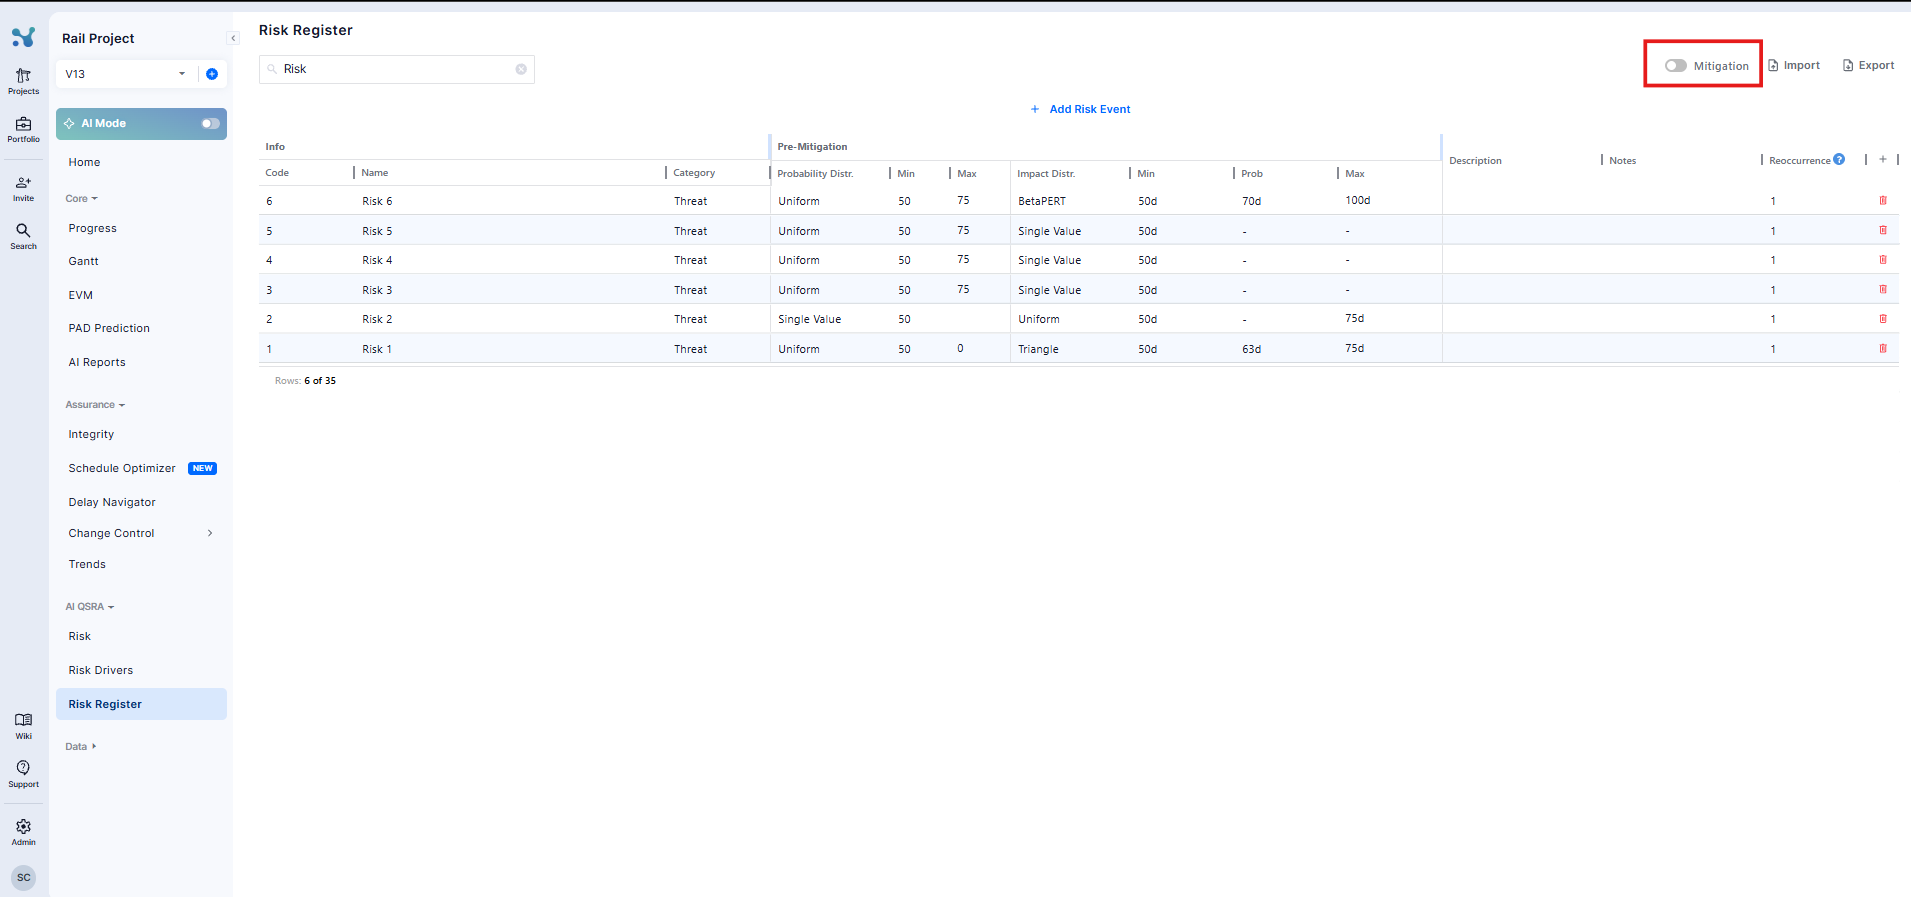
When the mitigation section is activated for the first time, the fields are automatically filled with the same values as the original (pre-mitigation) ones. You can then adjust them to show the reduced probability and/or impact after mitigation actions are applied.
Mitigated fields include:
- Mitigated Probability Distribution: The probability distribution type after mitigation
- Mitigated Probability (%): The likelihood of the risk occurring after mitigation.
- Mitigated Impact Distribution: The impact distribution type after mitigation.
Run Risk Analysis with Mitigation
Once the Mitigation section is set up, you can go to the main Risk screen to assign risk events to activities (if not assigned already) and run the analysis.
When you click the Run button:
- If mitigation values are set up, a pop-up will appear asking you to choose between:
- Run with mitigation: runs two scenarios (with and without mitigation) and shows both results on the same chart.
- Run without mitigation: runs only the scenario using the original (pre-mitigation) values.
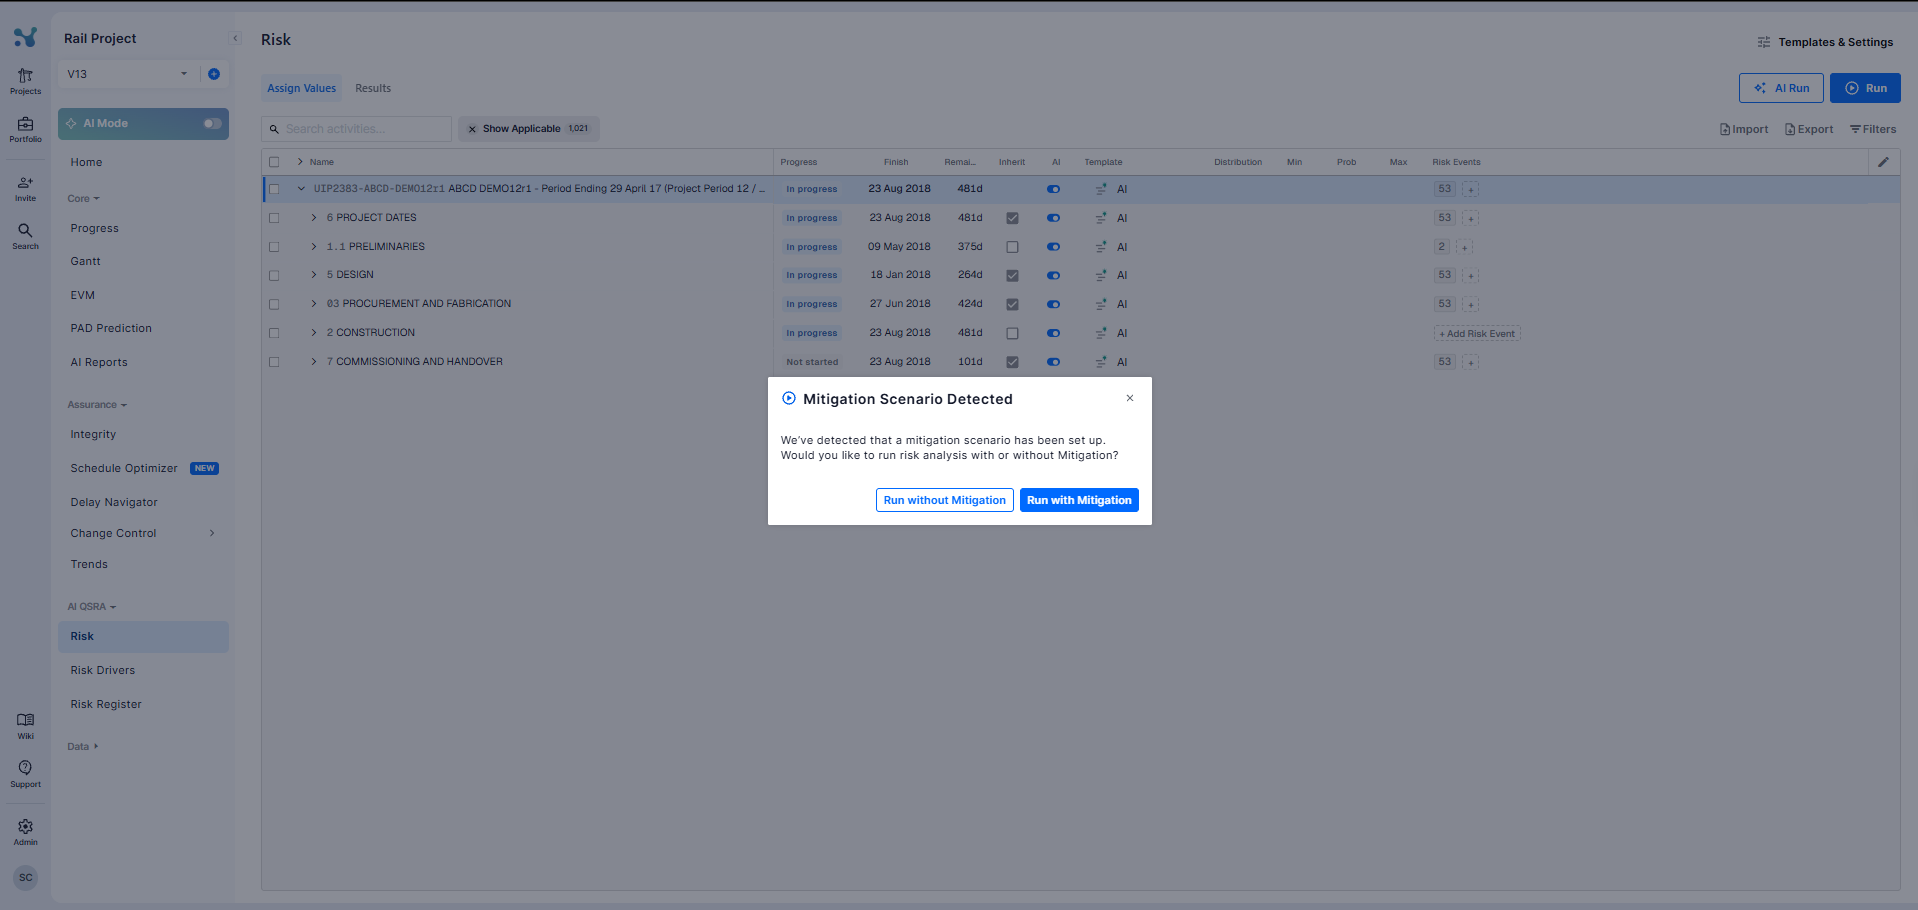
N.B. The mitigation section is filled by default with the pre-mitigation values. If these values are not changed, clicking Run will automatically run a single scenario using the pre-mitigation values, and the option to choose between running with or without mitigation will not appear.