👥 Users and Projects Management System
Here you will learn about
- User role permissions
- Inviting a new user
- Managing your N&L workspace
- Track your N&L usage
- Manage existing users
- Control all your N&L projects
- Control all user invites
- View Events in Your Workspace
1. User role permissions
Your platform role dictates the actions you can do on the platform. We have 3 user roles in the platform
- Admin
- Contributor
- Viewer
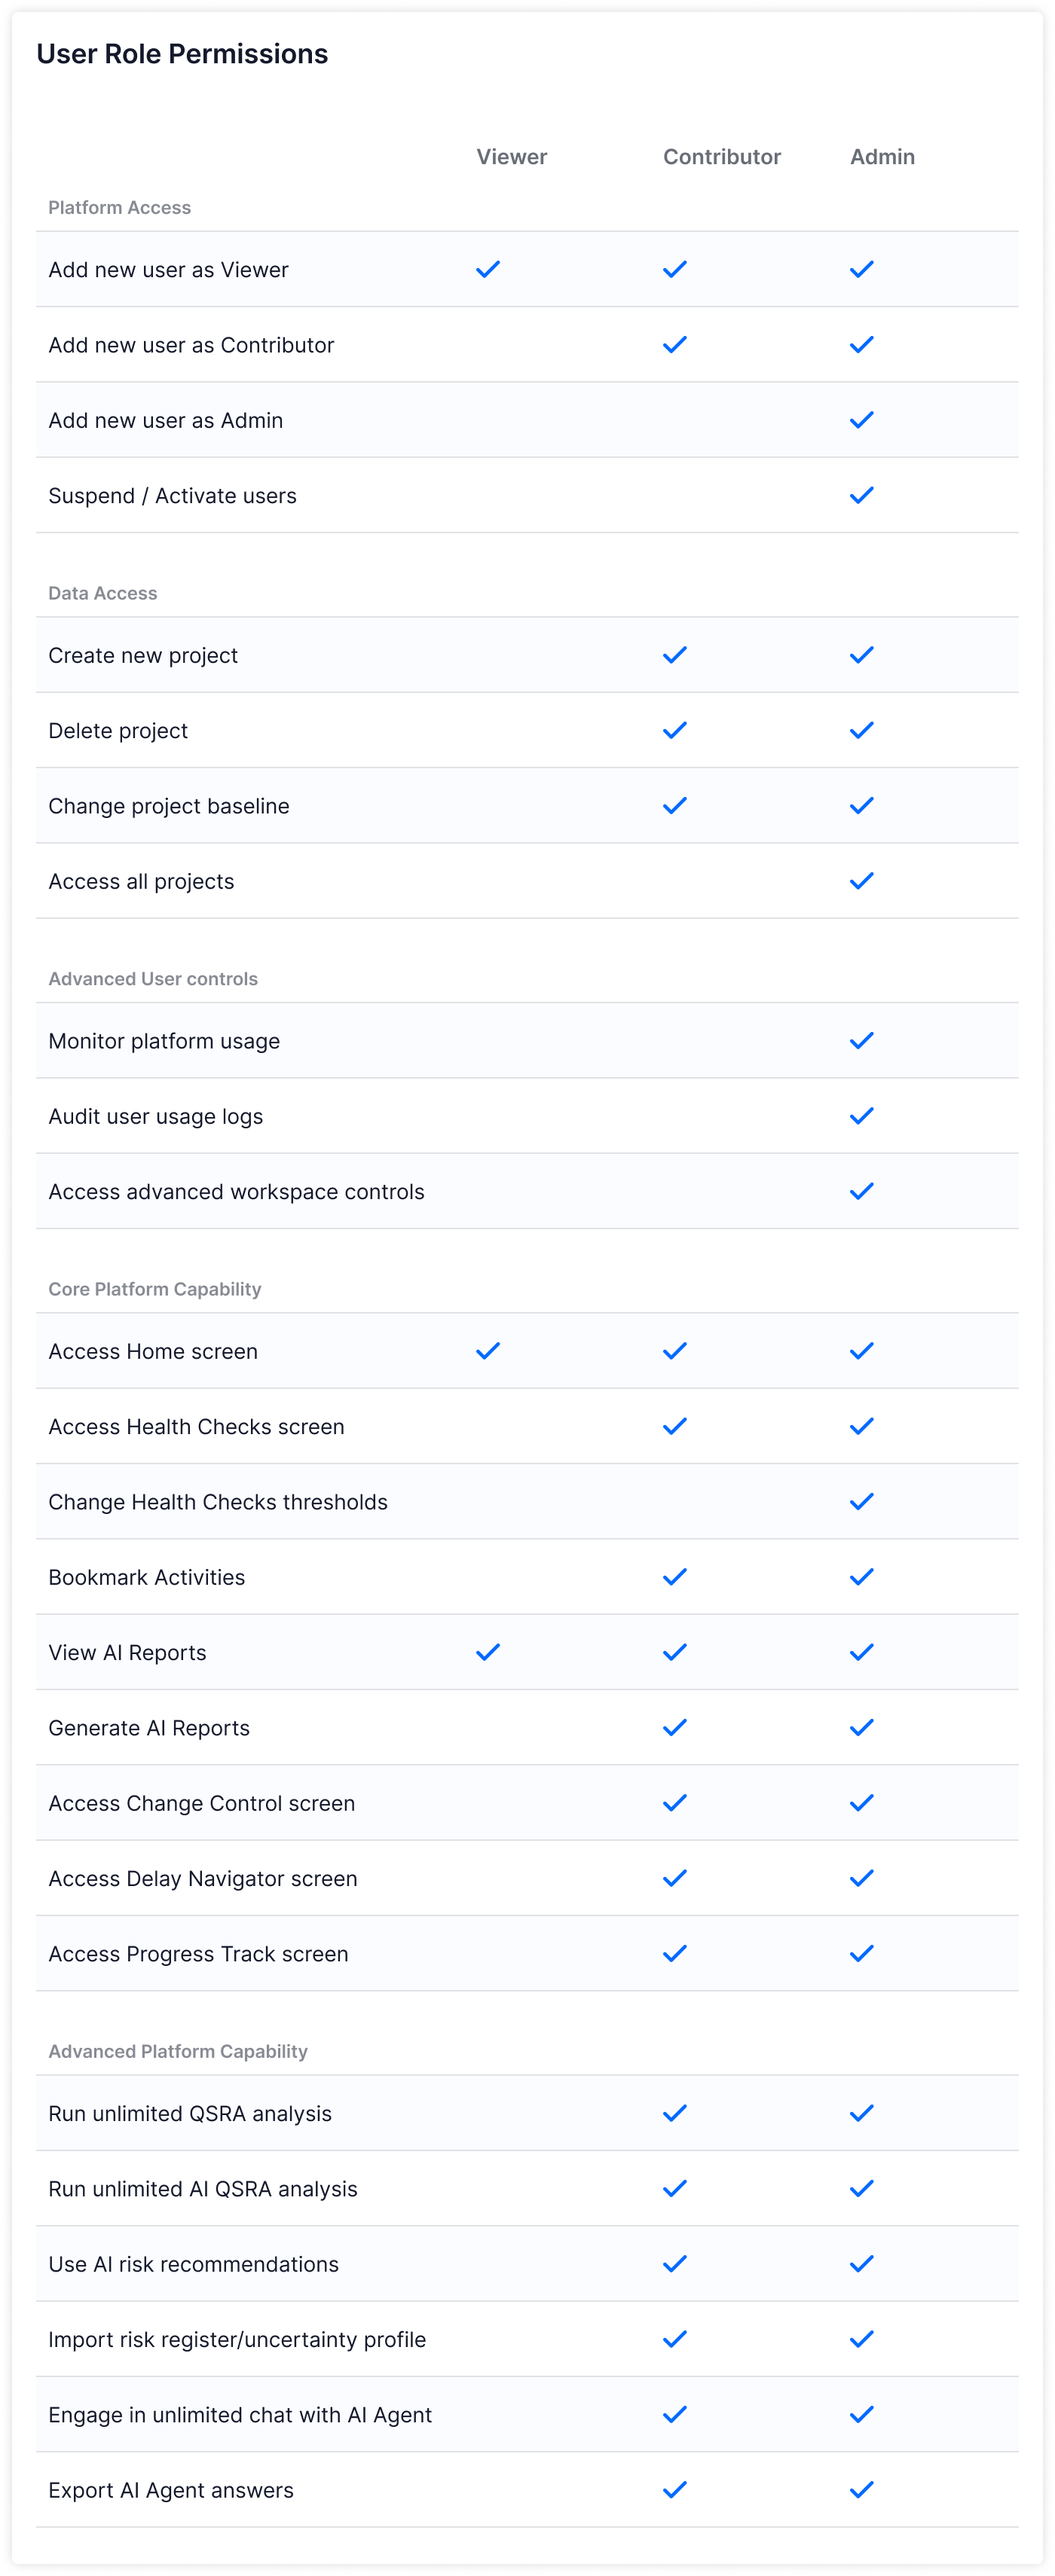
The Viewer is intended for external collaborators, where they can only see the Homescreen of a specific project, and cannot use any major platform capability, incl. creating a new project and uploading new data.
Contributor is the core role with full access, but limited Workspace actions.
In addition to all the actions that the Contributor can do, the Admin can also enforce Workspace-wide configurations like specifying all Schedule Health Check thresholds.
The Admin can see all N&L projects, whilst Contributors and Viewers can only see N&L Projects that they have been invited to.
Here is a detailed list of the differences of each role
2. Inviting a new user
Inviting users is straightforward, simply Click to enter the project you want to invite a user to, and click on the "Add to a project" button in the bottom left corner. You can invite one or many users at the same time, by simply adding their email addresses and assigning roles to them. Note that:
- Viewers can only invite a new user as a Viewer
- Contributors can invite a new user as a Viewer or Contributor
- Administrators can invite a new user as a Viewer, Contributor, or Admin
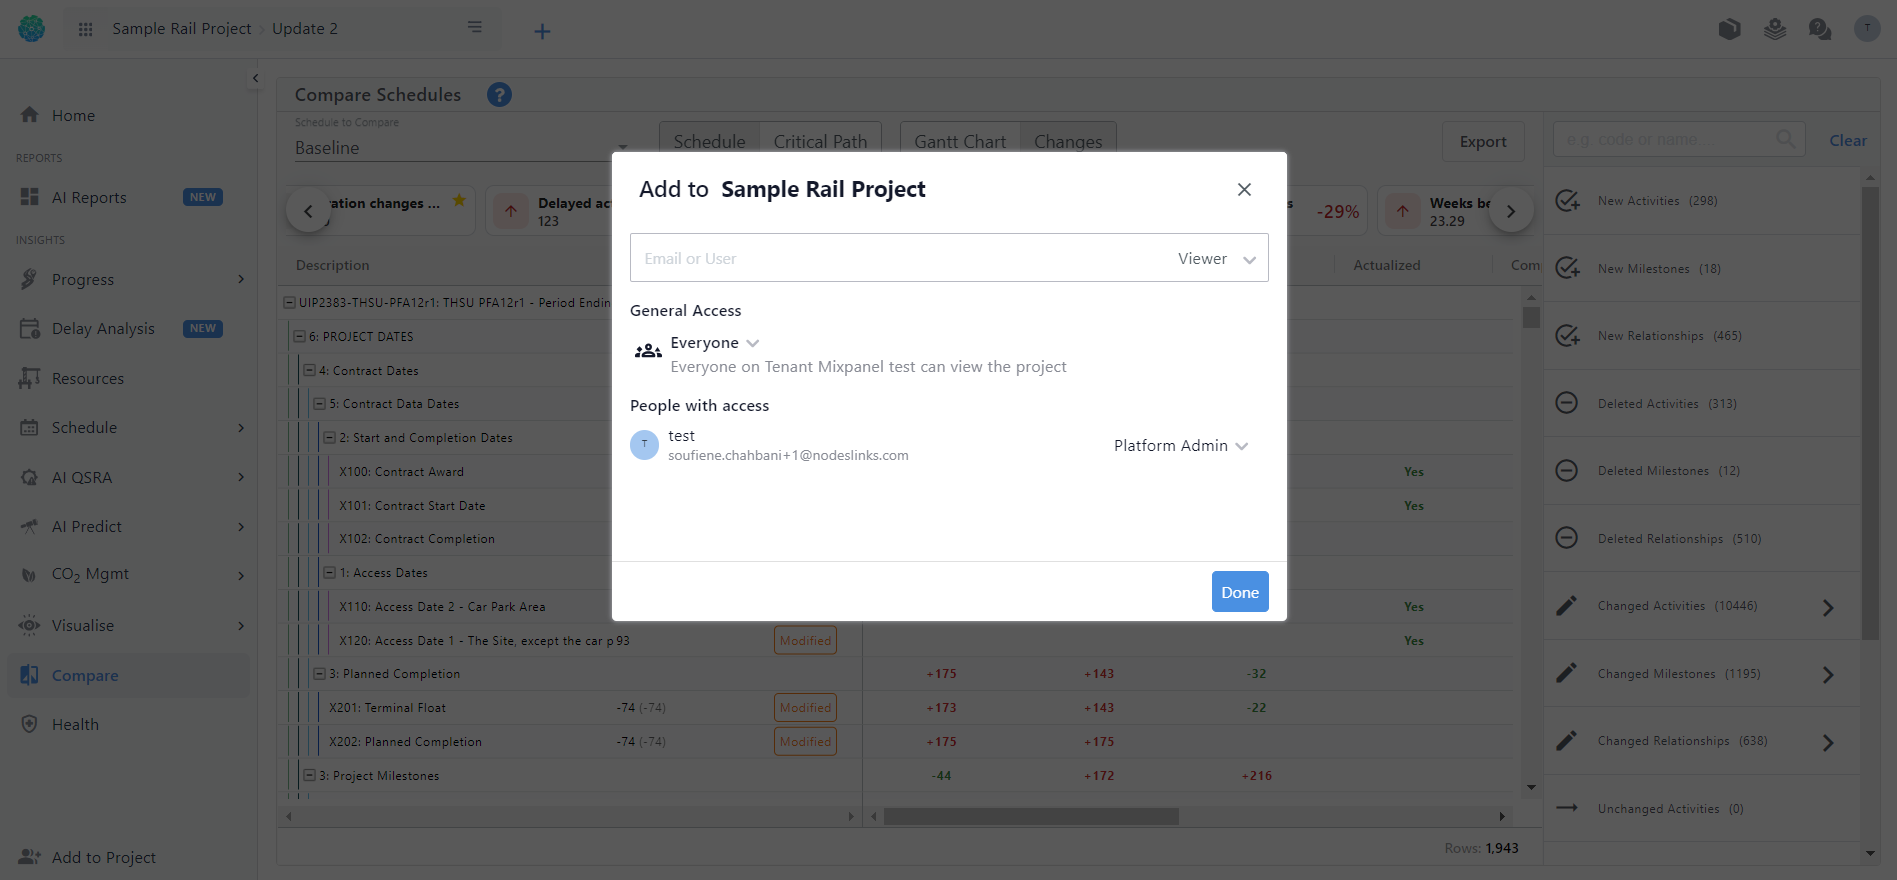
Note that to be able to invite someone on the platform, you need to invite them to at least one project already created on the platform.
If you want to invite someone to showcase the platform, but don't want to invite them to one of your projects, you can invite them to the generic Demo Rail Project - in that way, they can experience the full power of the platform without you sharing data with them that you don't want to.
3. Managing your N&L Workspace
What you see in the platform belongs to your own dedicated N&L workspace.
Admins can control and monitor certain aspects of the platform such as tracking overall platform adoption, monitoring user permissions, and if needed, controlling both existing user roles and pending invites.
You can control all of this through the Admin tool - if you are an Admin, you will see this Admin tool icon at the top right of your screen 

A. Track your N&L usage
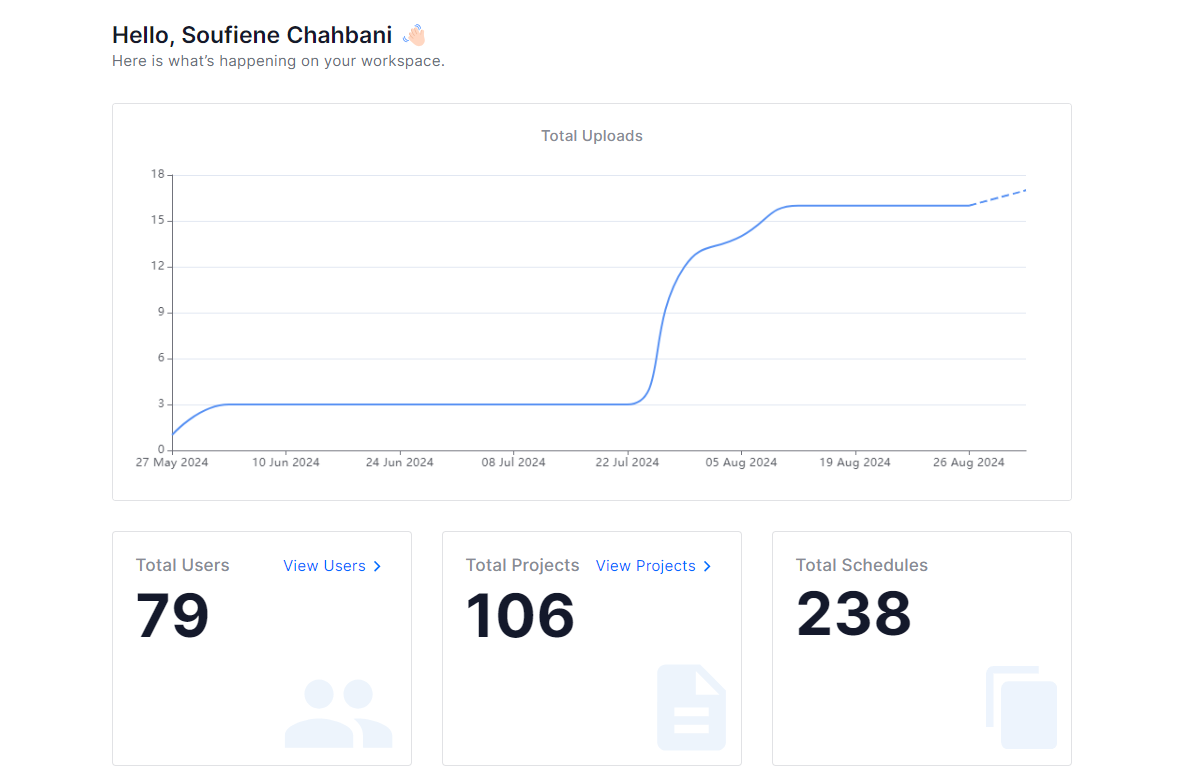
You can drive adoption of N&L by knowing how much your team is already using it - by clicking on the Overview screen you will an interactive chart that shows how many files are being adopted over time. The more files, the higher the adoption!
You can also see a number of additional adoption metrics, including the number of total users and the number of both projects and schedules currently being analysed on the platform.
B. Manage existing users
You can see all the users that have access to your N&L workspace by clicking on "Users" in the left navigation bar.
Each row is a user, and for each user, you can see useful information including
- Platform Role
- Last Login
- Projects they are part of
- MFA (On/Off)
- SSO (On/Off)
- Account Status (Active/Suspended)
You can use the search bar to search for a specific user, along with being able to filter and/or sort based on the information within any given column.
You can also export the information for your record - click the "Export" button on the Top right of the screen and you will receive a copy of the information shown on your screen.
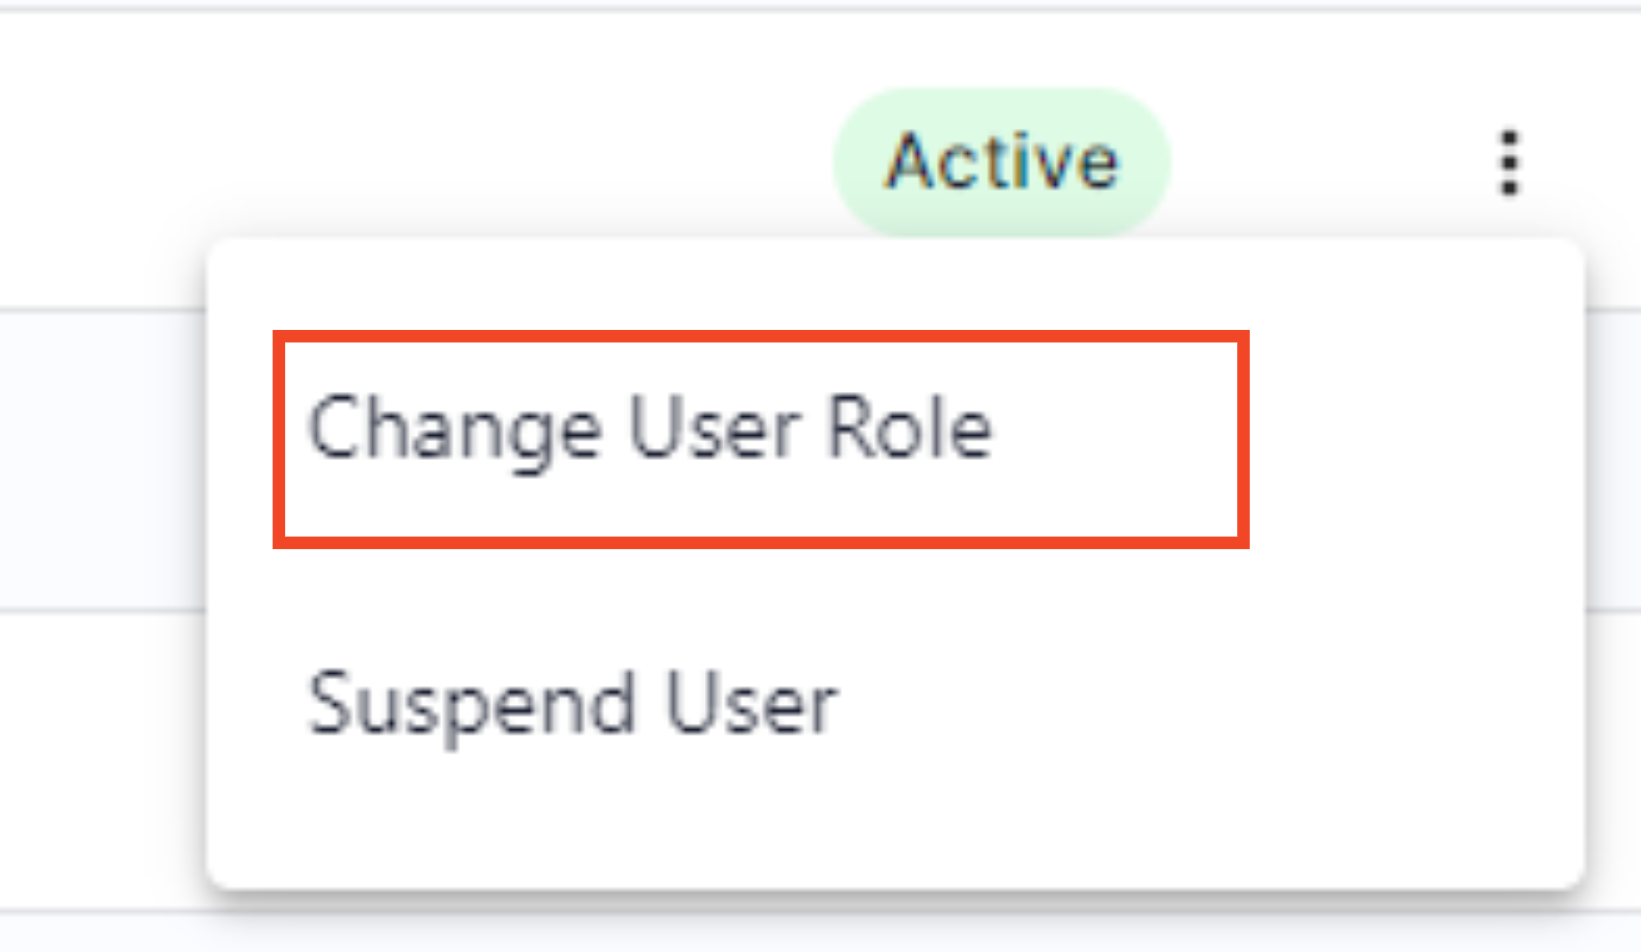
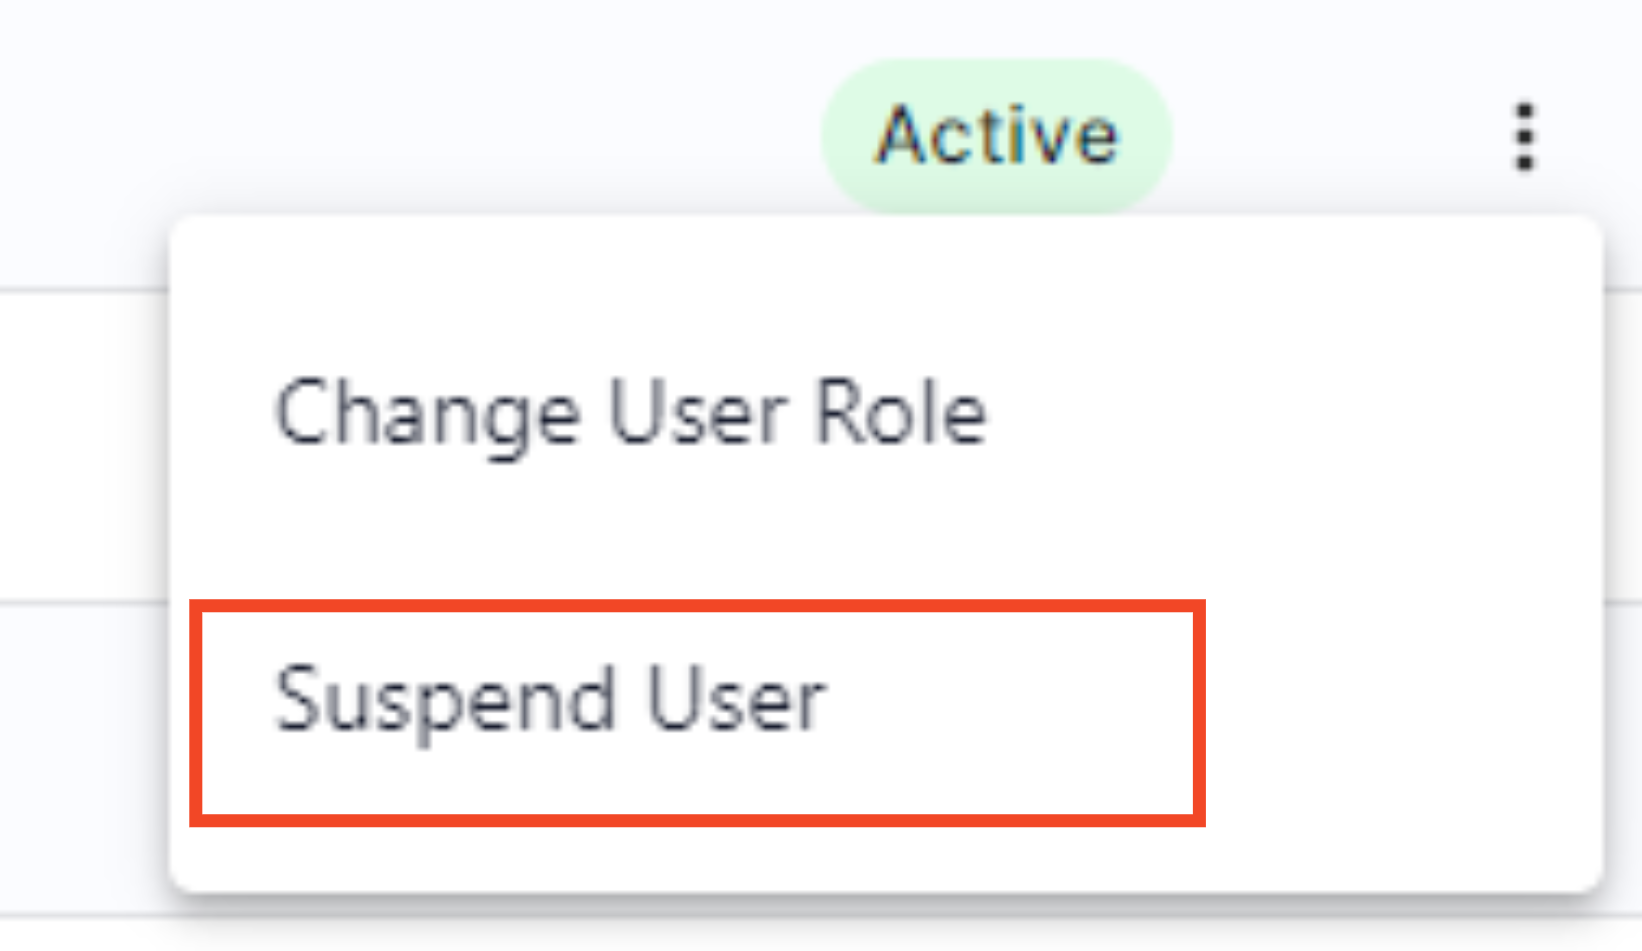
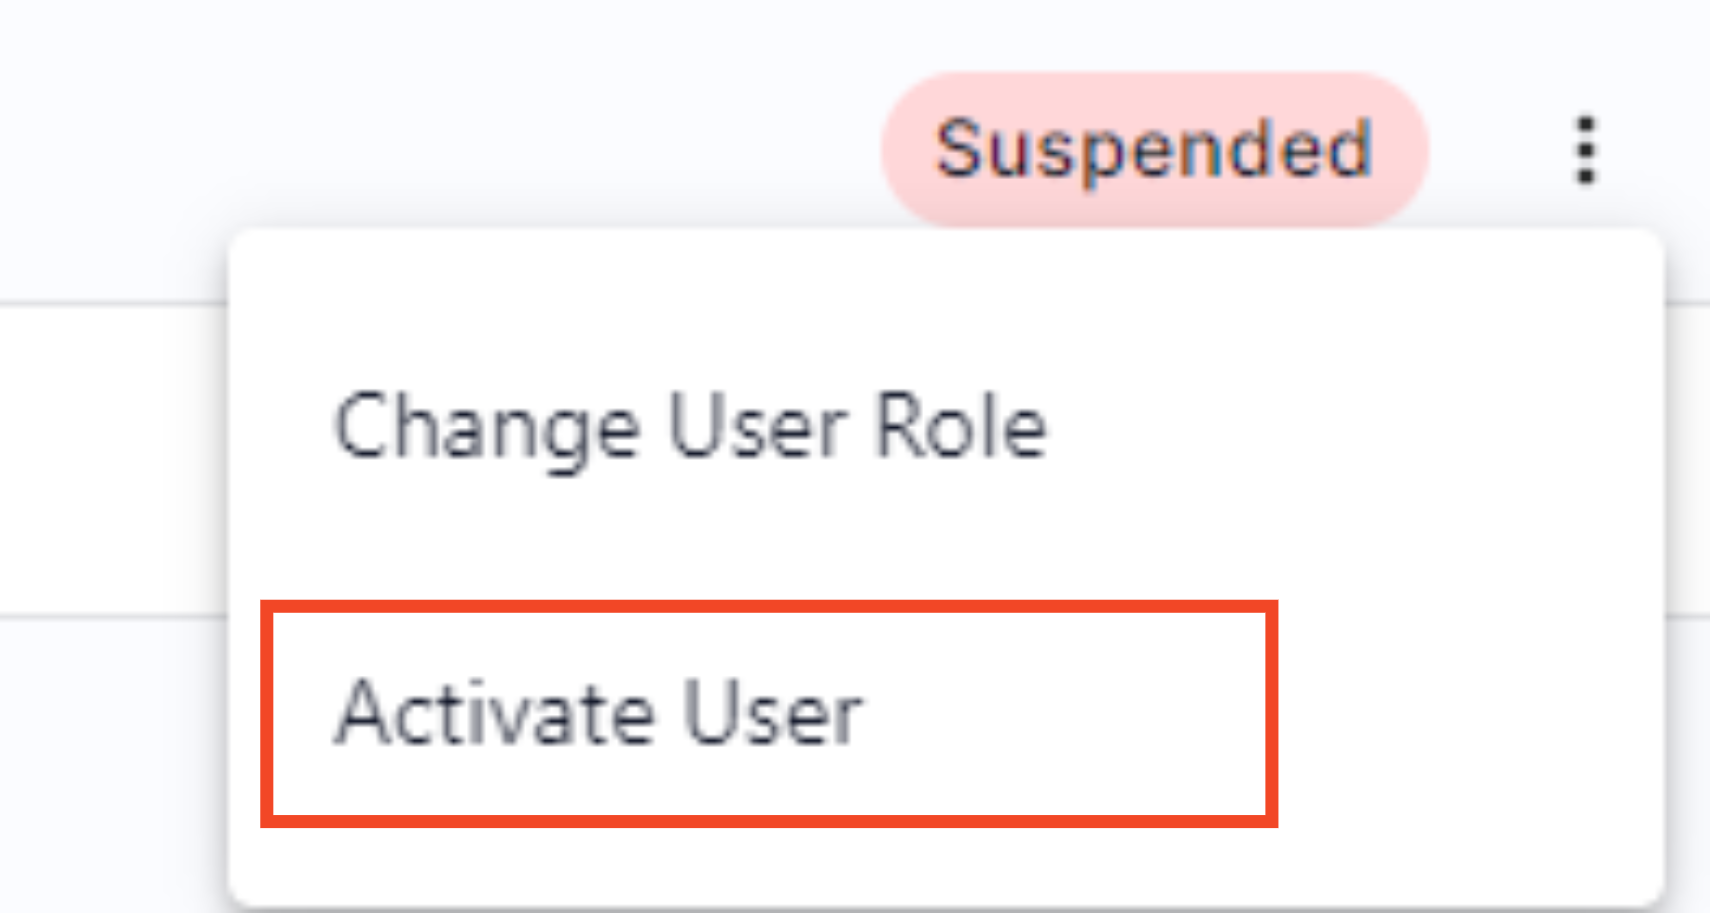
The Admin Tool also enables you to Change the platform role of a user, along with Suspend or Activate a user.
To Change a user role:
- Locate the user whose role you wish to change.
- Click on the three dots next to the Status column.
- Select "Change User Role" from the options.
- Select the new role from the drop-down and click Done.
To Suspend/ Activate the user:
- Locate the user you wish to suspend.
- Click on the three dots next to the Status column.
- Select "Suspend User" or "Activate User" from the options.
- Confirm the suspension/activation when prompted.
C. Control all your N&L projects
You can see all the projects uploaded to your N&L workspace by clicking on "Projects" in the left navigation bar.
Each row is a project, and for each project, you can see useful information including
- Project Name
- Date it was first created on the Platform
- The Project Owner i.e., the user who created the project first
- Date the project was last viewed
- Who viewed it last time
- The last schedule upload for that project
- Who did that last upload
- The users who have access to that project
- The total number of schedule versions within that project
You can also export all the information for your records by using the "Export" button on the top right. You can use the search bar to search for a specific project, along with being able to filter and/or sort based on the information within any given column.
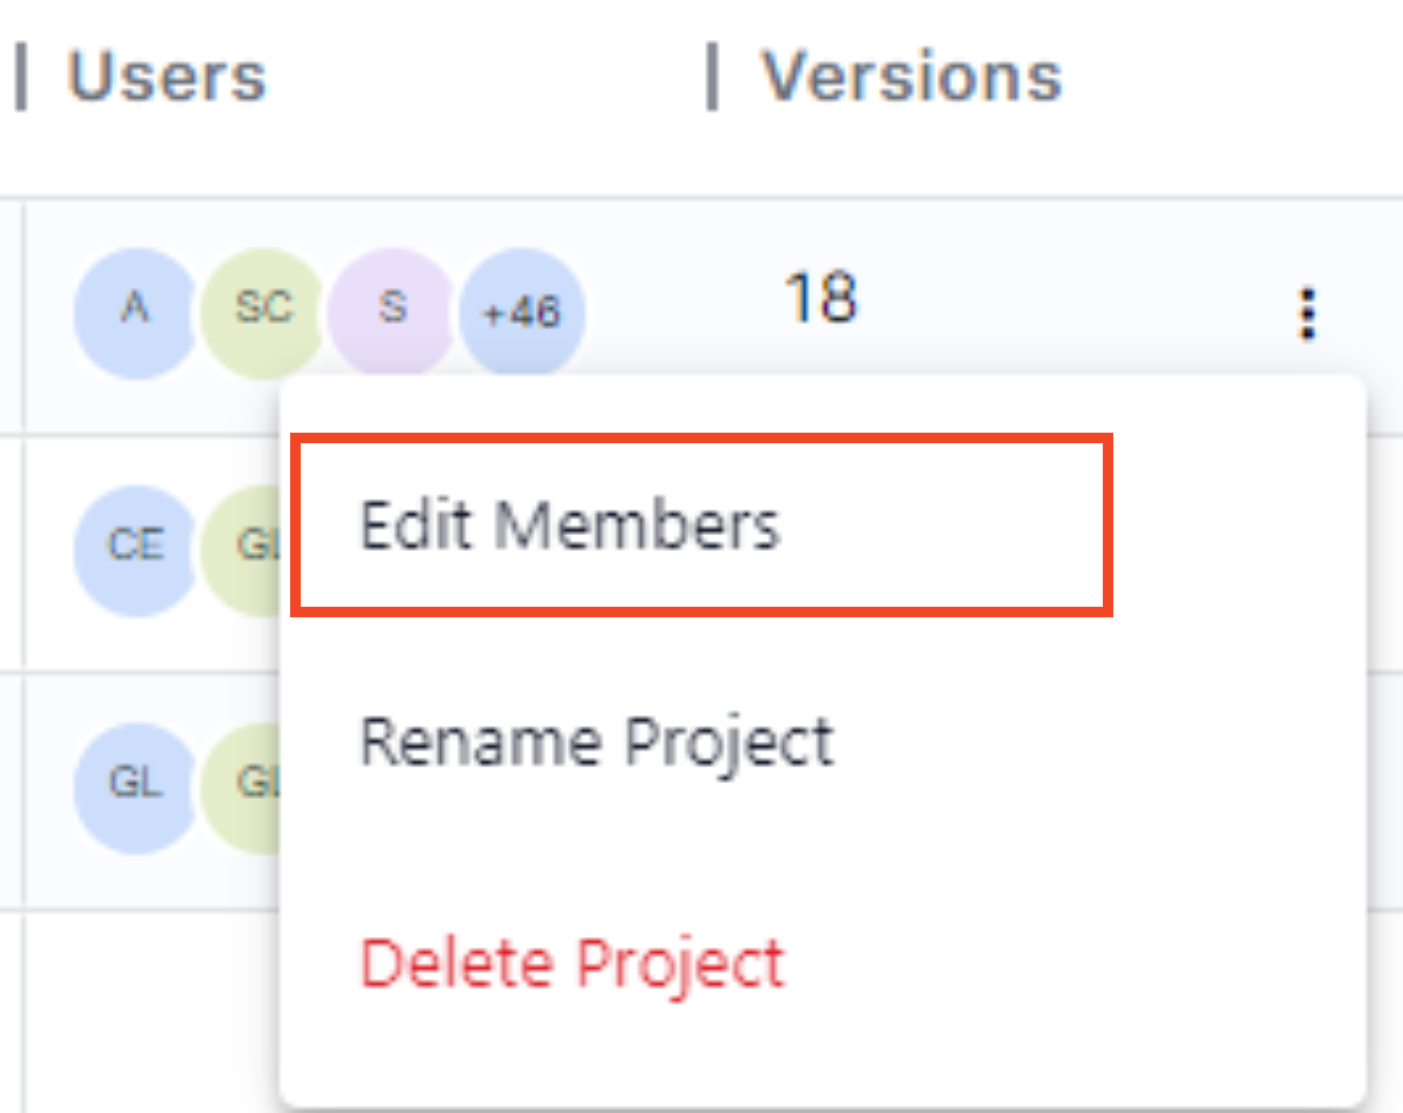
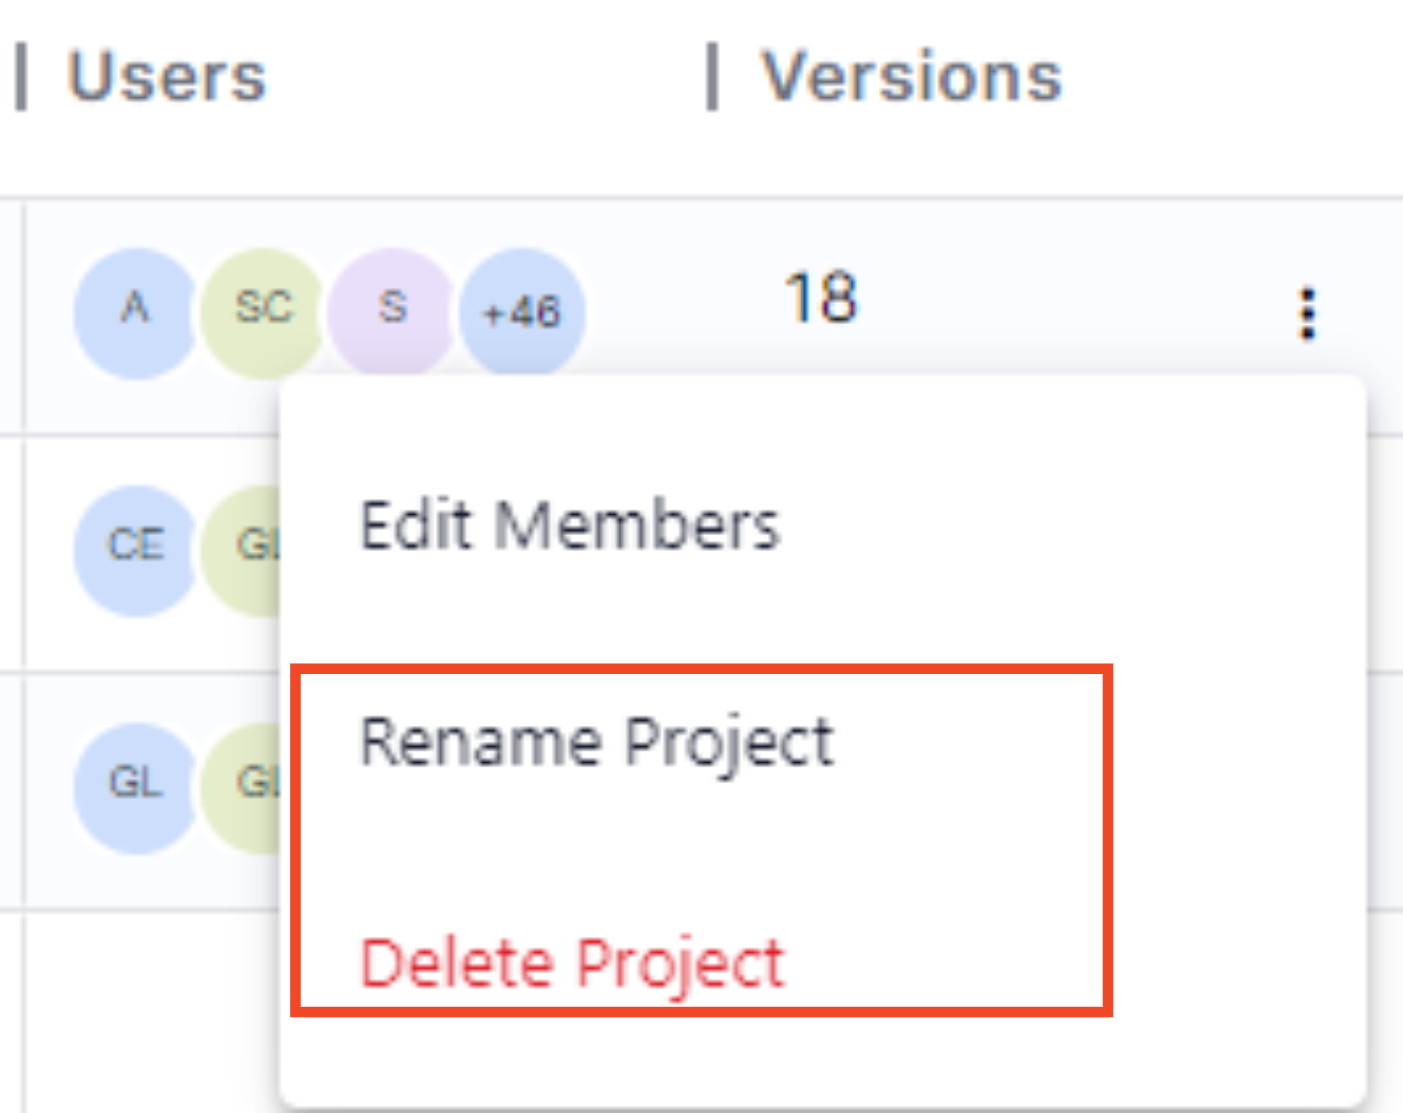
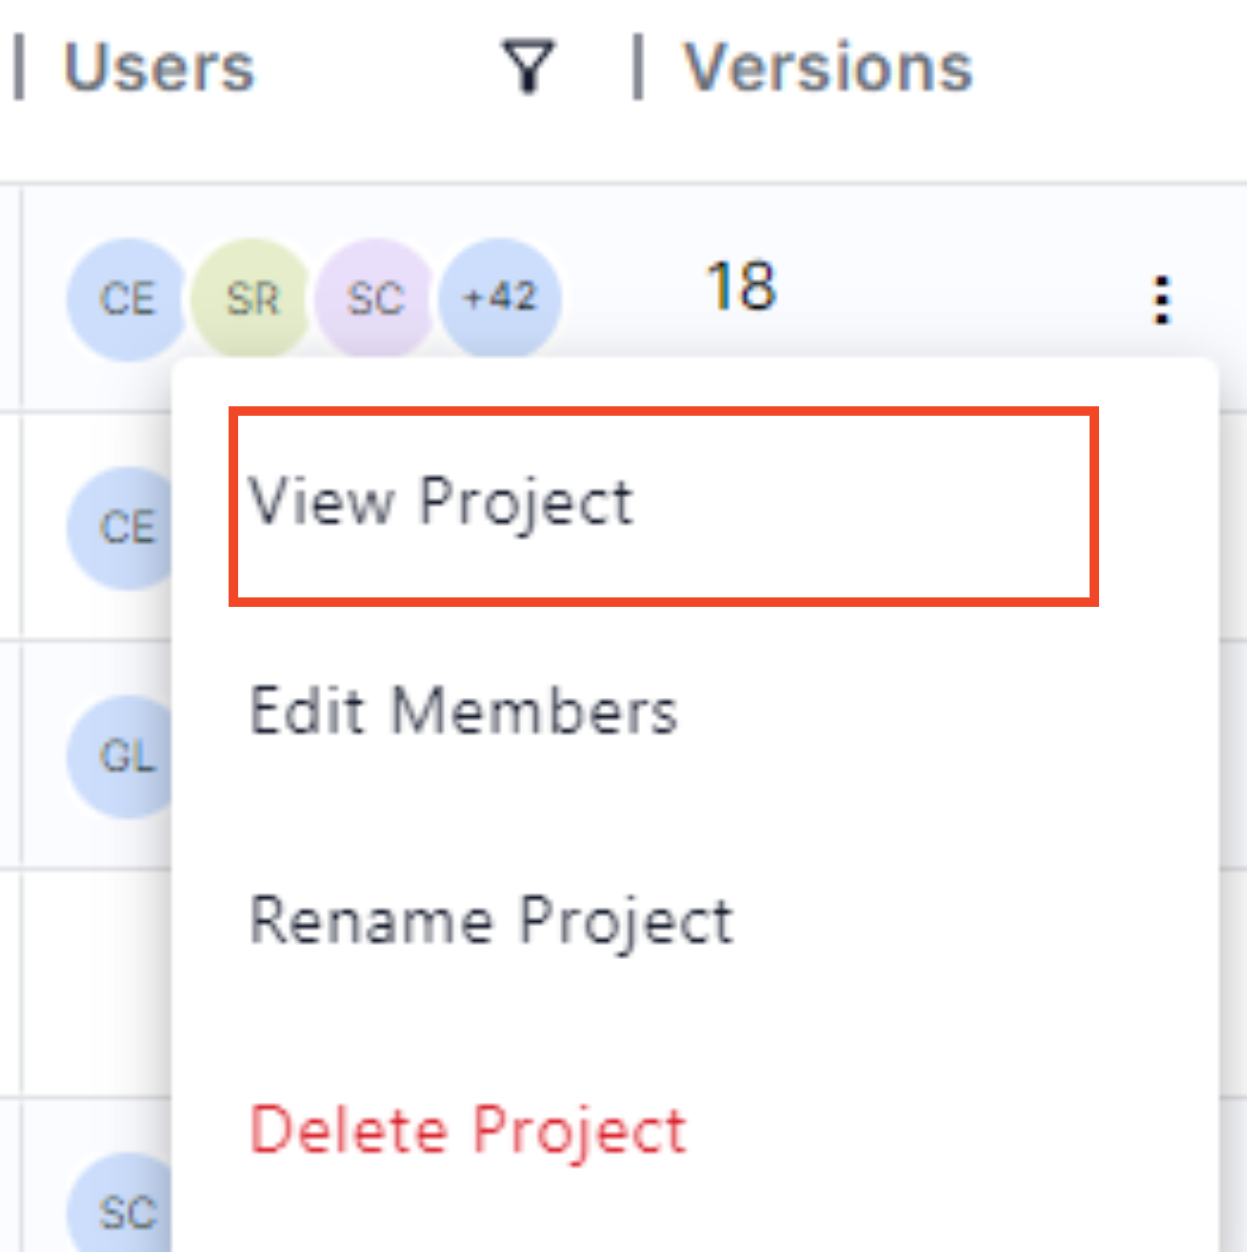
You can add or remove a user within a project, along with controlling the actions they can do by changing their platform role. You can also delete or rename any project.
To Edit project members:
- Locate the project for which you wish to edit members.
- Click on the three dots next to the Versions column.
- Select "Edit Project Members" from the options.
- Add or remove users using the invite pop-up.
- Click on Update.
To Delete or Rename a project:
- Locate the project you wish to delete or rename.
- Click on the three dots next to the Versions column.
- Select "Delete Project" or "Rename Project" from the options.
- Confirm the deletion or enter the new project name and save the changes.
To Access a project:
- Locate the project you wish to access
- Click on the three dots next to the Versions column.
- Select "View Project"
Defining how the critical path is calculated
To configure how the critical path is determined across your workspace, click Configure in the top-right corner of the Projects table. In the configuration panel, you’ll find a Critical Path Mode dropdown. This is a workspace-wide setting that applies to all projects in the account.
You can choose between:
- Float-based – The critical path is calculated using activity float values.
- Longest Path (from .xer) – The critical path is taken directly from the longest path as defined in the uploaded
.xerschedule file (e.g., from Primavera).
🧠 This setting affects how the project’s critical path is displayed across the platform — including in Timelines, Paths, and Reports.
D. Control all user invites
You can see all the pending invites already sent by clicking on "Invites" in the left navigation bar.
Each row is an invite that has already been sent out, and you can use this as an audit log to see who invited who, when, and to which project.
For each invite, you can see useful information including
- The email of the user invited
- Platform role the user was invited with
- Who invited the user
- Project to which the user was invited to
- Date the invite was sent
- The status of the invite (Joined/Pending).
You can also remind all pending invites with a single button on the top right of the screen, along with exporting the information for further review. As with the rest of the screens, you can use the search bar to search for an email, along with being able to filter and/or sort based on the information within any given column.
To Remind all pending invitees:
Simply click the "Remind All Pending" button at the top right of the table and confirm.

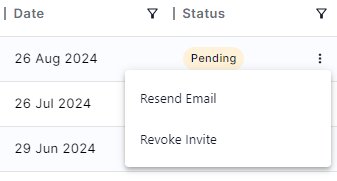
To Resend or Revoke an invitation:
- Locate the invite you wish to manage.
- Click on the three dots next to the Status column.
- Select "Resend Invite" or "Revoke Invite" from the options.
- Confirm to complete the action.
E.View Events in Your Workspace
You can view all the events in your workspace by selecting "Events" from the left navigation bar. Each row in the Events screen represents an event, providing the following details:
- Event Name
- The name and email of the user who performed the event
- The Timestamp
- Project and Version associated with the event
You can export the event list for further review. Additionally, the search bar allows you to search by email, event name, project, or user name, and you can filter the data within any column.
