
Setting up Autodesk Forma
Your documents live in Autodesk. Your schedule lives in Nodes & Links. RFIs and Change Orders raised in Forma Build, and the files in Forma Data Management, are exactly the records that move dates — and today nobody scheduling sees them until the movement has already happened.
Connecting Autodesk closes that gap. Once set up, Forma documents land in Nodes & Links automatically, next to the schedule they can impact.

Who this is for
Workspace admins. You set this up once for your whole organisation. Project members then see the documents automatically.
What you'll need:
- Autodesk Account Admin rights on the hub you want to connect
- Admin access to Nodes & Links
- An email address your team controls. It becomes the login for the dedicated Autodesk user that Nodes & Links will run as, so someone must be able to open it and accept the invitation
How Autodesk access works
Autodesk ties access to the user account that connects, not to the organisation. Whoever that user is decides what Nodes & Links can see.
So the setup is: your admin creates a dedicated Autodesk user for Nodes & Links, then gives that user access to exactly the projects and directories you want ingested.
Why this way:
- You stay in control. The dedicated user sees only what your admin grants. Nodes & Links can never surface anything beyond it.
- It's one-time. Set it up once, and the whole workspace benefits.
The invitation to that user goes to an email address. Make sure you can open that mailbox, because someone must accept the invitation and complete the account before the integration works.
Step 1: Invite the dedicated Nodes & Links member in AutodeskForma
One-time, done by an Autodesk Forma Account Admin.
- Sign in to Autodesk Forma as an Account Admin.
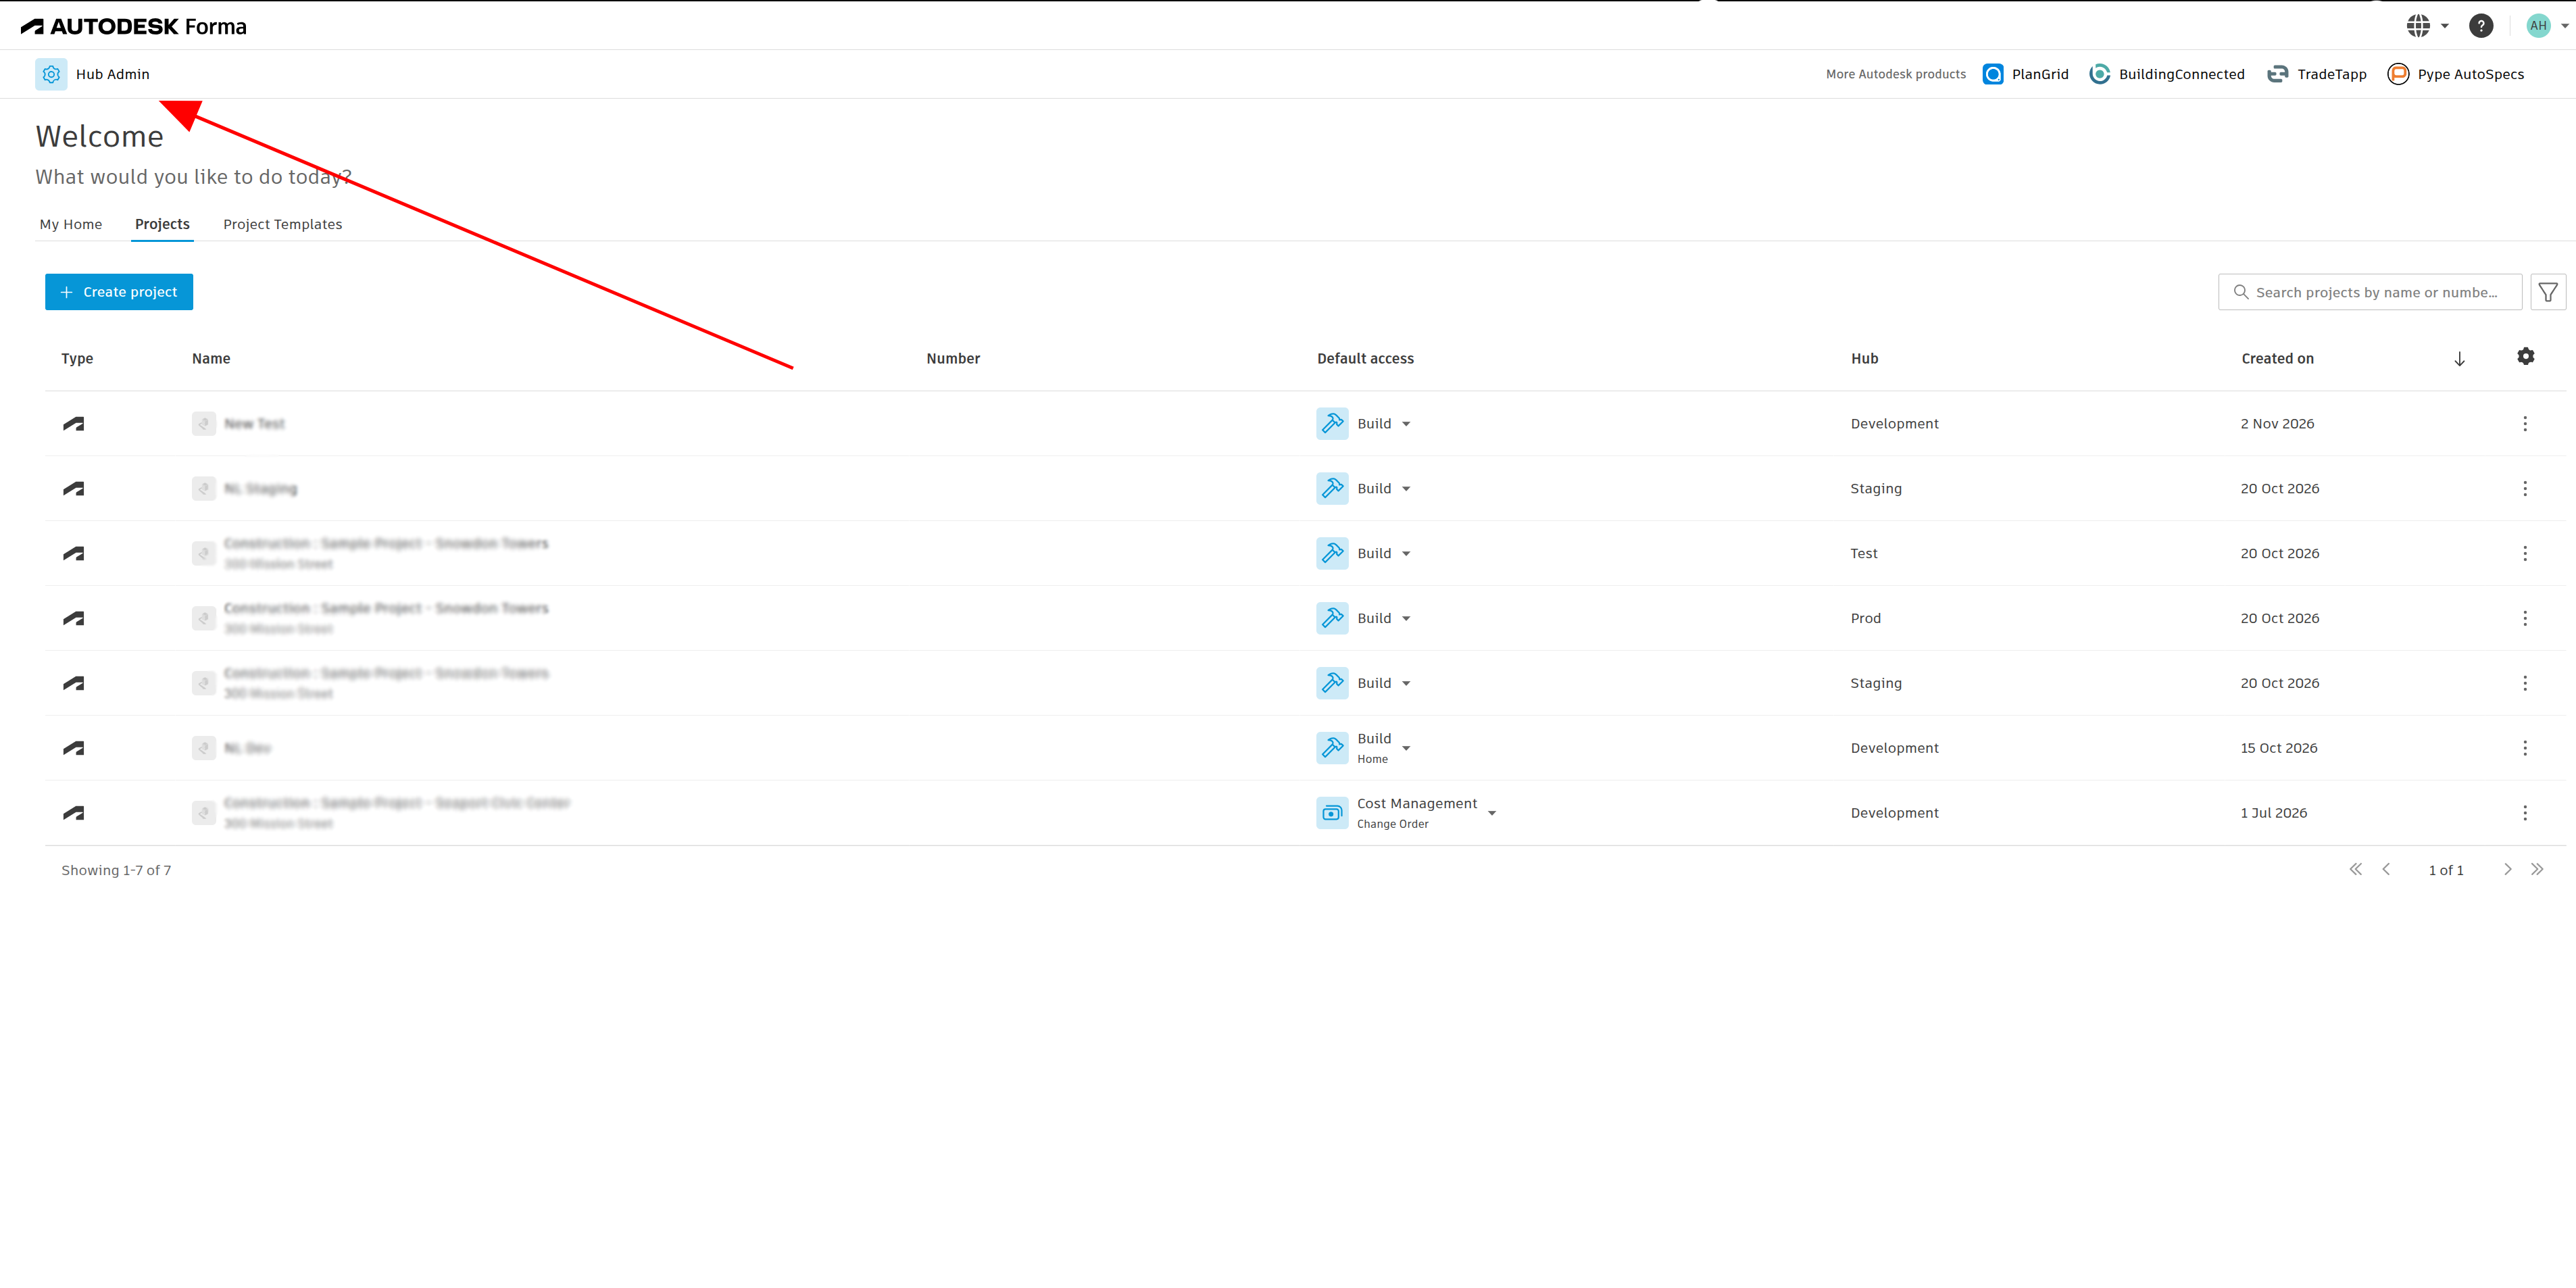
- Click on Hub Admin
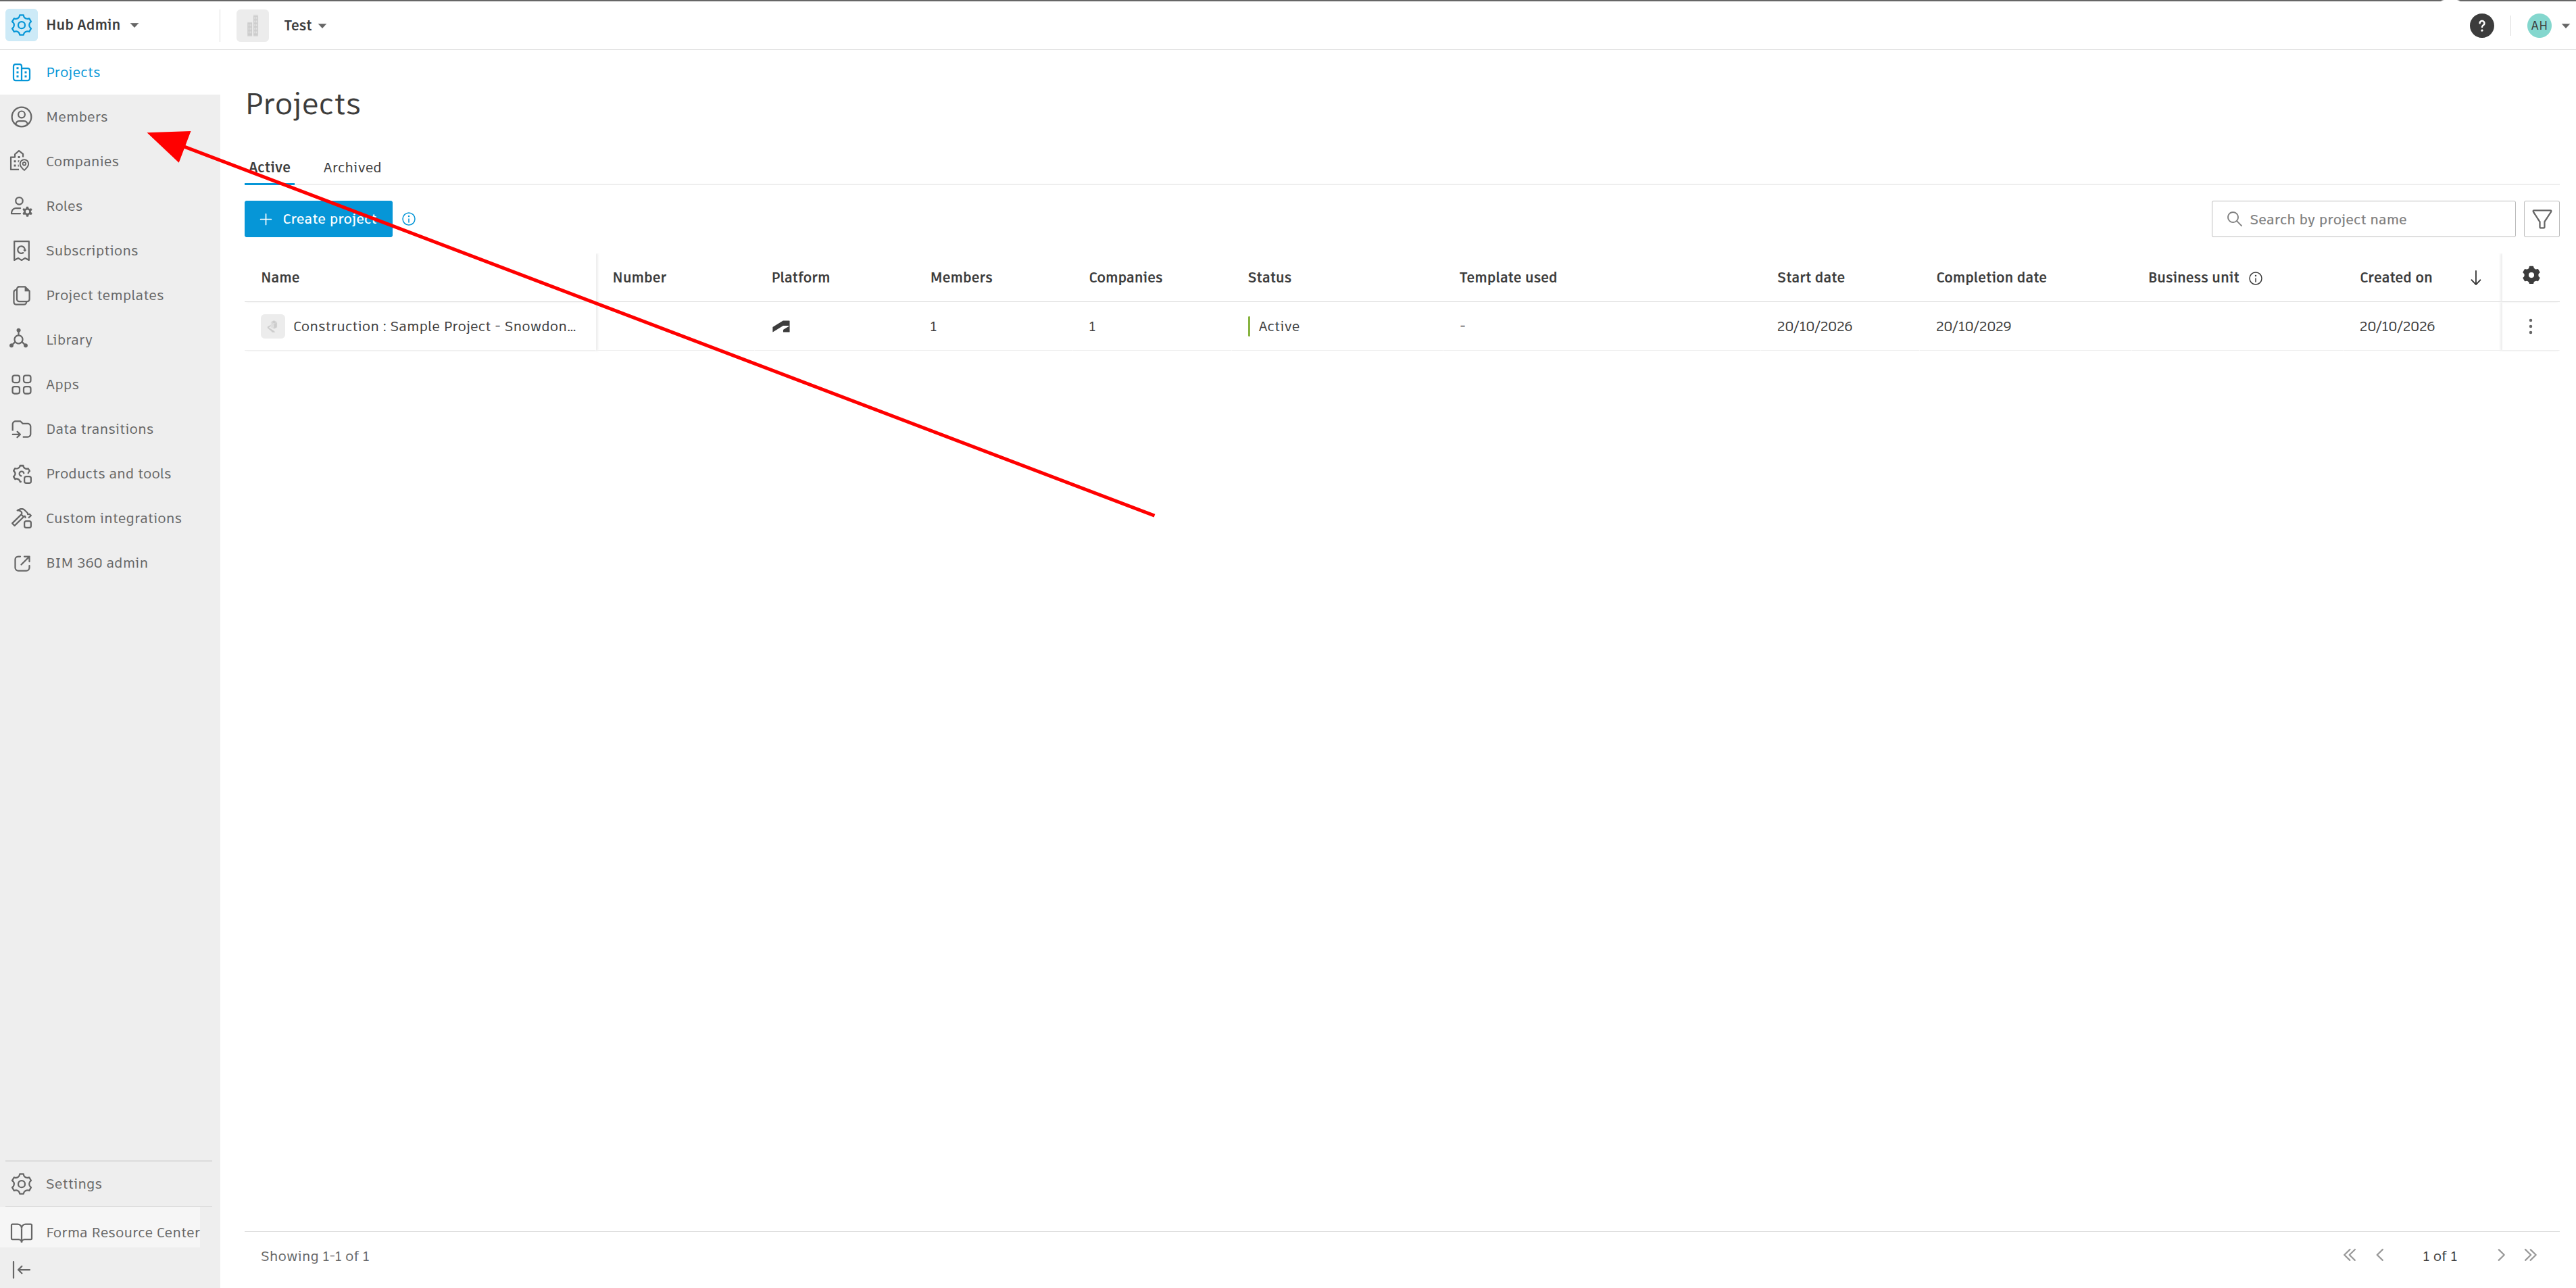
- Click on Members
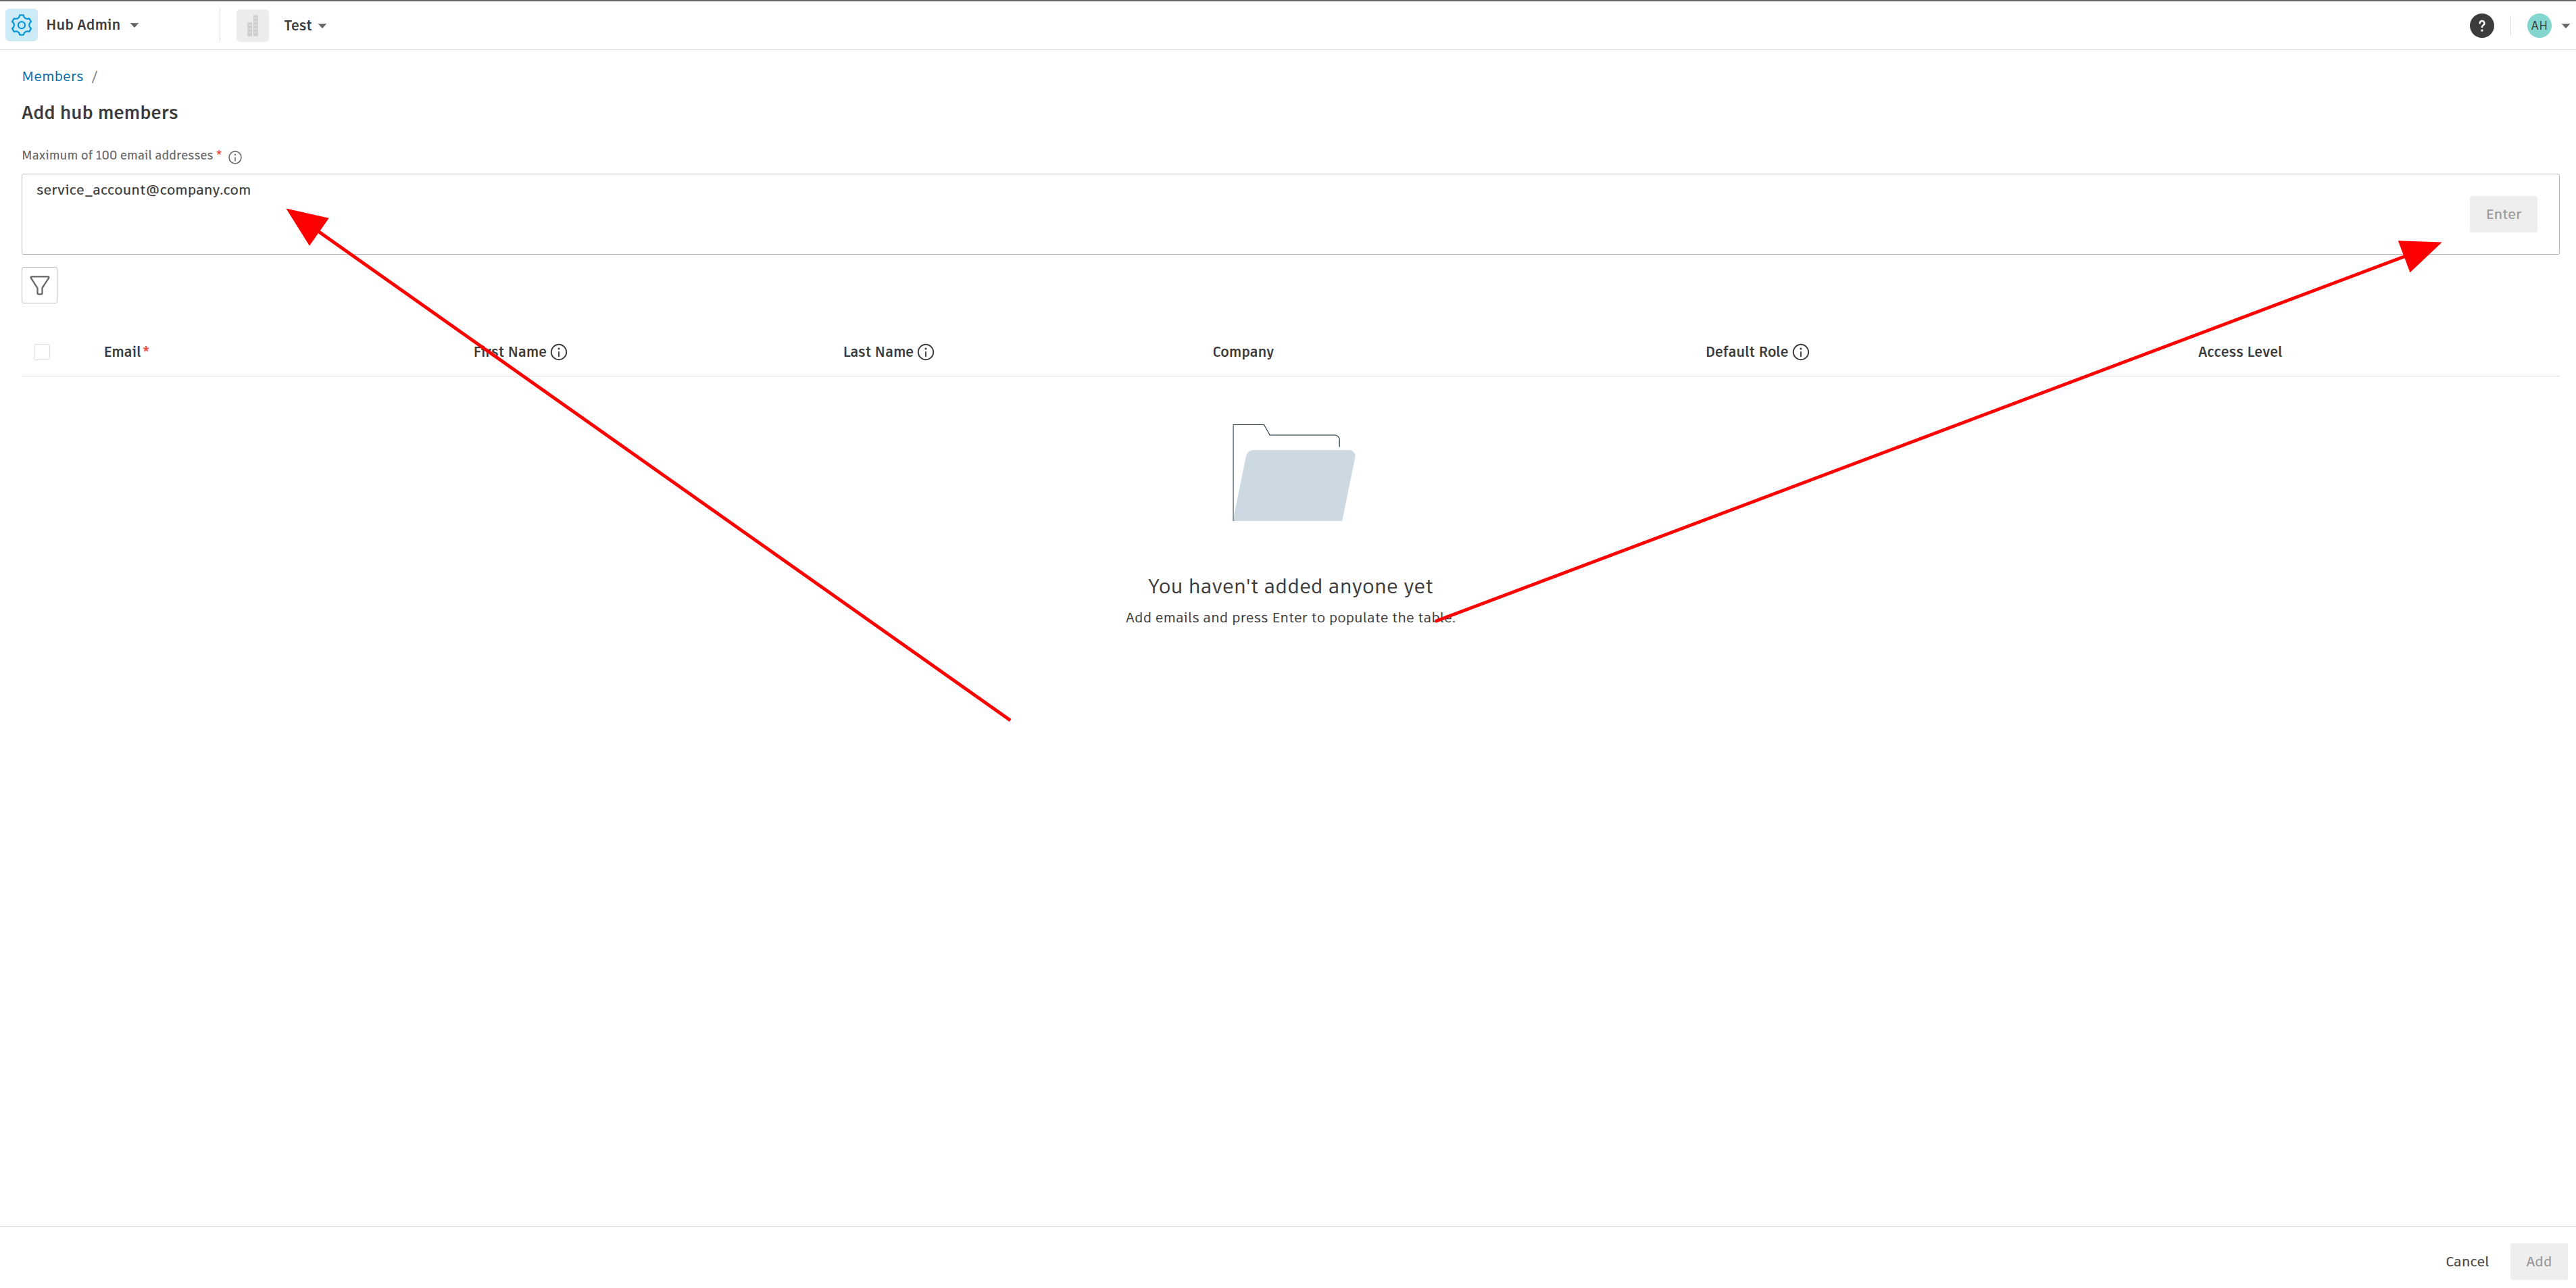
- Invite a new member and use an email address your team controls. Name the member for the integration rather than a person, so it is clear this is not anyone's personal login.
- Open that mailbox, accept the invitation, and complete the account setup.
- Add the new member to the projects you want Nodes & Links to read, with access to the directories in Forma Data Management and to RFIs and Change Orders in Forma Build.
💡 The integration reads only the records your admin grants, and only while the integration stays installed.
Step 2: Authorise Nodes & Links in Autodesk Forma
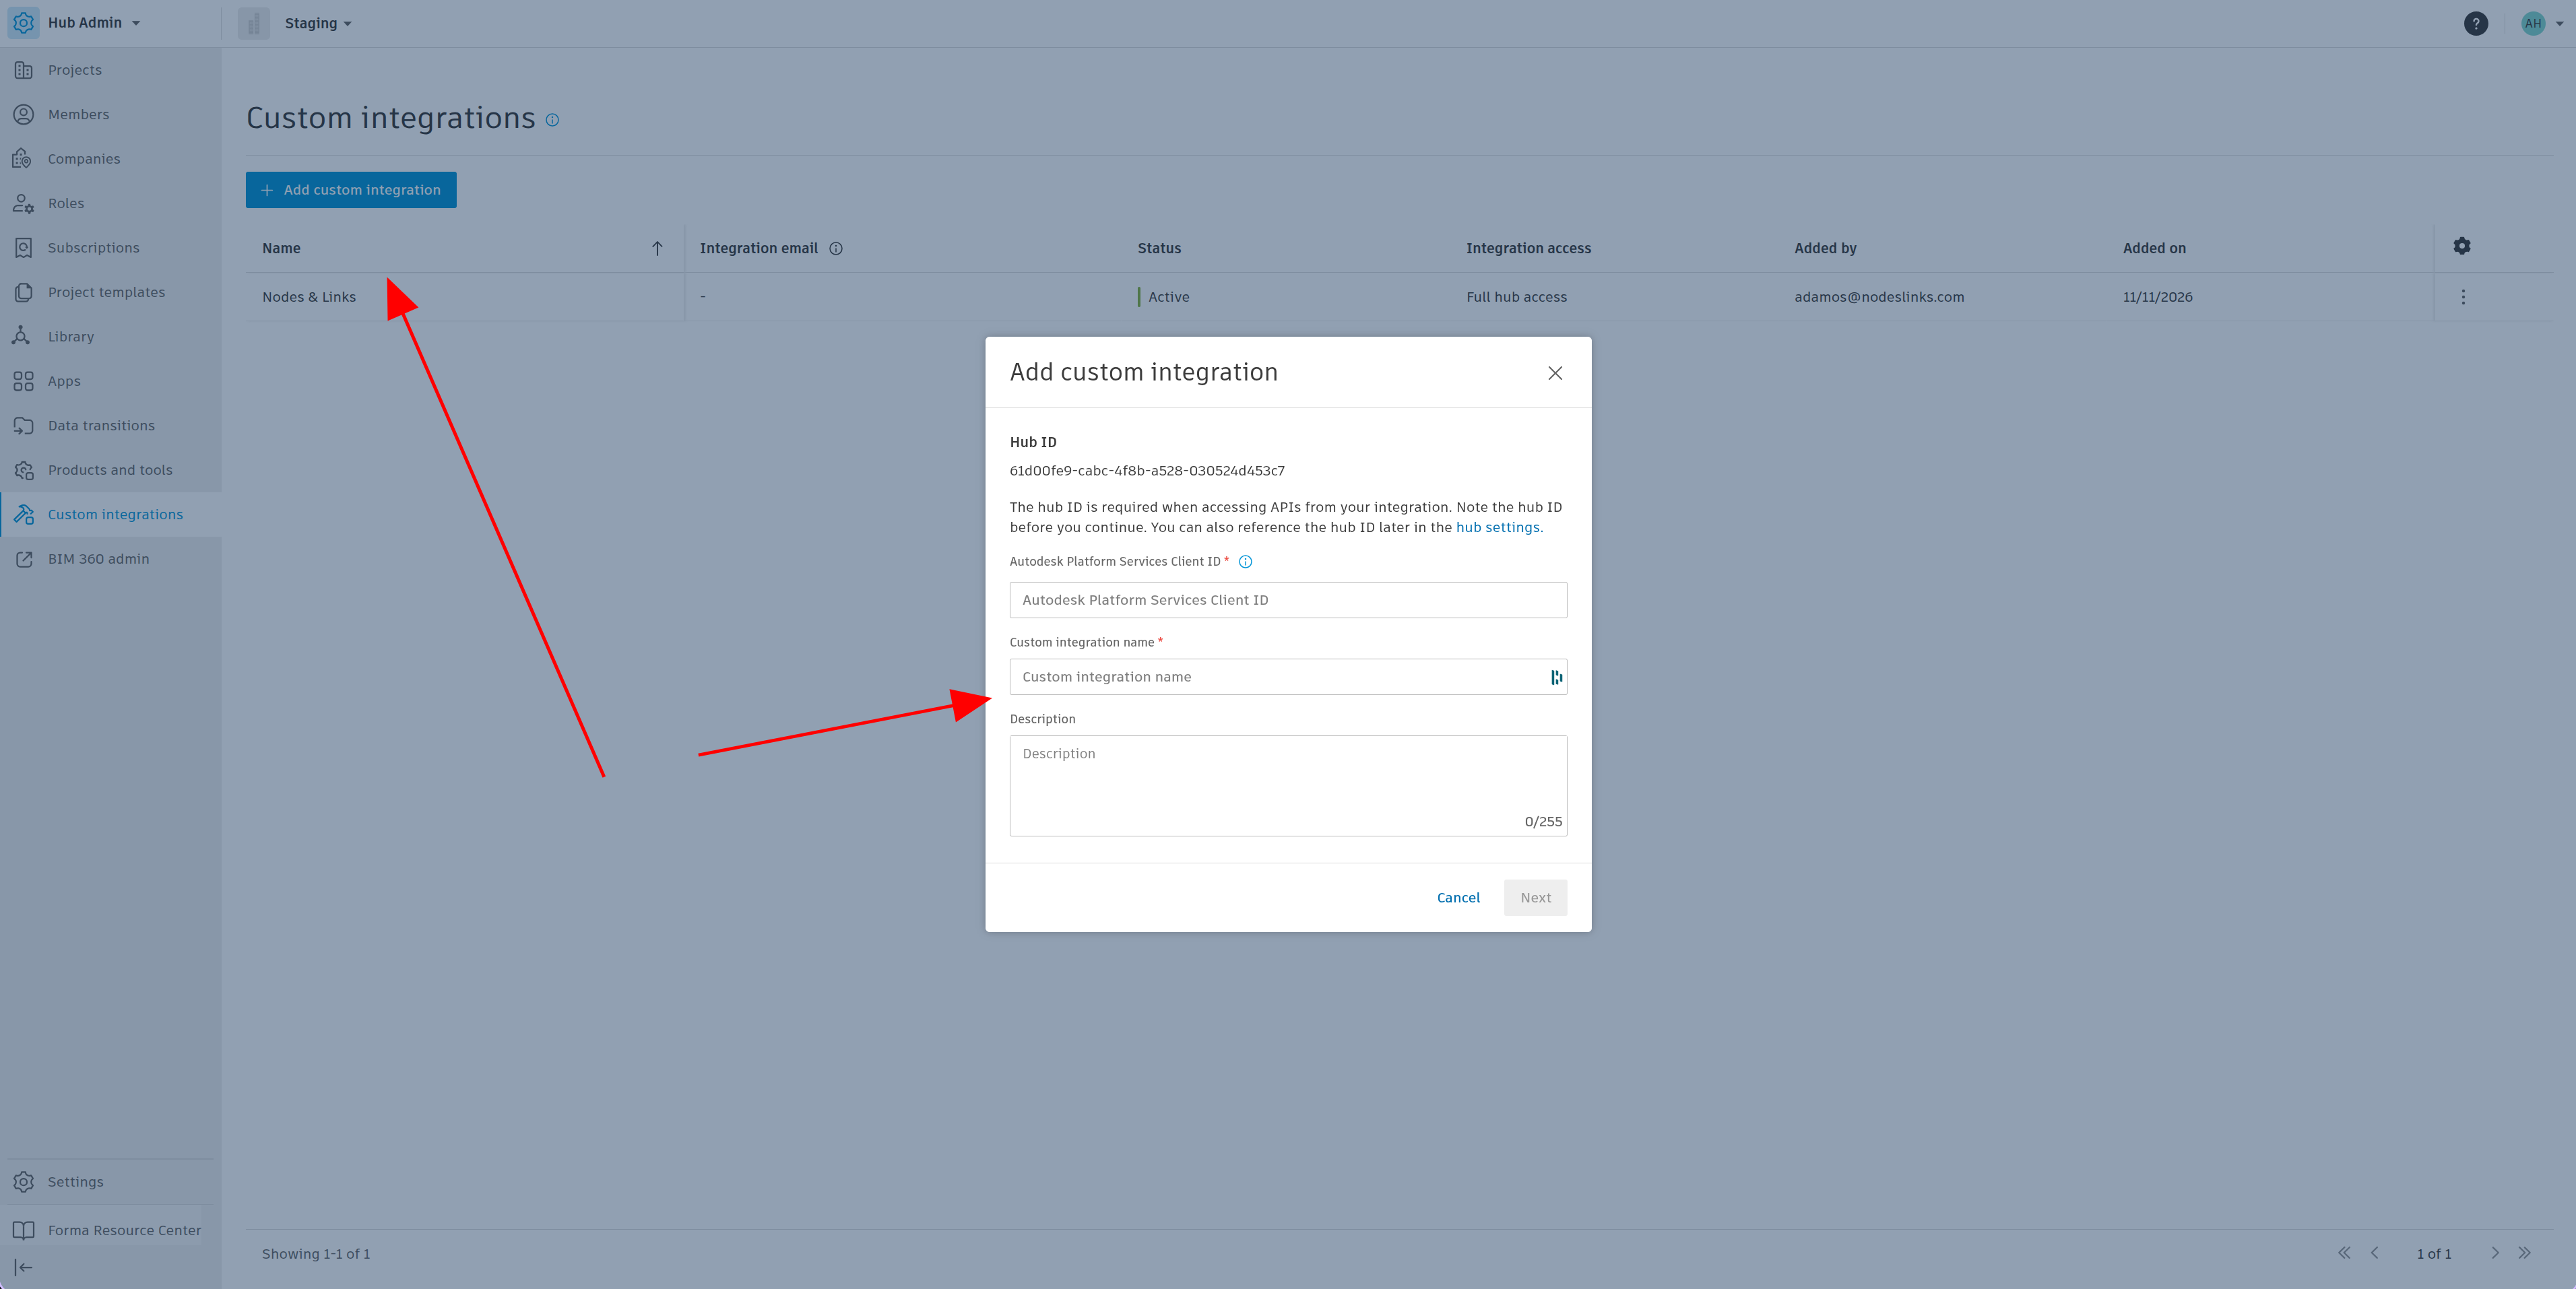
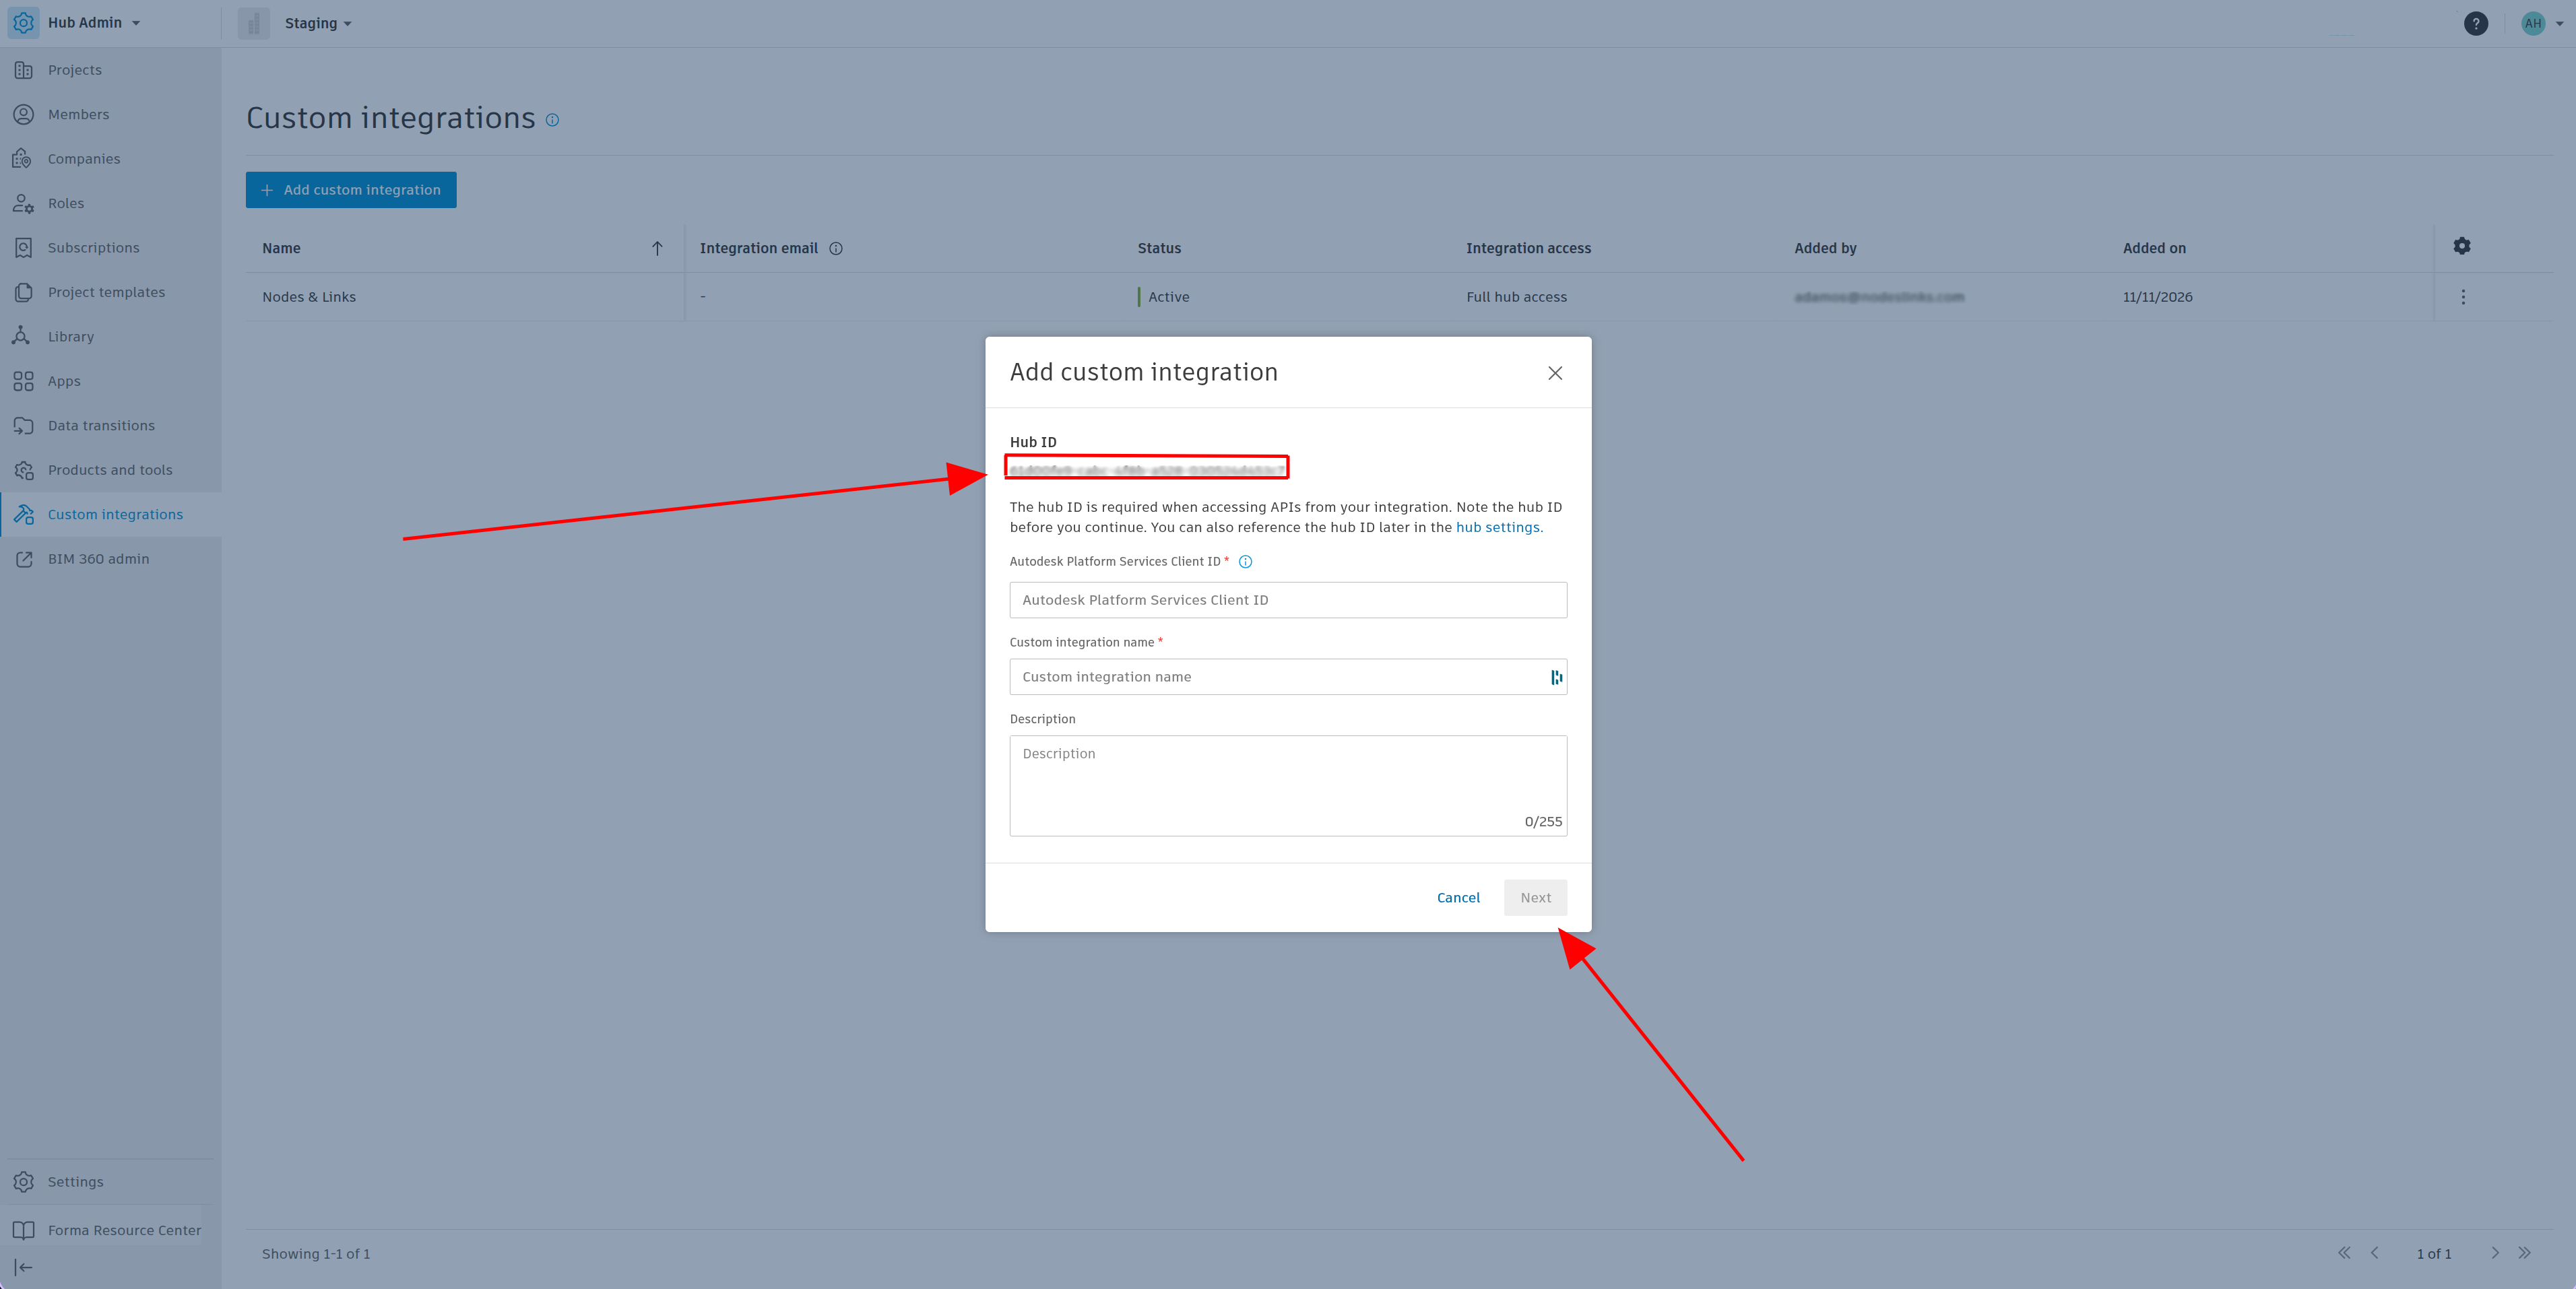
- In Autodesk Forma, go to the Custom Integrations
Then click on Add custom integration
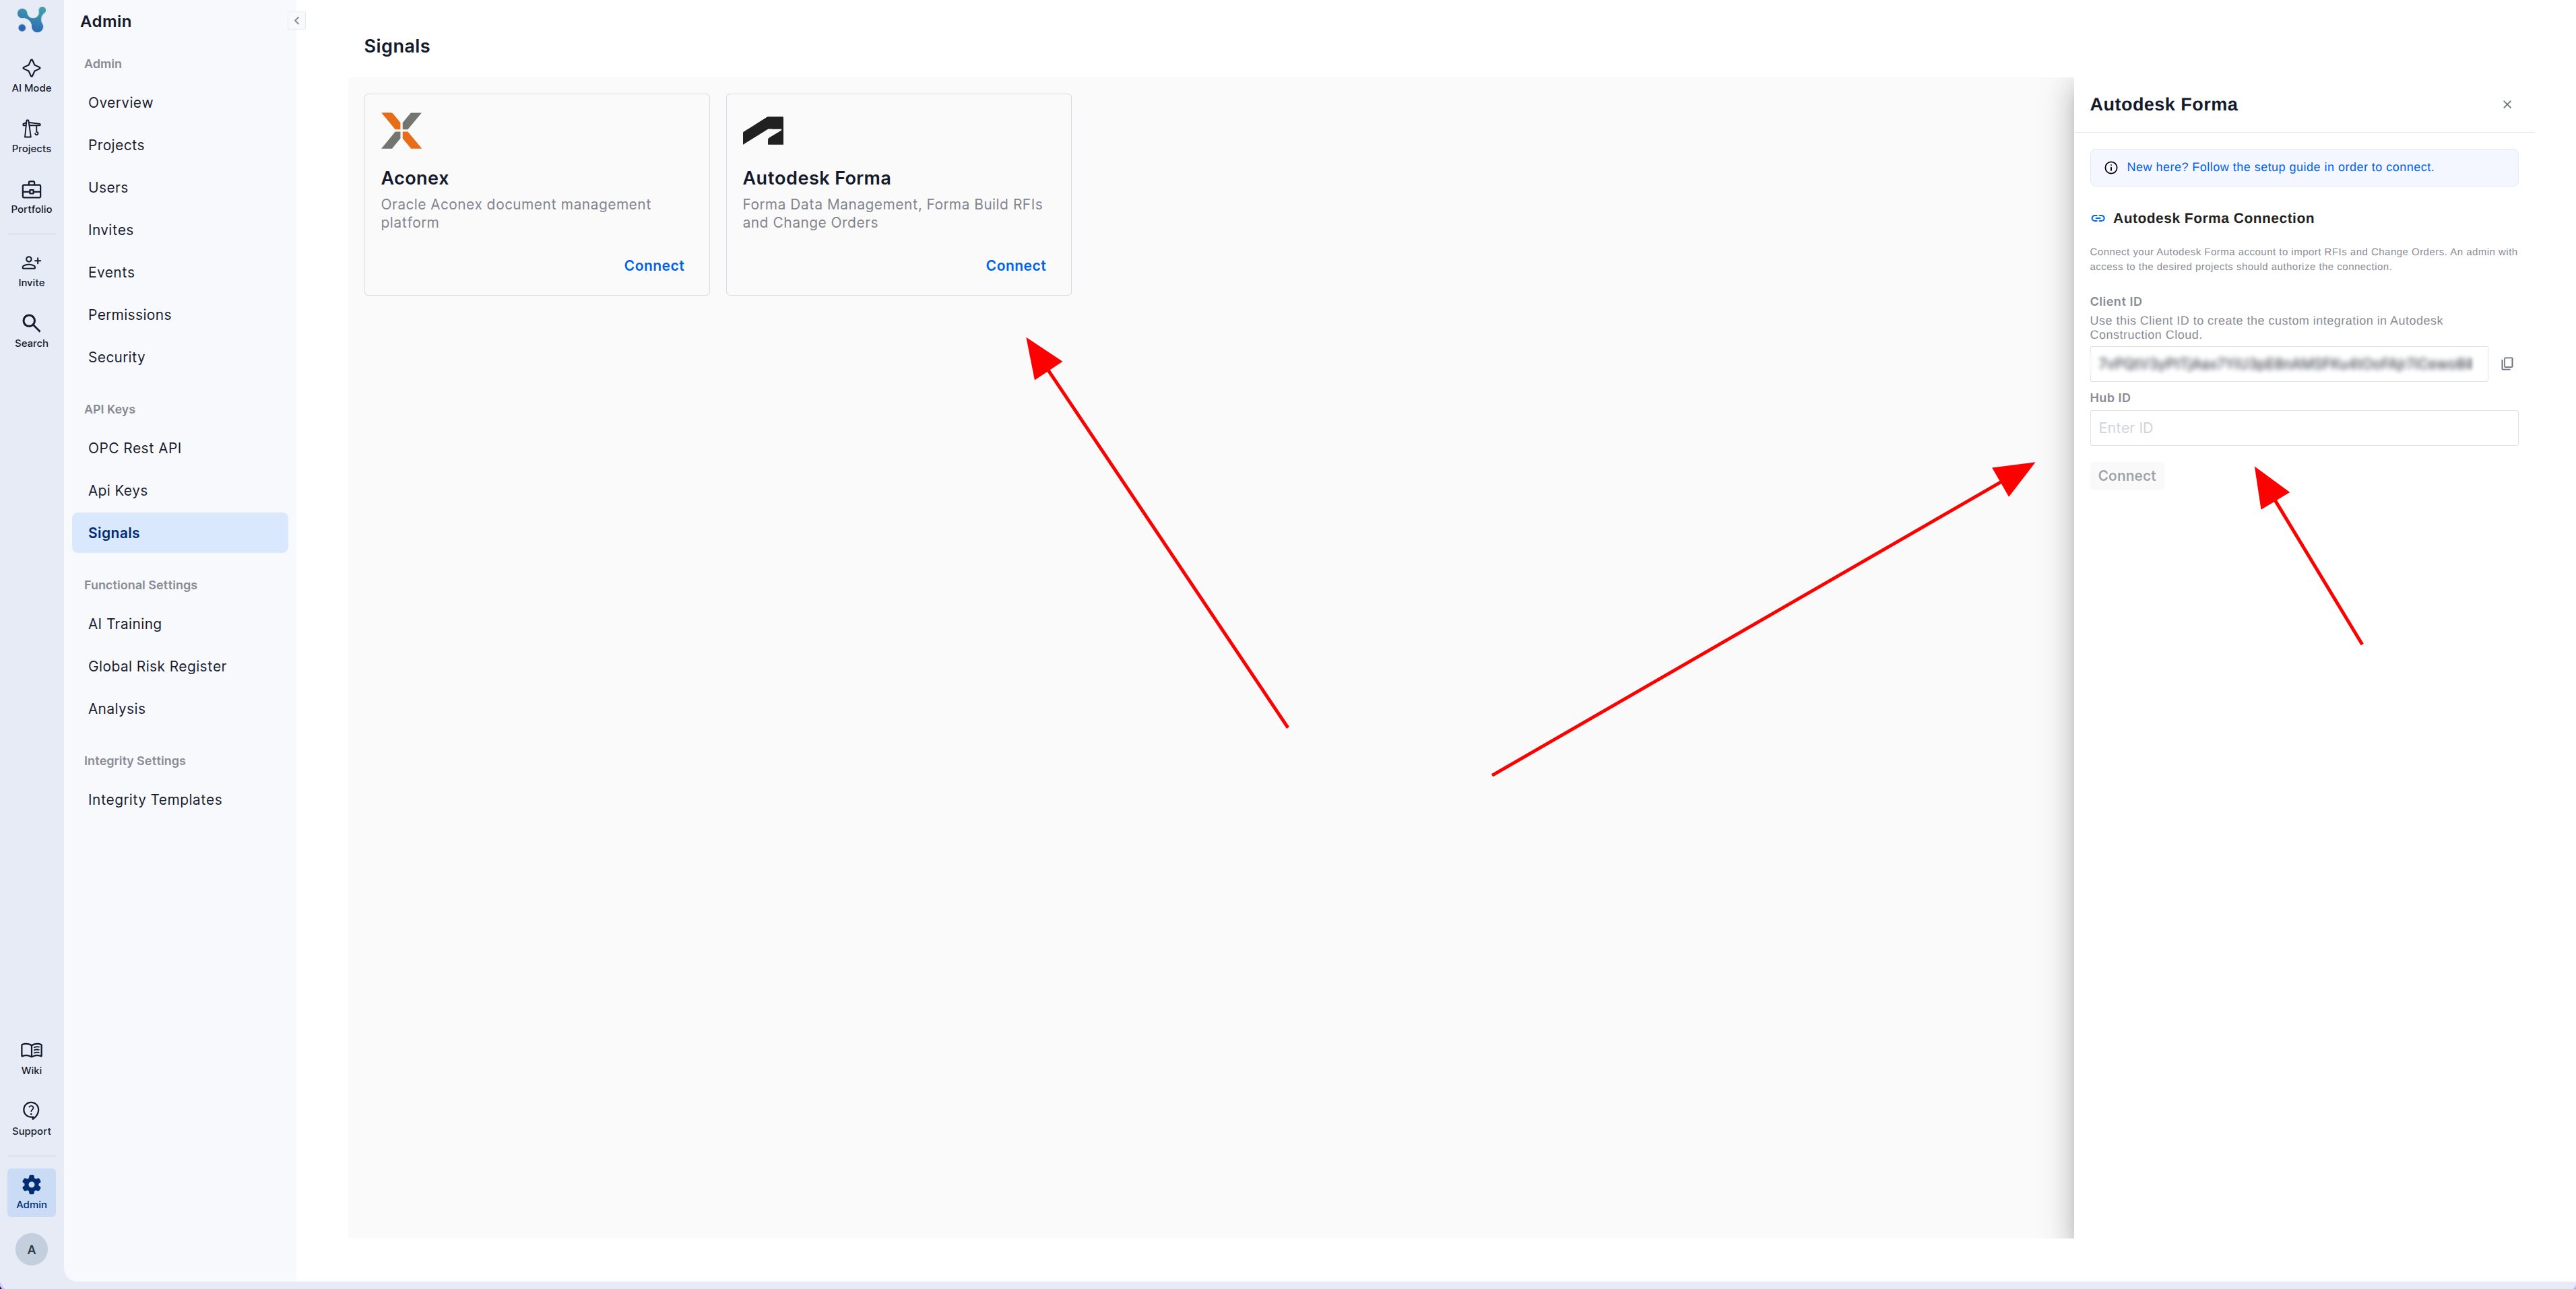
- In order to get the Autodesk Platform Services Client ID you need to access Nodes & Links and go to Admin Portal -> Signals -> Autodesk
Copy the Client ID from Nodes&Links, paste it in Autodesk Forma then enter 'Nodes & Links' for the integration name.
- Copy the Hub ID from within Autodesk Forma (we will need it for the next step) and click on ''Next".
Step 3: Finalise the connection within Nodes & Links & map your projects
- In Nodes & Links, open the Admin Portal.
- Go to Signals in the left sidebar.
- Click the Autodesk Forma tile. Paste your Hub ID (that you copied from AutoDesk Forma) and click Connect
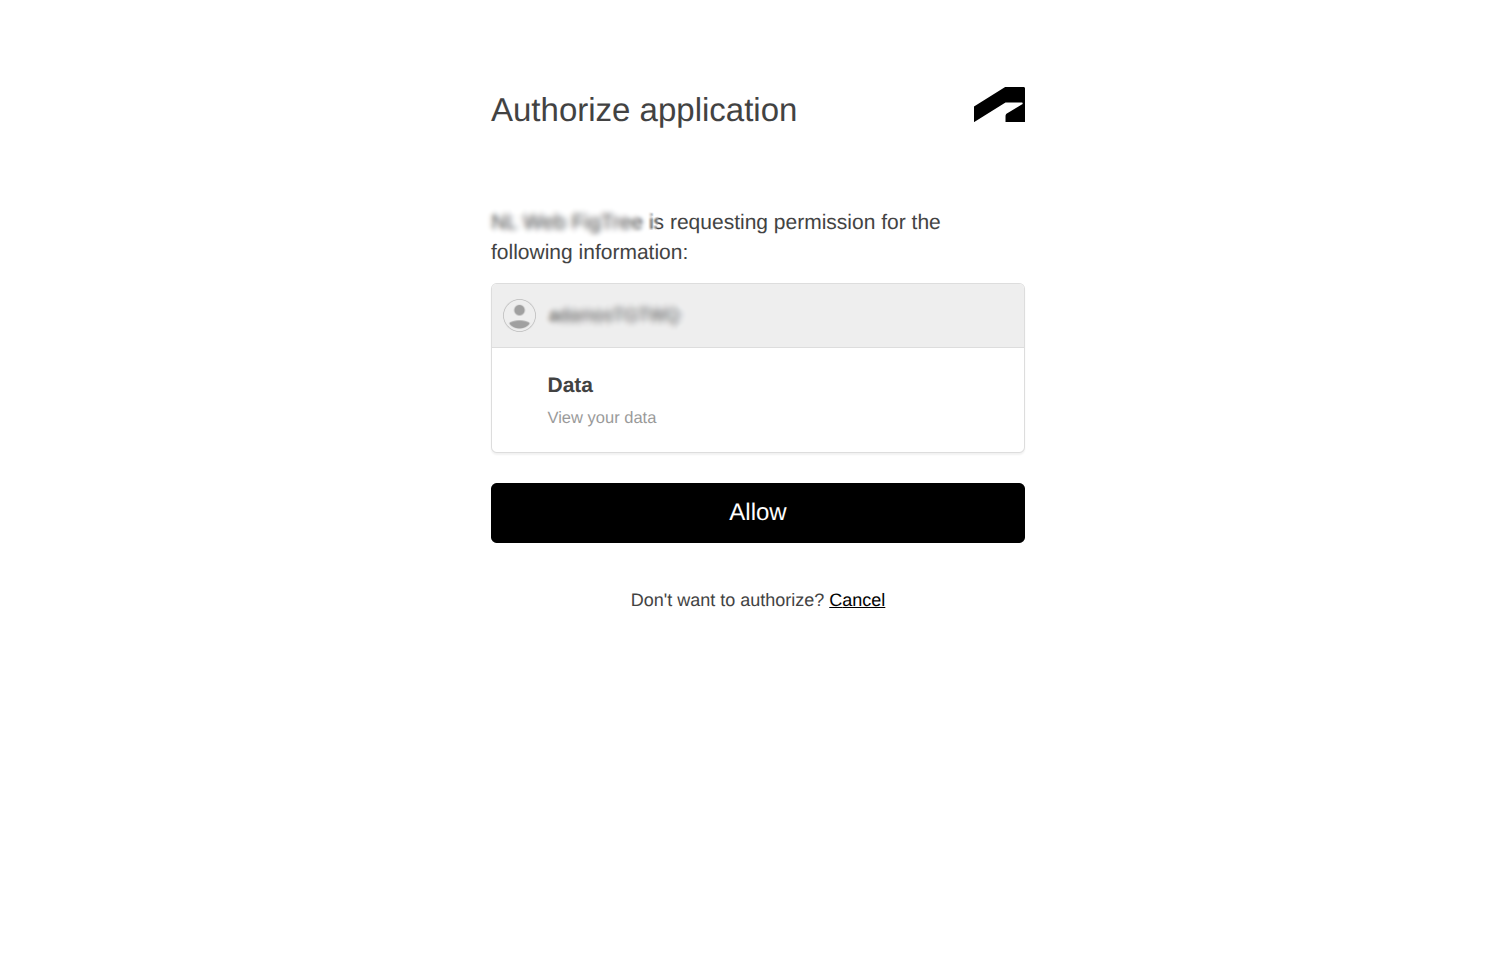
- You will be prompted to authorise the Nodes & Links integration. Click Allow.
- In the Autodesk drawer, find the Project matching section.
- Pick a Nodes & Links project, then the Autodesk directory it corresponds to.
- Repeat for every project you want documents being available.
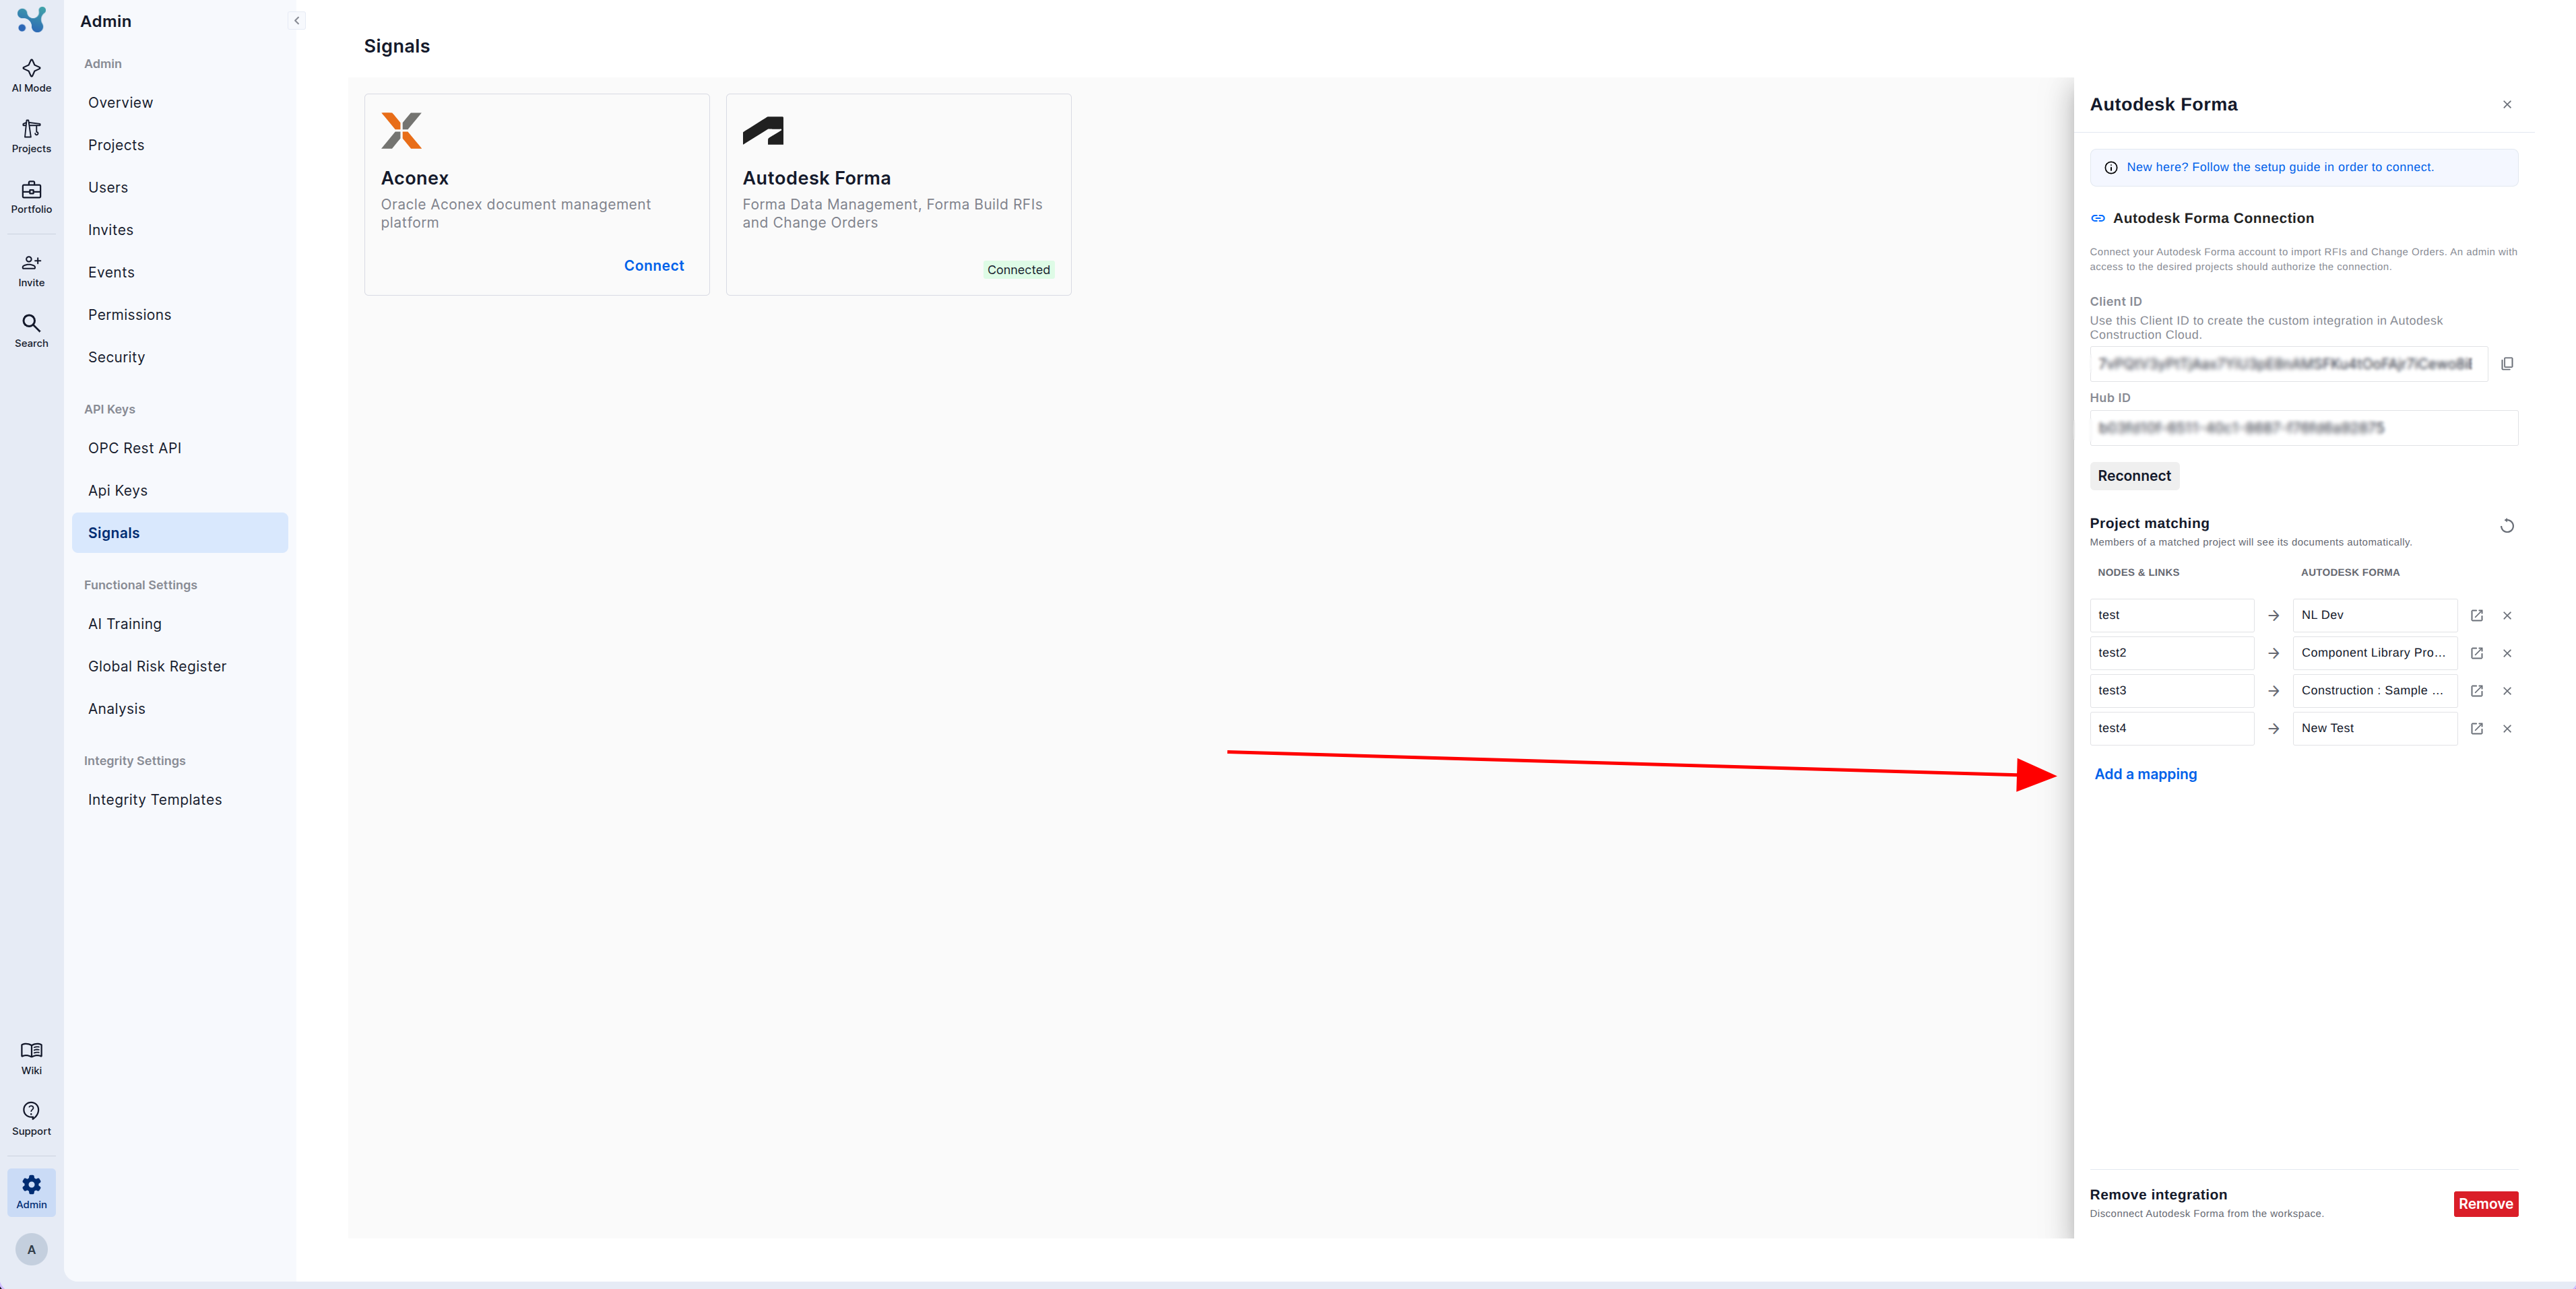
💡 Documents start flowing the moment a mapping is created, with no refresh needed.
You are ready to go!
Your Forma files and Forma Build RFIs and change orders now appear on each mapped project's Signals page, refreshed automatically every day. Your project members did nothing at all.
Don't hesitate to get in touch if you have any further queries!