
Setting up Unifier
Your contracts, cost records, RFIs and change orders live in Unifier. Your schedule lives in Nodes & Links. A change order approved in Unifier can quietly invalidate next month's sequence, and nobody scheduling finds out until it hurts.
Connecting Unifier closes that gap. Once set up, RFIs and change orders from your Unifier shells land in Nodes & Links automatically, next to the schedule they can impact.
Who this is for
Workspace admins. You set this up once for your whole organisation, then project members see their Unifier records automatically.
What you'll need:
- An Oracle-hosted Unifier Cloud instance. On-premises Unifier is not supported yet.
- Unifier admin access, to create a user and grant permissions
- REST API V2 enabled on your instance
- Admin access to Nodes & Links
How Unifier access works
Unifier ties access to the user account that connects. Your admin creates a dedicated integration user for Nodes & Links, then grants it access to the assets you want ingested.
You stay in control. The integration user sees only what your admin grants. Nodes & Links can never surface anything beyond it.
Step 1: Create the integration user
One-time, done in Unifier by an admin.
- In Unifier Admin Mode, create a new user.
- Set the user type to Integration. Integration users authenticate through the REST API, not the web portal.
- Name it for the integration rather than a person, so it is clear this is not anyone's personal login.
- Set a password and store it
Step 2: Grant it access to the shells and business processes
This grant defines what Nodes & Links can ever read.
- Add the integration user to each shell you want ingested.
- Grant it read access to the shells you want Nodes & Links to see.
- Confirm the user is active (Unifier Admin Mode → Company → Users shows a status per user. The integration user must be Active.)
💡 Read access is enough. Nodes & Links never writes to Unifier. Anything you do not grant will not appear in Nodes & Links.
Step 3: Connect Unifier in Nodes & Links
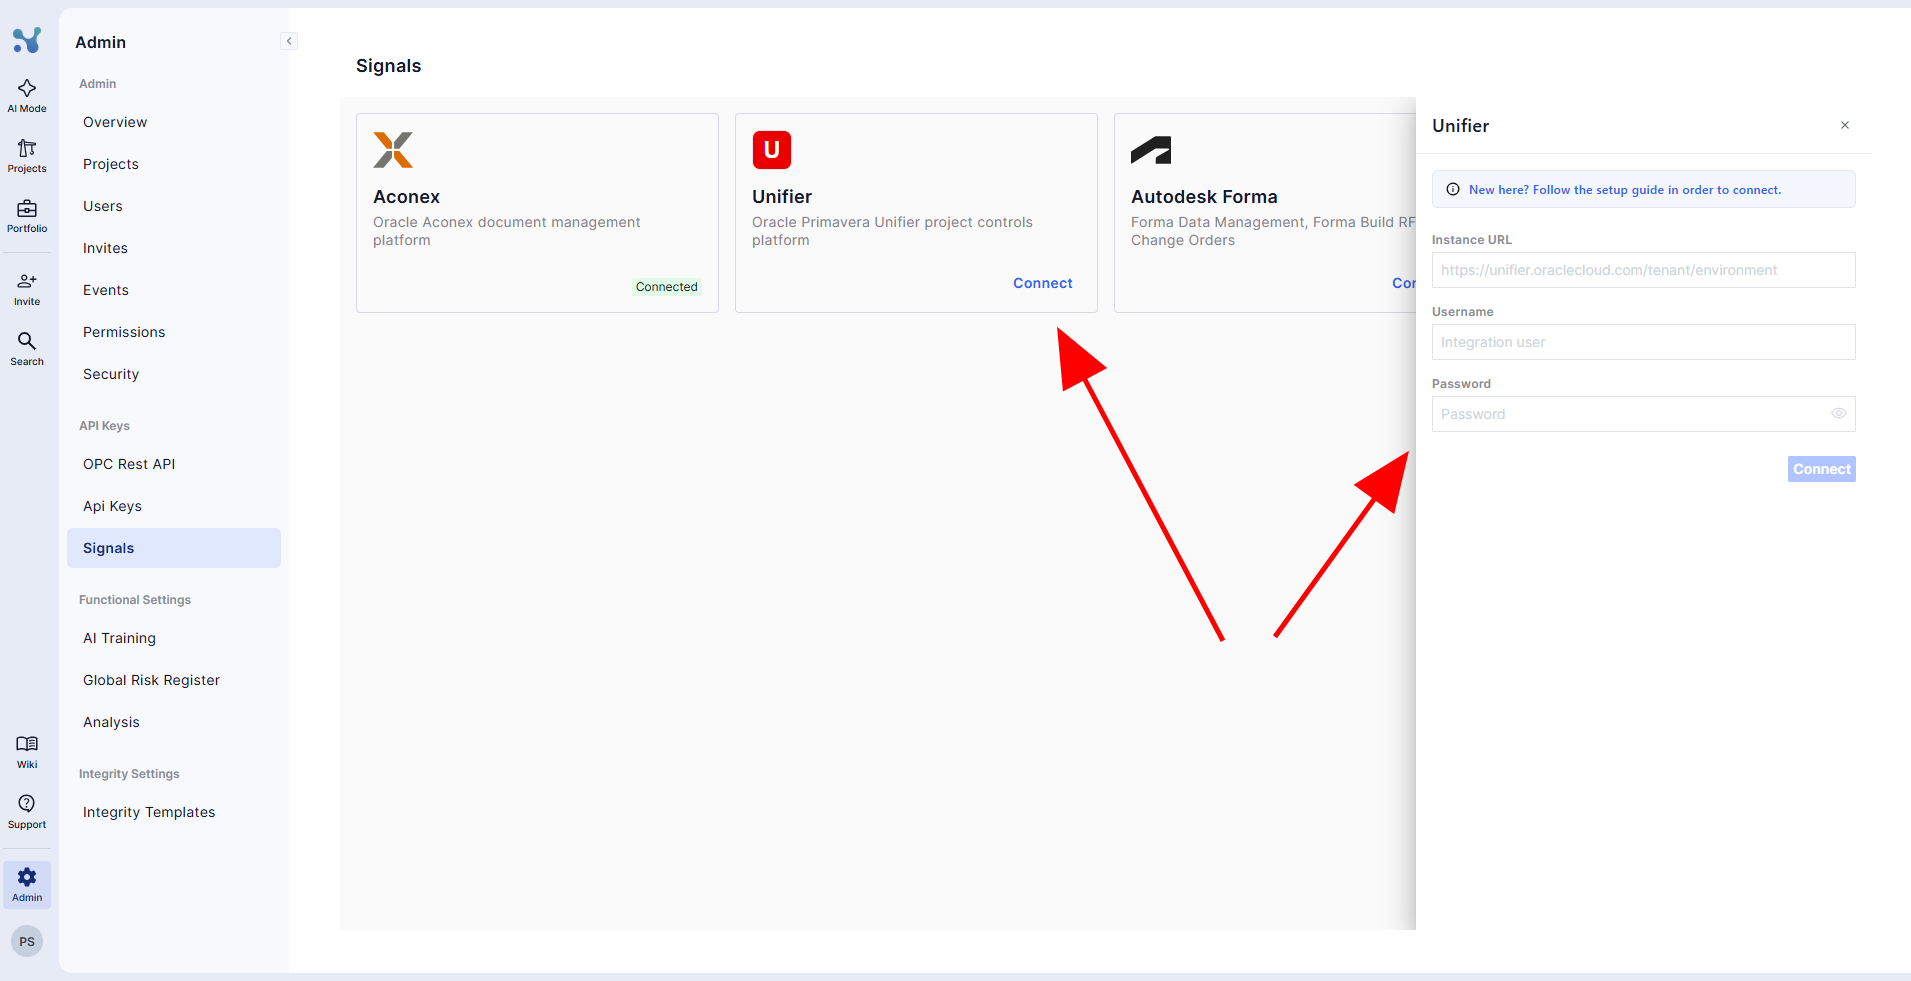
- In Nodes & Links, open the Admin Portal.
- Go to Signals in the left sidebar.
- Click the Unifier tile.
- Enter the Instance URL (check below), Username and Password of the integration user.
- Click Connect.
Finding your Instance URL
Your instance URL is the address you use to open Unifier, without anything after the company.
https://unifier.oraclecloud.com/<company>/<environment>
<company>is your Unifier company short name.<environment>only exists on stage or test instances. Production usually has none.
For example, if you open Unifier at https://unifier.oraclecloud.com/acme/stage/shell/HOSP-01, enter https://unifier.oraclecloud.com/acme/stage.
Do not include /ws/rest/service/v1 or anything else after the company.
Step 4: Map your projects
- In the Unifier drawer, find Project matching.
- Pick a Nodes & Links project, then the Unifier shell it belongs to.
- Repeat for every project you want covered.
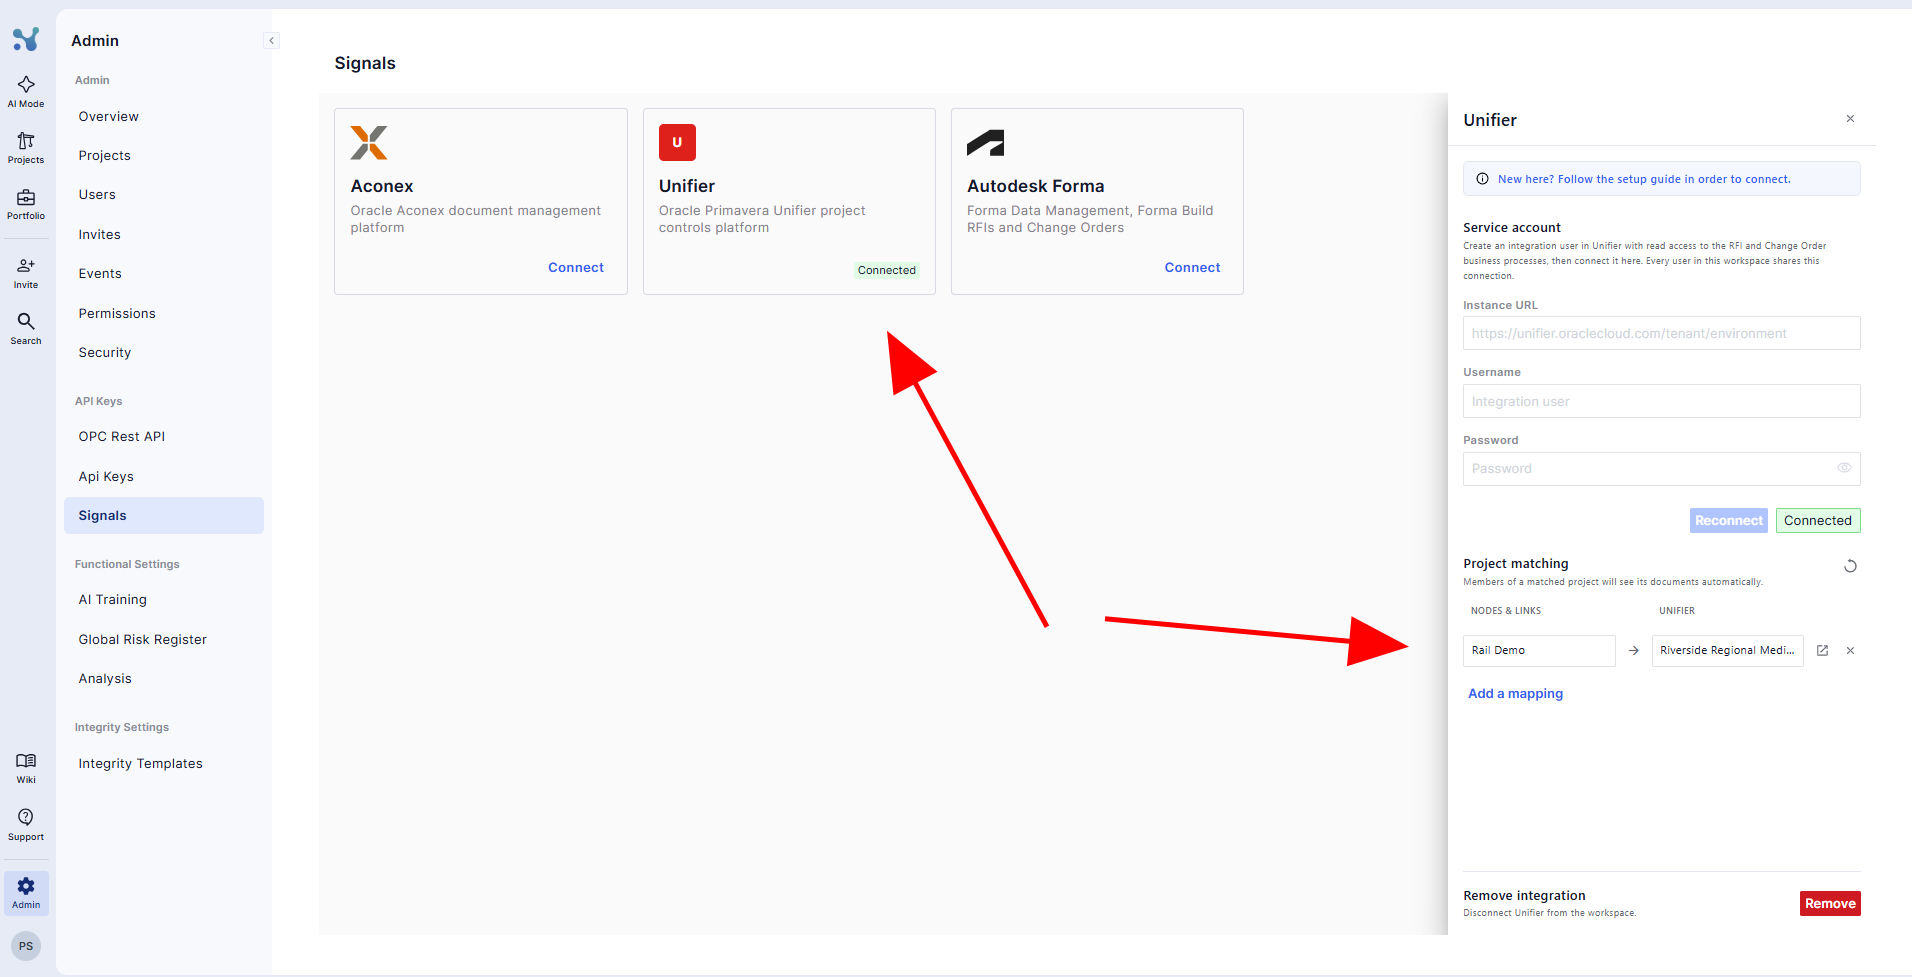
💡 Only shells the integration user can reach appear in the list. If one is missing, grant access in Unifier, then refresh.
You are ready to go!
RFIs and change orders from those shells now appear on each project's Signals page, refreshed automatically every day.
To change what Nodes & Links sees, change the integration user's permissions in Unifier.